4: Real-Ear Measurements
43
2. Instruct your patient’s spouse speak to the client about 6 feet away (2 meters).
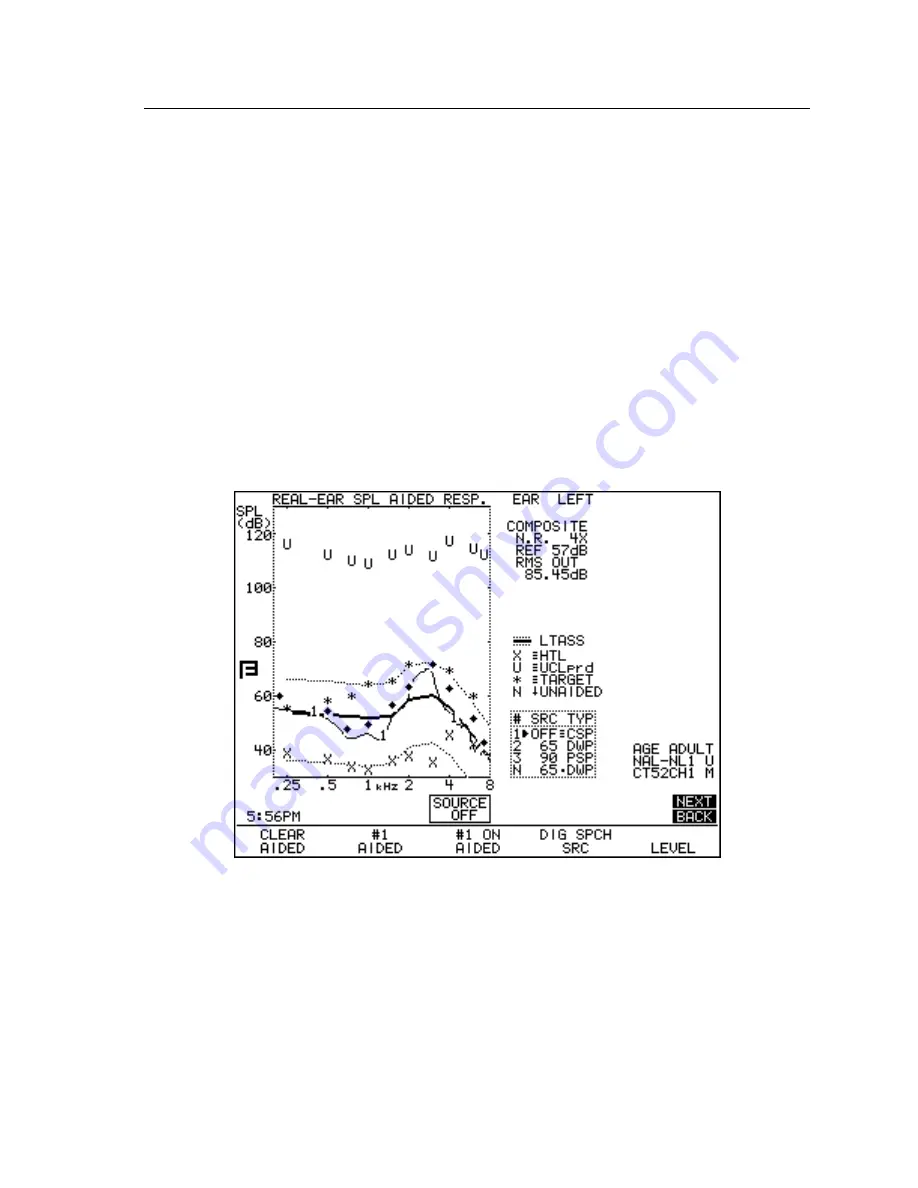
It helps to have something for them to read. The screen will display the aid’s
response to this speech and how it relates to the speech banana. A second curve
composed of small diamonds will also be displayed. This shows the average
response to the live signal. You can compare this curve to the target. See Figure
4.6.1.
3. Press [START/STOP] to stop the measurement. Show your patient and his spouse
how the hearing aid amplified the speech.
4. Press [F2] to select AIDED 2, and repeat steps 5-6 in the section above. Press
[START/STOP] to start a second measurement.
5. Instruct your patient’s spouse to stand 3 feet away (1 meter) and speak again.
6. Press [START/STOP] to stop the measurement. Show your patient and his spouse
how the distance improved the gain of the frequency response.
7. Experiment in this manner with different distances. This will help demonstrate
how close your patient and his spouse need to be to each other to maximum
speech intelligibility.
Figure 4.6.1—Visible Speech Testing
4.6.2 Measuring the occlusion effect
If you have the Composite/Digital Speech Option, you can use the Aided & Unaided
screen in order to measure the “occlusion effect” of a hearing aid. By analyzing the
spectrum of your patient’s own voice, you can judge whether the occlusion effect
will make the hearing aid uncomfortable, and you can measure an improvement
(lessening) of the occlusion effect after adjusting the vent opening.


