CAP881
39
Greasing the bearings:
Turn off the unit; disconnect the power, and lockout and tagout to prevent accidental restarting.
1.
Clean grease fittings.
2.
Remove the relief plug and free the hole of hardened grease.
3.
Add grease with hand operated grease gun until it appears at the shaft hole in the end plate or the
relief plug outlet.
4.
Re-connect the power, and run the unit for 20 minutes without the relief plug in place.
5.
Switch off the unit; disconnect the power, and lockout and tagout to prevent accidental restarting.
6.
Re-install the grease relief plug.
7.
Return unit to service.
6.13 AIR END/MOTOR REMOVAL
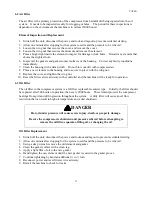
Air end/motor removal and installation
(Note: It is important to have clear access to the air end/motor area)
Lifting devices are necessary for the removal and installation of the air end/motor
A) Turn off compressor.
B) Turn off main power and lock out and tagout to avoid accidental start-up.
C) Remove all side access panels.
D) Remove belt guard and belts from pulleys.
E) Remove 3 hose fittings from the airend which are coming from the cooler.
F) Remove 3 sensors (2-Pressure sensors & 1-Temperature sensor).
G) Unplug PD (Position Differential) switch.
H) Unplug solenoid coil from airend.
I) Remove 4 air end mounting bolts.
J) Remove air end
Installation of the air end
Reverse removal instructions and readjust belt tension before installing the belt guard screen.
Motor Removal
K) Remove cover from motor junction box.
L) Note wire connections.
M) Remove wires and conduit connectors from the motor junction box.
N) Remove 4 bolts from motor base studs.
O) Lift and remove motor from cabinet.
To reinstall motor and air end, start with step (O) and reverse procedure.
Summary of Contents for SEG-10
Page 11: ...CAP881 11 ...
Page 12: ...CAP881 12 ...
Page 13: ...CAP881 ...
Page 14: ...CAP881 14 ...
Page 15: ...CAP881 ...
Page 16: ...CAP881 16 ...
Page 17: ...CAP881 17 ...
Page 18: ...CAP881 18 ...
Page 20: ...CAP881 20 ...
Page 24: ...CAP881 24 SEG 10 15 System Flow Diagram ...
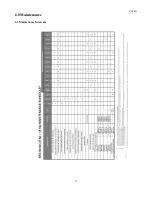
Page 32: ...CAP881 32 6 0 Maintenance 6 1 Maintenance Intervals ...
Page 44: ...CAP881 44 NOTES ...

