background image


14 

Wearing The Chest Strap


(Sold Separately) 

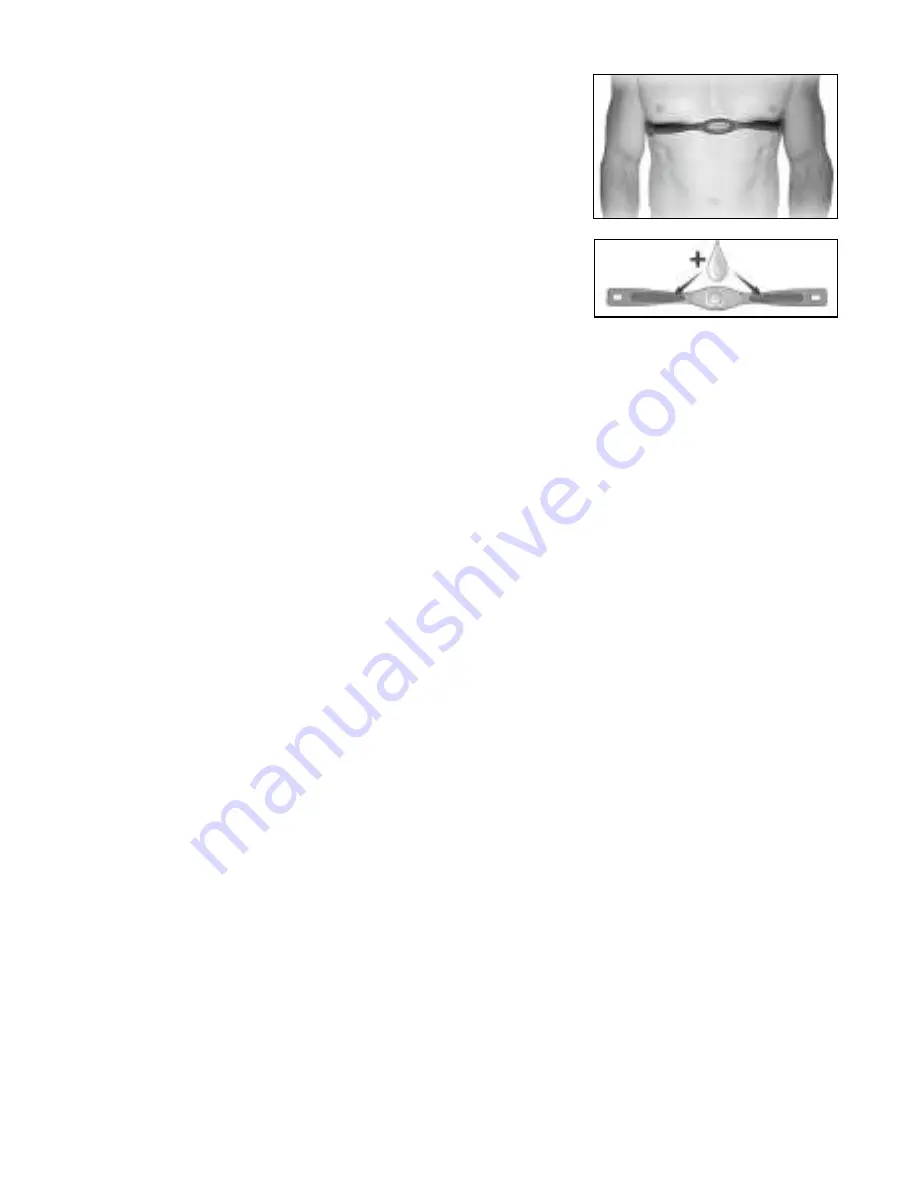
1.  Attach the transmitter to the elastic strap using the locking 

parts. 

2.  Adjust the strap as tightly as possible as long as the strap 

is not too tight to remain comfortable. 

3.  Position the transmitter with the logo centered in the 

middle of your torso facing away from your chest (some 
people must position the transmitter slightly left of center). 
Attach the final end of the elastic strap by inserting the 
round end and, using the locking parts, secure the 
transmitter and strap around your chest. 

4.  Position the transmitter directly below the pectoral 

muscles. 

5.  Sweat is the best conductor to measure very minute heart beat electrical signals. 
 

However, plain water can also be used to pre-wet the electrodes (2 ribbed oval areas on the 


reverse side of the belt and both sides of the transmitter). It’s also recommended that you 


wear the transmitter strap a few minutes before your work out. Some users, because of 


body chemistry, have a more difficult time in achieving a strong, steady signal at the 


beginning. After “warming up”, this problem lessens. As noted, wearing clothing over the 


transmitter/strap doesn’t affect performance. 

6.  Your workout must be within range - distance between transmitter/receiver – to achieve a 

strong steady signal. The length of range may vary somewhat but generally stay close 
enough to the console to maintain good, strong, reliable readings. Wearing the transmitter 
directly on bare skin assures you of proper operation. If you wish, you may wear the 
transmitter over a shirt. To do so, wet the areas of the shirt that the electrodes will rest upon. 

Summary of Contents for 5.0 BIKE

Page 1: ...PLEASE CAREFULLY READ THIS ENTIRE MANUAL BEFORE OPERATING YOUR NEW FITNESS BIKE FUEL 5 0 BIKE OWNER S MANUAL...

Page 2: ...a highly gaseous environment Never drop or insert any object into any openings Do not use outdoors To disconnect turn all controls to the off position then remove the plug from the outlet Do not attem...

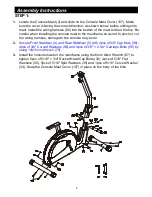
Page 3: ...Check List 33 5 16 Flat Washer 4pcs 34 5 16 Curved Washer 1pc STEP 1 35 5 16 1 5T Split Washer 5pcs 32 5 16 3 4 Socket Head Cap Bolt 5pcs 96 3 8 Curved Washer 4pcs 95 3 8 2 3 4 Carriage Bolt 4pcs 98 3...

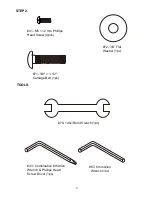
Page 4: ...12 mm Phillips Head Screw 4pcs STEP 2 72 3 8 Flat Washer 1pc 79 14 15mm Wrench 1pc 71 3 8 1 1 2 Carriage Bolt 1pc TOOLS 43 Combination M5 Allen Wrench Phillips Head Screw Driver 1pc 87 6mm Allen Wren...

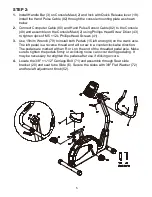
Page 5: ...e wiring harness damage to the console may occur 2 Secure Front Stabilizer 4 and Rear Stabilizer 5 with 4pcs of 3 8 Cap Nuts 98 4pcs of 3 8 Curved Washers 96 and 4pcs of 3 8 2 3 4 Carriage Bolts 95 by...

Page 6: ...e 15m m Wrench 79 to install both Pedals 15 left and right on the crank axle The left pedal is a reverse thread and will screw in a counterclockwise direction The pedals are marked with an R or L on t...

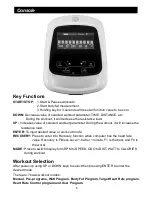
Page 7: ...d ENTER To input desired value or work out mode RECOVERY Press to enter into Recovery function when computer has the heart rate value Recovery is Fitness Level 1 6 after 1 minute F1 is the best and F6...

Page 8: ...s loading and 8 bars in each column Each column represents 1 minute workout without the change of time value and each bar represents 3 levels loading 12 Music playing There is an audio input port on t...

Page 9: ...ased on Age When Heart Rate exceeds Target H R the number of Heart Rate will flash Pulse 60 220 90 1 Setting Parameters for Target heart rate Program Operation Manual P1 Program profile P1 Selecting M...

Page 10: ...16 22 24 15 20 7 P16 12 21 15 12 1 4 11 18 13 17 P17 11 6 18 15 14 13 22 23 8 13 P18 9 18 12 12 21 18 16 14 21 8 P19 9 7 9 21 11 24 16 16 9 7 P20 4 3 12 5 11 19 10 15 15 7 P21 7 4 7 18 3 16 15 12 3 1...

Page 11: ...4 8 12 10 9 24 16 10 15 9 P31 3 6 3 7 4 14 15 24 17 6 P32 9 21 15 18 12 10 16 4 2 5 P33 9 6 7 18 16 6 21 15 16 13 P34 7 10 12 17 14 17 20 13 14 6 P35 4 3 1 10 6 9 17 8 9 12 P36 12 9 18 3 7 5 17 20 13...

Page 12: ...ss START KEY to continue the other unfinished parameter will continue counting down Watt control program P38 Program profile P38 Setting Parameters for Watt control program Selecting Watt control prog...

Page 13: ...45 to 50 BMR Basal Metabolism Ratio BMI Body Mass Index Press START STOP KEY to return the main Display TARGET HEART RATE Program Program profile Setting Parameters for TARGET H R Selecting TARGET H...

Page 14: ...then the next parameter of Distance can not be adjusted Continue through all desired parameters pressing START STOP to start workout Note If Pulse is above or below 5 the setting TARGET H R the compu...

Page 15: ...er can also be used to pre wet the electrodes 2 ribbed oval areas on the reverse side of the belt and both sides of the transmitter It s also recommended that you wear the transmitter strap a few minu...

Page 16: ...to be adjusted If user sets up the target time to workout then the next parameter of Distance can not be adjusted Continue through all desired parameters After finished set up desired parameter the l...

Reviews: