Google Cloud Print
681
A
ppe
n
d
ix
16
Preparing Paper
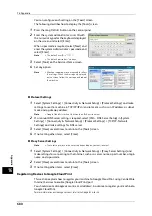
The machine will print out a registration paper during the procedure. Make the following
settings before starting the registration.
Note
•
When the registration is finished, restore the original settings.
1
Log in to your machine as a system administrator.
2
Select [Tools] on the Services Home screen.
3
Select [System Settings] > [Print Service Settings] > [Other Settings] > [Substitute Tray].
Then select [Change Settings].
4
Select [Use Closest Size], and select [Save].
5
Select [Close].
6
Select [Close].
Enabling [Google Cloud Print] Port
1
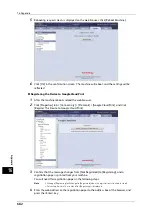
Start a web browser from a network connected computer.
2
Enter the machine's IP address into the address box on the browser, and then press the
<Enter> key. Connection to CentreWare Internet Services is established.
Note
•
During connection/operation, pop-up screen for user ID/passcode entry may appear. In this case,
enter a system administrator's user ID/passcode and click [OK].
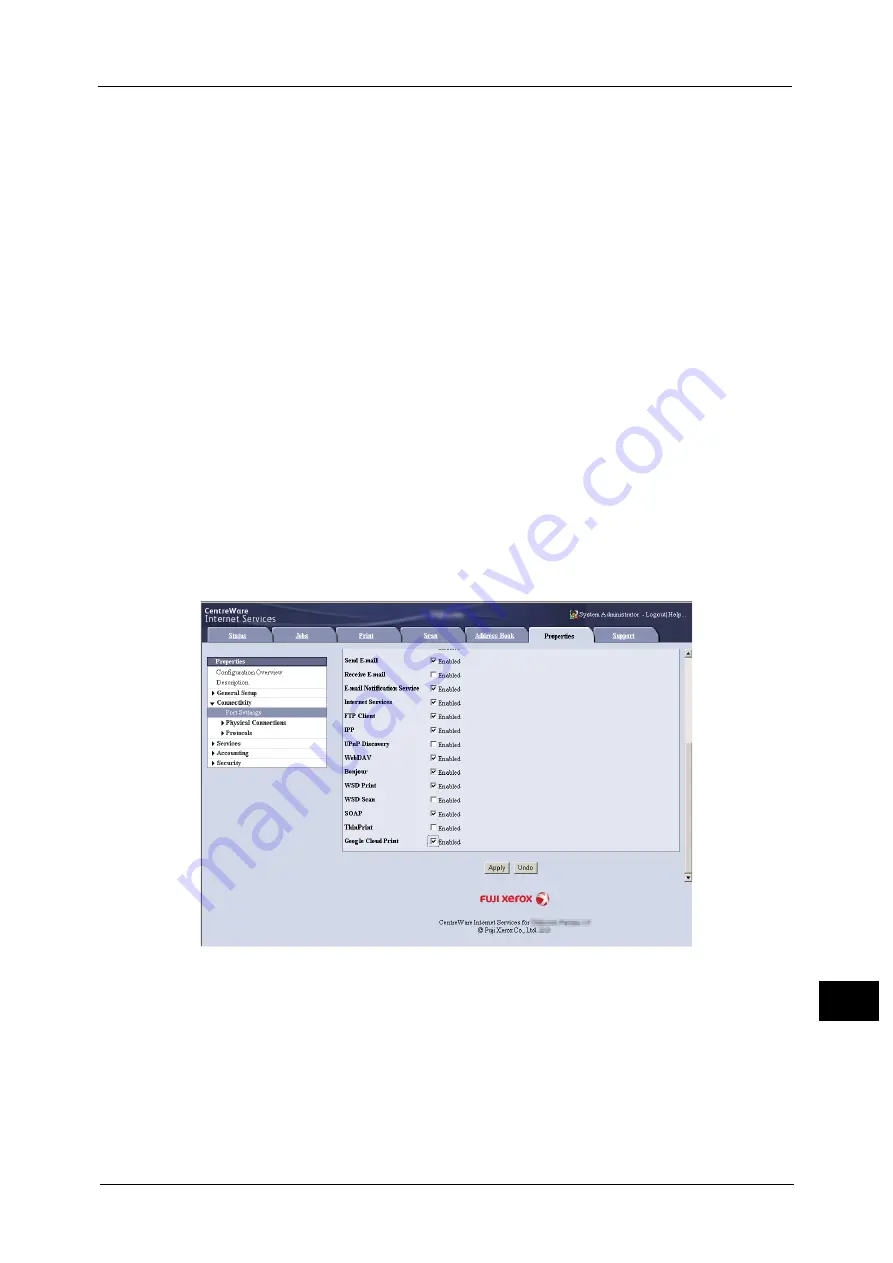
3
Click [Properties] tab > [Connectivity] > [Port Settings]. Then check [Enabled] in [Google
Cloud Print].
Note
•
WSD stands for Web Services on Devices.
4
Click [Apply].
Summary of Contents for ApeosPort-V 6080
Page 1: ...ApeosPort V 7080 ApeosPort V 6080 DocuCentre V 7080 DocuCentre V 6080 Administrator Guide ...
Page 13: ...13 Activity Report 727 EP System 731 Glossary 732 Index 735 ...
Page 14: ...14 ...
Page 62: ...2 Paper and Other Media 62 Paper and Other Media 2 ...
Page 88: ...3 Maintenance 88 Maintenance 3 ...
Page 110: ...4 Machine Status 110 Machine Status 4 ...
Page 296: ...5 Tools 296 Tools 5 ...
Page 346: ...9 Scanner Environment Settings 346 Scanner Environment Settings 9 ...
Page 354: ...10 Using IP Fax SIP 354 Using IP Fax SIP 10 ...
Page 366: ...12 Using the Server Fax Service 366 Using the Server Fax Service 12 ...
Page 382: ...13 Encryption and Digital Signature Settings 382 Encryption and Digital Signature Settings 13 ...
Page 734: ...16 Appendix 734 Appendix 16 ...
Page 744: ...Index 744 Index ...

