13 Problem Solving
348
P
rob
le
m Solving
3
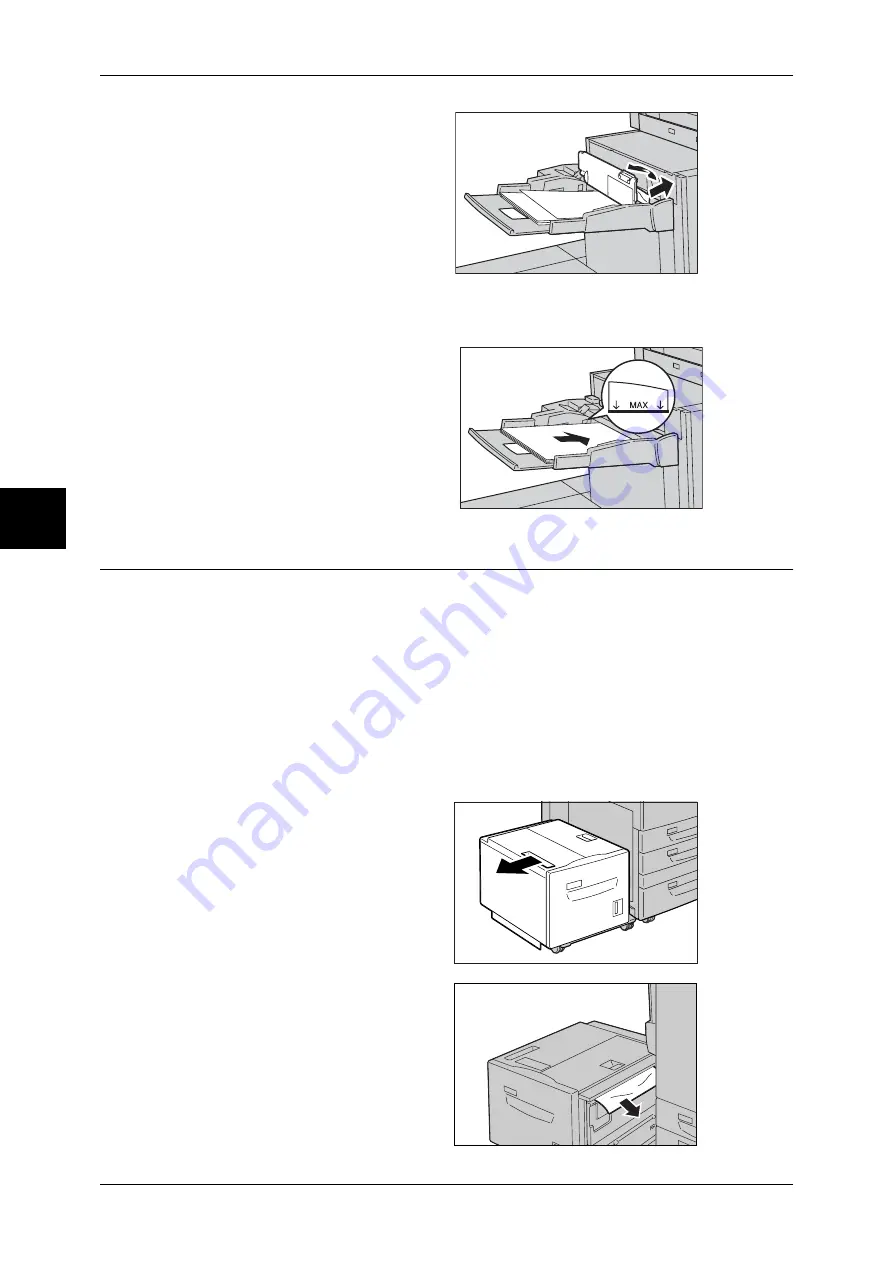
If you cannot remove the paper in
Steps 1 and 2, open the Tray 5
(bypass) top cover to remove all
paper loaded in the Tray 5
(bypass).
Note
•
If paper is torn, check for any
torn pieces of paper inside the
machine.
4
Close the top cover.
5
Fan the paper you removed making sure that all four corners are neatly aligned.
6
Insert the paper into the tray with
the printing side facing up until its
leading edge lightly comes up
against the paper feed entrance.
Note
•
Do not load paper exceeding
the maximum fill line (MAX in
the figure to the right). It may
cause paper jams or machine
malfunctions.
Paper Jams in the Tray 6 (High Capacity)
The following describes how to clear paper jams in the Tray 6 (High Capacity).
This section describes how to clear paper jams at the following locations:
The references are described below.
Paper Jams in the Tray 6 (High Capacity) Exit ........................................................................348
Paper Jams in the Tray 6 (High Capacity) Top Cover..............................................................349
Paper Jams in the Tray 6 (High Capacity) ................................................................................349
Note
•
Remedy differs depending on where the paper jam occurs. Follow the instructions displayed
and remove the jammed paper.
Paper Jams in the Tray 6 (High Capacity) Exit
1
Gently move the Tray 6 (High
Capacity) to the left until it stops by
gripping the handle on the top left
side of the Tray 6 (High Capacity).
2
Remove the jammed paper.
Note
•
If paper is torn, check for any
torn pieces of paper inside the
machine.


