124
Printing Basics
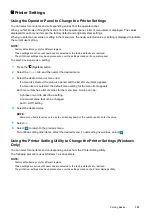
To select a new value as a setting:
1
Click
Start
All Programs
Fuji Xerox
Fuji Xerox Printer Software for Asia-Pacific
your printer
Printer Setting Utility
.
NOTE:
•
The window to select a printer appears in this step when multiple print drivers are installed on your computer. In this
case, click the name of the desired printer listed in
Printer Name
.
The Printer Setting Utility appears.
2
Click the
Printer Maintenance
tab.
3
Select the desired menu item.
Each menu item has a list of values for the menu item. A value can be:
•
A phrase or word to describe a setting
•
A numerical value that can be changed
•
An On or Off setting
4
Select the desired value, and then click
Apply New Settings
or
Restart printer to apply new settings
.
Adjusting the Language
To display a different language on the operator panel:
• Using the Operator Panel
1
Press the
(
System
) button.
2
Select the
Tools
tab, and then select
Language Settings
.
3
Select
Panel Settings
, and then select desired language.
4
Select
OK
.
• Using the Printer Setting Utility (Windows Only)
The following procedure uses Windows 7 as an example.
1
Click
Start
All Programs
Fuji Xerox
Fuji Xerox Printer Software for Asia-Pacific
your printer
Printer Setting Utility
.
NOTE:
•
The window to select a printer appears in this step when multiple print drivers are installed on your computer. In this
case, click the name of the desired printer listed in
Printer Name
.
The Printer Setting Utility appears.
2
Click the
Printer Maintenance
tab.
3
Select
System Settings
from the list at the left side of the page.
The
System Settings
page is displayed.
4
Select the desired language from
Panel Language
, and then click
Apply New Settings
.
Summary of Contents for DocuPrint CM225FW
Page 1: ...DocuPrint CM225 fw User Guide ...
Page 10: ...10 Contents Technical Support 338 Online Services 339 Index 340 ...
Page 260: ...260 Digital Certificates 11 Digital Certificates Using Digital Certificates on page 261 ...
Page 272: ...272 Troubleshooting 4 Lower the levers to their original position 5 Close the rear cover ...


