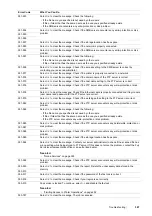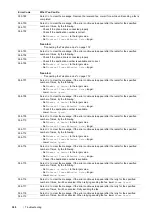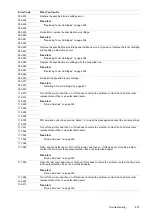
Troubleshooting
299
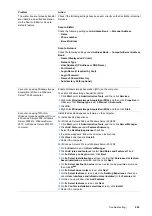
The printer does not properly transfer
scan data to a specified destination
via the Scan to E-Mail or Scan to
Network feature.
Check if the following settings have been set correctly on the CentreWare Internet
Services.
Scan to E-Mail
Check the following setting under
Address Book
Personal Address
:
•
Name
•
Phone number
•
E-mail Address
Scan to Network
Check the following settings under
Address Book
Computer/Server Address
Book
:
•
Name (Displayed on Printer)
•
Network Type
•
Host Address (IP Address or DNS Name)
•
Port Number
•
Login Name (if required by host)
•
Login Password
•
Name of Shared Directory
•
Subdirectory Path (optional)
Cannot scan using Windows Image
Acquisition (WIA) on a Windows
Server
®
2003 computer.
Enable Windows Image Acquisition (WIA) on the computer.
To enable Windows Image Acquisition (WIA):
1
Click
Start
, point to
Administrative Tools
, and then click
Services
.
2
Right-click
Windows Image Acquisition (WIA)
, and then click
Properties
to
make sure that
Startup type
is set to
Manual
or
Automatic
.
3
Click
OK
.
4
Right-click
Windows Image Acquisition (WIA)
, and then click
Start
.
Cannot scan using TWAIN or
Windows Image Acquisition (WIA) on
a Windows Server 2008, Windows
Server 2008 R2, Windows Server
2012, or Windows Server 2012 R2
computer.
Install the Desktop Experience feature on the computer.
To install Desktop Experience:
For Windows Server 2008 and Windows Server 2008 R2:
1
Click
Start
, point to
Administrative Tools
, and then click
Server Manager
.
2
Click
Add Features
under
Features Summary
.
3
Select the
Desktop Experience
check box.
4
If a window appears, follow the on-screen instructions.
5
Click
Next
, and then click
Install
.
6
Restart the computer.
For Windows Server 2012 and Windows Server 2012 R2:
1
On the
Start
screen, click
Server Manager
.
2
Click
Add roles and features
to start
Add Roles and Features
Wizard.
3
On the
Before you begin
screen, click
Next
.
4
On the
Select installation type
screen, confirm that
Role-based or feature-
based installation
is selected, and then click
Next
.
5
On the
Select destination server
screen, select an appropriate server and
then click
Next
.
6
On the
Select server roles
screen, click
Next
.
7
On the
Select features
screen, select the
Desktop Experience
check box
under
User Interfaces and Infrastructure (Installed)
in the
Features
list.
8
On the pop-up window, click
Add Features
.
9
On the
Select features
screen, click
Next
.
10
On the
Confirm installation selections
screen, click
Install
.
11
Restart the computer.
Problem
Action
Summary of Contents for DocuPrint CM225FW
Page 1: ...DocuPrint CM225 fw User Guide ...
Page 10: ...10 Contents Technical Support 338 Online Services 339 Index 340 ...
Page 260: ...260 Digital Certificates 11 Digital Certificates Using Digital Certificates on page 261 ...
Page 272: ...272 Troubleshooting 4 Lower the levers to their original position 5 Close the rear cover ...


