96
3 Copy
3.5
Setting the Image Quality Features
The following explains how to set the image quality features.
This corresponds to " Step 4 Set the copy features (P. 80)" in “3.1 Copying Procedure”.
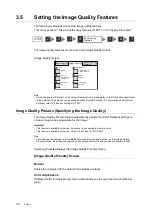
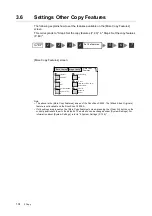
The image quality features can be set on the [Image Quality] screen.
[Image Quality] screen
Note
• If old settings are still present on the [Image Quality] screen, pressing the <Clear All> button resets them
to the defaults. The defaults can be changed under [System Settings]. For information about [System
Settings], refer to "6 System Settings (P. 129)".
Image Quality Presets (Specifying the Image Quality)
The Image Quality Presets feature automatically adjusts the [Color Balance] settings to
produce image tones appropriate for the image.
Important
• This feature is available only when the scanner is connected to a color printer.
• This feature is available only when [Output Color] is set to [Full Color].
Note
• If you change the settings on [Color Balance] screen after configuring them on the [Image Quality
Presets] screen, the settings configured on the [Image Quality Presets] screen will become invalid.
Selecting [Presets] displays the [Image Quality Presets] screen.
[Image Quality Presets] Screen
Normal
Copies the originals with the default Color Balance settings.
Color Adjustment...
Displays the [Color Adjustment] screen which allows you to adjust the tone of red/blue/
green.
STEP
1
4
Set the copy
features
3
2
5
6
7
Normal
Y 0 0 0/M 0 0 0
C 0 0 0/K 0 0 0
Sharper
Normal
On
Text & Photo
(Halftone)
Presets
Color Balance
Original Type
Sharpness
Auto Exposure
Color Saturation
Basic Copying Image Quality
More Copy
Features


