


21
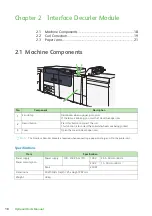
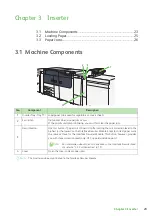
Chapter 2 Interface Decurler Module
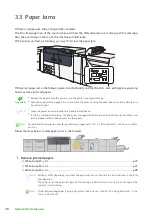
2.3
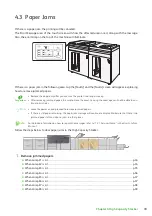
Paper Jams
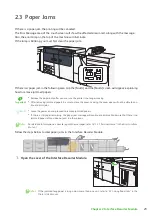
If there is a paper jam, the printing will be canceled.
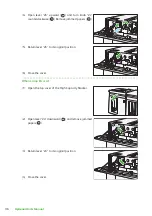
The Error Message area of the touch screen will show the affected area in red, along with the message.
Also, the error lamp on the top of the machine will illuminate.
If the lamp is blinking, you must first clear the paper jam.
If there is a paper jam in the following area, tap the [Faults] and the [Faults] screen will appear, explaining
how to remove jammed papers.
Important
Remove the paper only after you are sure the printer is no longer moving.
After removing jammed papers, be sure to close the cover. Leaving the cover open will not be able to con-
tinue to print jobs.
Note
Leave the power on and proceed to remove jammed papers.
If there is still paper remaining, the paper jam message will continue to display. Make sure that there is no
jammed paper left and also no jams in other places.
Refer
For detailed information on how to regard the messages, refer to "1.2.1 Services Home" in the
User Interface
Manual
.
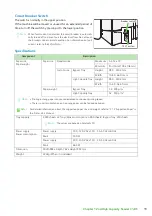
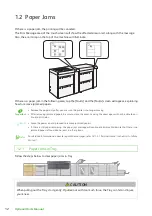
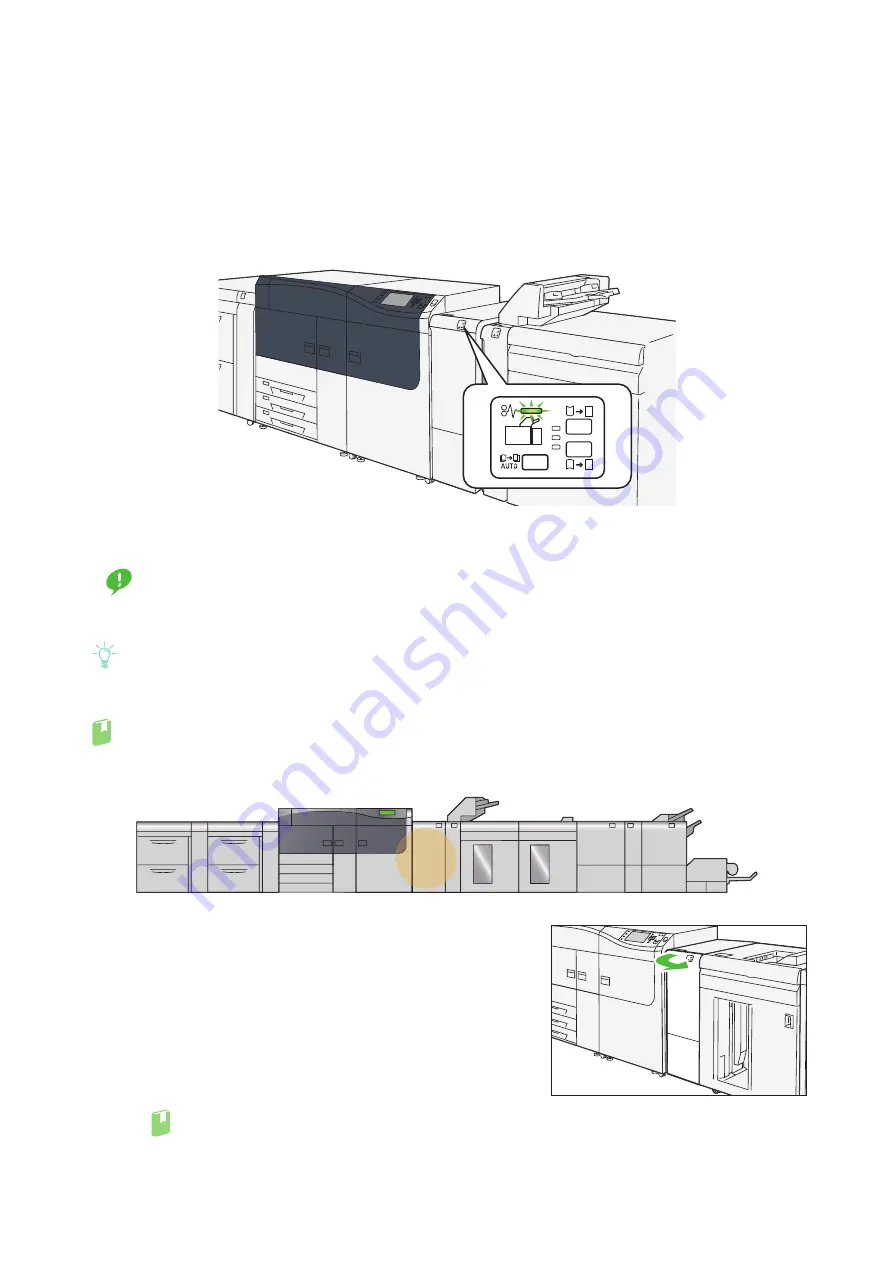
Follow the steps below to clear paper jams in the Interface Decurler Module.
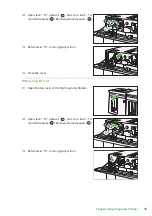
1.
Open the cover of the Interface Decurler Module.
Refer
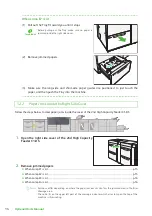
If the jammed long paper is lying across more than one unit, refer to "3.3.4 Long Paper Jam" in the
Printer Unit Manual
.
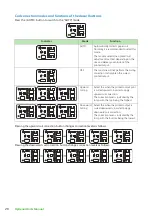
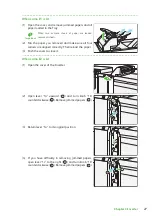
E1
E2
E3


