background image

COLOUR TELEVISION WITH REMOTE CONTROL

OPERATING INSTRUCTIONS

FJ2205

Summary of Contents for FJ2205

Page 1: ...COLOUR TELEVISION WITH REMOTE CONTROL OPERATING INSTRUCTIONS FJ2205 ...

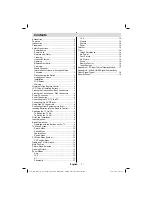
Page 2: ...5 Viewing the Connections Back Connectors 5 Viewing the Connections Side Connectors 6 Power Connection 6 Aerial Connection 6 Connecting the LCD TV to a PC 7 Connecting to a DVD Player 7 Using Side AV Connectors 8 Connecting Other Equipment via Scart 8 Inserting Batteries into the Remote Control 8 Switching the TV On Off 8 To Switch the TV On 8 To Switch the TV Off 8 First Time Installation 9 Input...

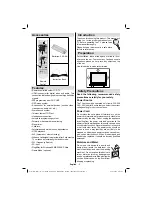
Page 3: ...e any objects on top of the set Use this device in moderate climates Safety Precautions Read the following recommended safety precautions carefully for your safety Power Source The TV set should be operated only from a 220 240 V AC 50 Hz outlet Ensure that you select the correct voltage setting for your convenience Power Cord Do not place the set a piece of furniture etc on the power cord mains le...

Page 4: ...re intended for ventilation and to ensure reliable operation To prevent overheating these openings must not be blocked or covered in anyway Heat and Flames The set should not be placed near to open flames and sources of intense heat such as an electric heater Ensure that no open flame sources such as lighted candles are placed on top of the TV Batteries should not be exposed to excessive heat such...

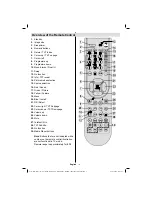
Page 5: ...d 16 Green Picture 17 Yellow Feature 18 Menu 19 Blue Install 20 OK Select 21 Cursor righ TXT Subpage 22 Cursor down TXT Downpage 23 Volume up 24 Volume down 25 Mute 26 Teletext Mix 27 TXT Subtitle 28 No function 29 Media Player buttons 30 Note Buttons that are not indicated with a number on the remote control illustration are not functional in TV mode Remote range is approximately 7m 23ft 01_MB45_...

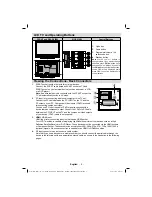
Page 6: ...cting component video You can use PC input to enable YPbPr signal connection with a device that has component output Connect the YPbPr to PC cable between the PC INPUT on the TV and the component video outputs of your device YPbPr cable is not supplied HDMI 3 HDMI input HDMI Input is for connecting a device that has an HDMI socket Your LCD Television is capable of displaying High Definition pictur...

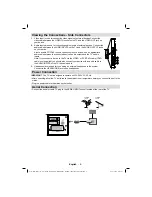
Page 7: ...YPbPr cable YPbPr cable is not supplied you should also connect your device with an audio cable to the AUDIO INPUTS of the TV to enable audio Headphone jack is used for connecting an external headphone to the system 3 Connect to the HEADPHONE jack to use headphones Power Connection IMPORTANT The TV set is designed to operate on 220 240V AC 50 Hz After unpacking allow the TV set to reach the ambien...

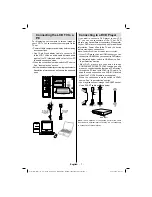
Page 8: ...off both the TV and the device before making any connections Note Cables shown in the illustration are not supplied If your DVD player has an HDMI socket you can connect via HDMI When you connect to DVD player as illustrated below switch to HDMI source See Input Selection section Most DVD players are connected through COMPONENT SOCKETS YPbPr can be use only when you connect a device that has a YPb...

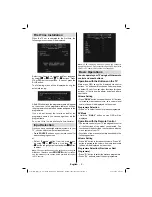
Page 9: ...kwards from the indicated part Insert two AAA R3 or equivalent type batteries inside Place the batteries in the right directions and replace the battery cover Note Remove the battery from remote control when it is not to be used for a long period Otherwise it can be damaged due to any leakage of batteries Switching the TV On Off To Switch the TV On Connect the power cord to the 220 240V AC 50 Hz T...

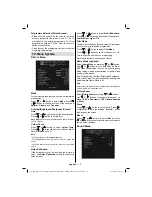
Page 10: ...t through the PC input with YPbPr to PC cable YPbPr cable is not supplied Basic Operations YoucanoperateyourTVusingboththeremote control and onset buttons Operation with the Buttons on the TV Main menu OSD cannot be displayed via control buttons buttons will function as volume up down as default Even if you set other functions for these buttons buttons will perform as default after a short while V...

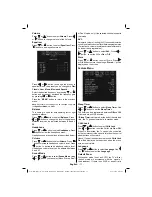
Page 11: ...ss or to choose from one of these options Low Medium High or Off Film Mode Films are recorded at a different number of frames per second to normal television programmes Press or button to select Film Mode Press or button to set this feature On or Off Turn this feature on when you are watching films to see the fast motion scenes clearly Game Mode optional Select Game Mode by pressing or button Use ...

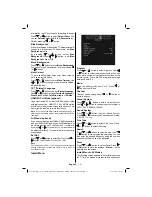
Page 12: ...hat mode AVL Automatic Volume Limiting AVL function adjusts the sound to obtain fixed output level between programmes For instance volume level of advertisements tend to be louder than programmes Press or button to select AVL Press or button to set the AVL as On or Off Store Press or button to select Store Press or OK button to store the settings Stored will be displayed on the screen Feature Menu...

Page 13: ...If you select 1 1 screen ratio will be adjusted correctly If you set Normal screen ratio may expand Ext Out Press or button to select Ext Out Use or button to set the Ext Out as On or Off Note For copying from a DVD or VCR device you should choose desired source from source menu and turn On to EXT Out from feature menu Install Menu Program Press or button to select Program Use or button to select ...

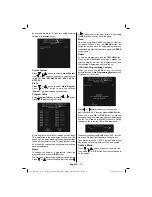
Page 14: ...Press the GREEN button By navigation buttons move the selected programme to the decided programme space and press the GREEN button again Delete To delete a programme press the YELLOW button Pressing the YELLOW button again erases the selected programme from the programme list and the following programmes shift one line up APS Auto Programming System When you press the BLUE button for starting auto...

Page 15: ...on This item shifts the image vertically towards the top or bottom of the screen Select V Position item by using or button Use or button to adjust the value Phase Depending on the resolution and scan frequency that you input to the TV set you may see a hazy or noisy picture on the screen In such a case you can use this item to get a clear picture by trial and error method Select Phase item by usin...

Page 16: ...niformly stretches the left and right sides of a normal picture 4 3 aspect ratio to fill the wide TV screen For 16 9 aspect ratio pictures that have been squeezed into a normal picture 4 3 aspect ratio use the 16 9 mode to restore the picture to its original shape 4 3 Use to view a normal picture 4 3 aspect ratio as this is its original size Panoramic This stretches the left and right sides of a n...

Page 17: ...ted the correct TV system Is your TV set or house aerial located too close to a non earthed audio equipment or neon lights etc Mountains or high buildings can cause double pictures or ghost images Sometimes you can improve the picture quality by changing the direction of the aerial Is the picture or teletext unrecognisable Check if you have entered the correct frequency Please retune the channels ...

Page 18: ... 768 72 57 7 13 1024 768 75 60 0 14 1152 864 70 64 2 VESA 15 1152 864 75 67 5 VESA 16 1152 870 75 68 9 MAC 17 1280 768 60 47 7 VESA 18 1366 768 60 47 7 19 1280 960 60 60 0 VESA 20 1280 1024 60 64 0 VESA 21 1280 1024 75 80 0 VESA 22 1600 1200 60 75 0 VESA Products Battery Information for Users on Disposal of old Equipment and Batteries European Union only These symbols indicate that equipment with ...

Page 19: ... 1080I 50Hz O 1080I 60Hz O 1080P 24Hz O 1080P 25Hz O 1080P 30HZ O 1080P 50HZ O 1080P 60HZ O X Not Available O Available Note In some cases a signal on the LCD TV may not be displayed properly The problem may be an inconsistency with standards from the source equipment DVD Set top box etc If you do experience such a problem please contact your dealer and also the manufacturer of the source equipmen...

Page 20: ...240V AC 50 Hz AUDIO German Nicam Stereo AUDIO OUTPUT POWER WRMS 10 THD 2 x 2 5 POWER CONSUMPTION W 50 W max 1 W Standby PANEL 22 wide display DIMENSIONS mm DxLxH With foot 155 x 532 x 384 50 Weight Kg 5 40 DxLxH Without foot 60 x 532 x 347 Weight Kg 5 25 01_MB45_ GB _ 01 TV _1900UK_ANALOG_BRONZE11_22880W_10067059_50162270 indd 19 01_MB45_ GB _ 01 TV _1900UK_ANALOG_BRONZE11_22880W_10067059_50162270...

Page 21: ...PCM audio via coaxial digital audio output optional Multi Audio up to 8 support According to disc content Multi Subtitle up to 32 support According to disc content Multi Angle up to 9 support According to disc content 8 level parental control Fast forward and rewind in 5 different speeds 2x 4x 8x 16x 32x Slow motion playback in 4 different speeds 1 2x 1 4x 1 8x 1 16x forward Frame by frame forward...

Page 22: ...r leave it in a car parked in direct sunlight as the temperature can rise quickly and damage the disc After playing store the disc in its case On cleaning Before playing clean the disc with a cleaning cloth Wipe the disc from the center out Do not use solvents such as benzine thinner commercially available cleaners or anti static spray intended for vinyl LPs Licence Notification This product incor...

Page 23: ...es to eject Overview of the Remote Control Standby 1 Numeric buttons 2 Return back 3 Language selection Set language 4 Display time DVD menu 5 Clear 6 Stop 7 No function 8 Rapid Reverse 9 Rapid advance 10 Info 11 Zoom 12 Repeat 13 Root 14 Menu 15 Title 16 OK Select 17 Navigation Buttons 18 Subtitle 19 Angle 20 Search mode 21 Play 22 Pause 23 Skip next 24 Skip previous 25 MENU INFO EPG FAV PRESETS ...

Page 24: ...dio language X X MENU Displays TV menu OK SELECT Enter View Play REPEAT Displays repeat options RETURN Returns back to the previous menu if available ROOT Goes back to the root folder if available SEARCH MODE Direct selection of scenes or time Selects the desired file Selects the desired file SUBTITLE Subtitle on off Press repeatedly to switch between subtitle options X X SWAP Media source selecti...

Page 25: ... to the disc s priority language Usually a circulation will happen while switching 8 to another language that is you can cancel the subtitle by pressing this button a number of times until Subtitle Off appears on the screen When the power is turned on or the disc is 9 removed the language heard is the one selected at the initial settings If this language is not recorded on the disc only the availa...

Page 26: ... Scratch fingerprint etc Clean the DVD disc and try again See instructions described in Notes on Discs to clean your disc properly Ensure that the DVD disc is in the drawer with the label uppermost A damp DVD disc or condensation may effect the equipment Wait for 1 to 2 hours in Stand by to dry the equipment Disc does not play No disc in the machine Place a disc into the loader Disc incorrectly lo...

Page 27: ...ch are adhered to each other Since the thinner the disc the higher the density at which the information can be recorded a DVD disc has a greater capacity than a single 1 2 mm thick disc Since the two thin discs are adhered to each other there is the potential to achieve double sided play sometime in the future for even longer duration play Subtitles These are printed lines appearing at the bottom ...

Page 28: ...id ed 240 m in D o u b le sid ed 480 m in S ing le side d 80 m in D o u b le sid ed 160 m in C h aracteristic s D V D co n ta in s ex cellen t so u n d a n d vid eo du e to D olby D igital and M P E G 2 S ystem Vario u s screen and au dio fu nctio n s ca n b e easily selected throu gh th e on scr een m enu A n LP is record ed as an an alo g sig n al w ith m ore d isto rtio n C D is re cord e d as ...

Page 29: ...Text File Format but do not support Picture File Format smi sub ssa ass Note It is not guaranteed that all DivX formats are supported Specifications Types of Discs Supported DVD SS SL 4 7 DVD 5 SS DL 4 7 DVD 9 DS SL 4 7 DVD 10 DS DL 4 7 DVD 18 CD DA CD R CD RW MP 3 JPEG Video Type MPEG 2 Video Standard Decoding MPEG 1 supported Full Screen Video Display of 720 x 576 PAL 720 x 480 NTSC pixels 50 an...

Page 30: ...50162270 ...

Reviews: