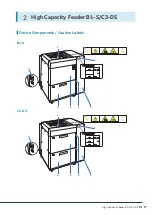
High Capacity Feeder B1-S/C3-DS
13
5.
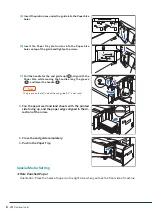
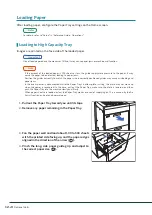
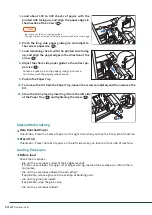
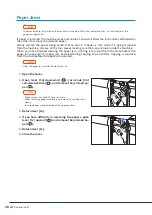
Load remaining sheets with the printed side facing
up, and align the paper edges in the direction of the
arrow (
1
).
6.
Adjust the short-side paper guide to the correct pa-
per size (
2
).
To leave a space, pinch the paper guide grip to move.
To narrow, push the paper guide to move.
Note
Make sure that Paper Feed Precision Lever is set to the Normal position. If printed image is still skewed (mis-
alignment of image on prints) after you load paper in Paper Tray correctly, enable switching of paper feed
precision.
Refer
“Changing Paper Feeding Accuracy” (p.15)
7.
Push in the Paper Tray.
Postcard Setting
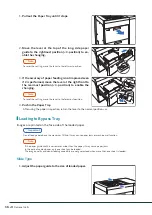
Attach Postcard Kit to the Paper Tray to load paper with the width of 100 to 181 mm.
1.
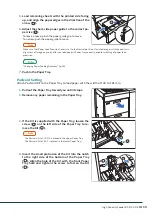
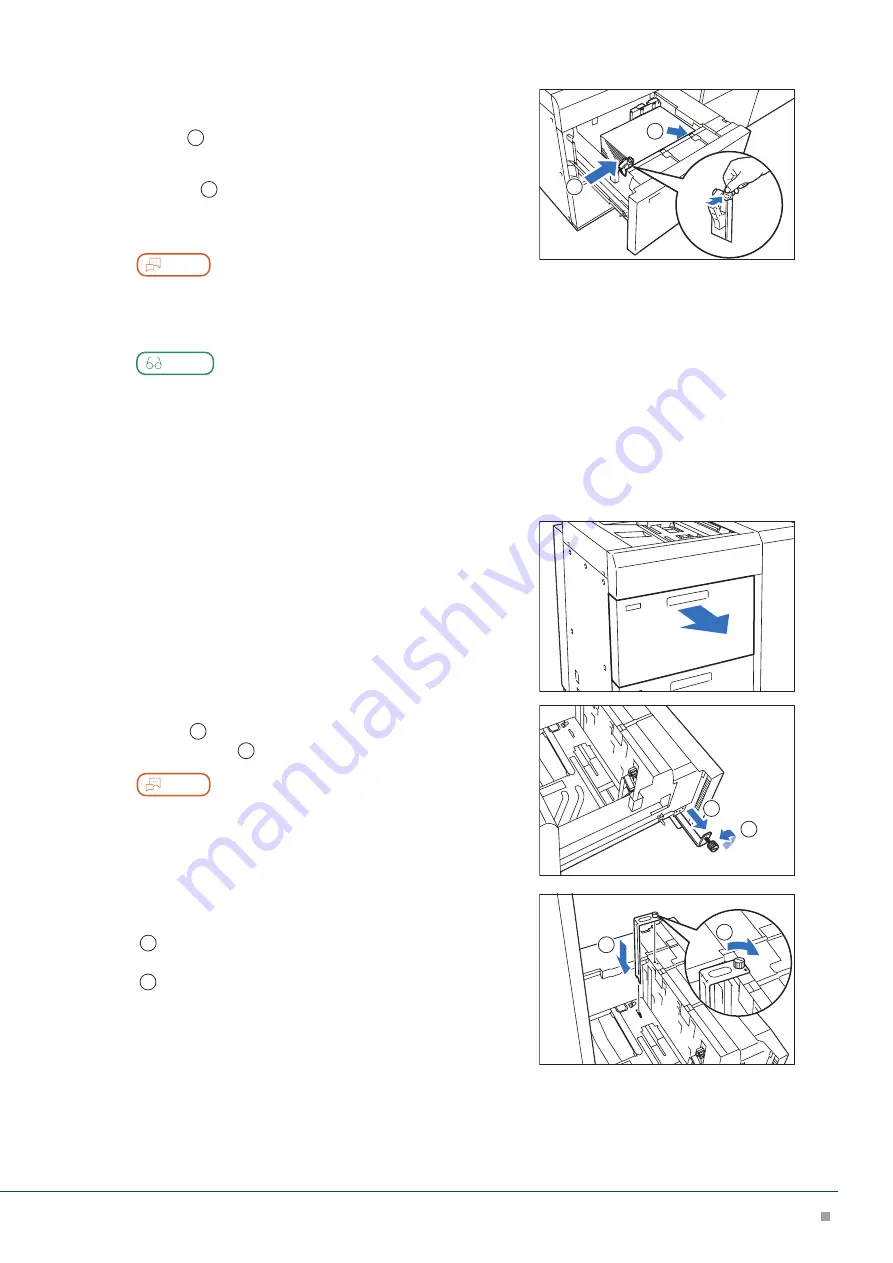
Pull out the Paper Tray toward you until it stops.
2.
Remove any paper remaining in the Paper Tray.
3.
If the Kit is supplied with the Paper Tray, loosen the
screw (
1
) on the left side of the Paper Tray to re-
move the Kit (
2
).
Note
• The Postcard Kit of C3-DS is placed in the upper Paper Tray.
• The Postcard Kit of B1-S is placed in the lower Paper Tray.
4.
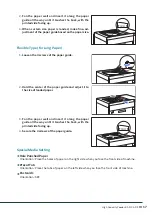
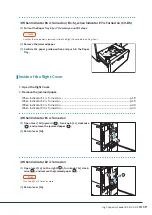
Insert the small protrusion of the Kit into the notch
to the right side of the bottom of the Paper Tray
(
1
). Align the hole of the Kit with the front Paper
Tray hole and tighten the screw to fasten the Kit
(
2
).
1
2
2
1
1
2

