47
4. Adjustment
FinePix S2 Pro (U/E) SERVICE MANUAL
[Preparations]
To perform AF offset adjustment, prepare an AF
adjustment lens and AF solid chart jig beforehand.
[Notes]
1) When measuring the distance for AF adjustment, measure
from the front of the F mount on the camera.
2) To perform AF offset adjustment, you must obtain the AF
adjustment correction data beforehand. The adjustment
procedure is described below starting with the AF
adjustment correction data creation method.
<Step 1>
Select
[F6]
from
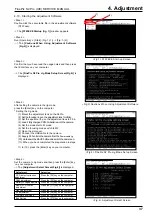
[Adjustment Select Screen (Fig.4)]
(ie press the [F6] key on the computer).
---> The
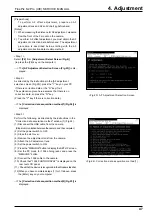
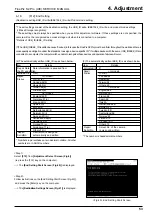
[AF Adjustment Selection Screen (Fig.23)]
is dis-
played.
<Step 2>
As directed by the instructions in the [AF adjustment
selection screen (Fig.23)], press the "Y" key on your PC
if there is correction data or the "N" key if not.
The explanation given here assumes that there is no
correction data, so press the "N" key.
(Press the "Y" key if there is correction data.)
-->The
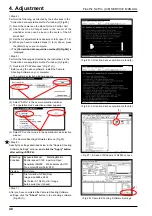
[Correction data acquisition method(1)(Fig.24)]
is
displayed.
<Step 3>
Perform the following, as directed by the instructions in the
"Correction data acquisition method" window (1) (Fig.24).
(1) Disconnect the USB cable from the camera.
(Stops communication between the camera and the computer.)
(2) Set the power switch to OFF.
(3) Close the slot cover.
(4) Remove the adjustment lens from the camera.
(5) Attach the AF adjustment lens.
(6) Set the power switch to ON.
(7) Press the "MENU/OK" button to display the SET-UP screen.
(8) Set the PC mode for 1394 photography and press the
"MENU/OK" button.
(9) Connect the 1394 cable to the camera.
(10) Check that "1394 PHOTOGRAPHY" is displayed on the
rear text LCD panel.
(11) Check that the device is recognized in the Windows taskbar.
(12)When you have completed steps (1) to (11) above, press
the [Enter] key on your computer.
-->The
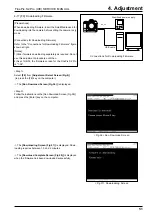
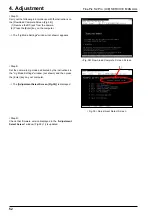
[Correction data acquisition method(2)(Fig.25)]
is
displayed.
<Fig.23> AF Adjustment Selection Screen
<Fig.24> Correction data acquisition method(1)

