4. Adjustment
48
FinePix S2 Pro (U/E) SERVICE MANUAL
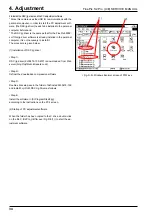
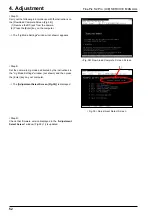
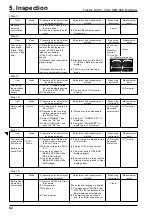
<Fig.27> Screen of Windows of S2Pshoot.exe
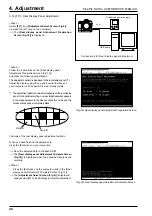
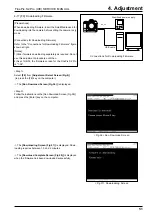
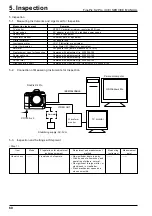
<Fig.26> Correction data acquisition method(3)
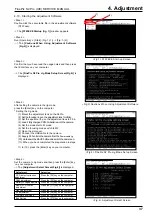
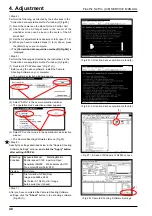
<Fig.25> Correction data acquisition method(2)
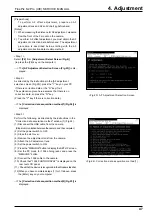
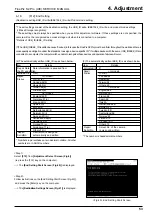
<Fig.28> Camera Shooting Software Settings
Shoothing
Exposure:Manual
Metering:Matrix
Condition
Shutter speed:1/125 Aperture:Open
Sensitivity:ISO200
White balance:AUTO
Tone curve/Sharp/Color:STD
Preview
Not rotate
File
File format:Exif JPEG(Fine)
Image size:4256 x 2848
Set Folder:C:\ S2Pro_UE \ Image
Auto aquire:Use (=check)
(1)
(1)
<Step 4>
Perform the following, as directed by the instructions in the
"Correction data acquisition method" window (2) (Fig.25).
(1) Mount the camera on the stand for the AF solid chart.
(2) Check that the AF target mark in the center of the
viewfinder screen can be seen in the center of the AF
solid chart.
(3) Set the AF adjustment lens aperture to fully open (F1.4).
(4) When you have completed steps (1) to (3) above, press
the [Enter] key on your computer.
-->The
[Correction data acquisition method(3)(Fig.26)]
is
displayed.
<Step 5>
Perform the following as directed by the instructions in the
"Correction data acquisition method" window (3) (Fig.26).
(1) Double-click "S2Pshoot.exe" (Fig.27-(1)).
* Before using the above software, install the Camera
Shooting Software on your computer.
--> The camera selection window appears.
(2) Select "S2Pro" in the camera selection window.
--> The operation mode selection window appears.
(3) Select PC control mode in the operation mode selection
window.
--> The Camera Shooting Software starts up (Fig.28).
<Step 6>
Specify the settings described below in the "Camera Shooting
Software Settings" window,
and, click the "Apply" button
after setting <STEP6>.
<Step 7>
After you have completed the Camera Shooting Software
settings, click the
"Shoot"
button in the shooting software
(Fig.28-(1)).

