background image

RD-S45T


6

 -


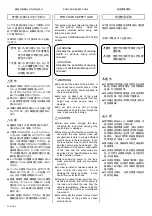
アイリスの操作方式には、オートアイリスモ
ードとマニュアルモードがあります。各方式
の操作方法については、それぞれの項目を
参照してください。

■ オートアイリスモード

アイリスモード切替スイッチを『

A

』に設定しま

す。アイリスは、カメラからの信号により、被
写体の明るさに応じて自動的に調整されま
す。

■ マニュアルモード

a.

アイリスモード切替スイッチを『

M

』に設定

します。

b.

アイリスリングを直接手で回して、アイリ
スを調整します。リングを

カメラ側から

見て

時計方向に回すと、クローズ側に

なり、反時計方向に回すと、オープン側
になります。

1. 

マニュアルモードの時でも、アイリスモ
ーメンタリスイッチを押すと、押している
間はオートアイリスになります。

2. 

アイリス

A-M

位置切替スイッチ(

20

ペー

ジ参照)を

ON

にすると、アイリスモード

切替スイッチのオートアイリスモードと
マニュアルモードの位置を逆にすること
ができます。逆にした場合には、混乱
を防ぐために、レンズに同梱してありま
すモード表示シールを、レンズのモード
表示の上に貼ってご使用ください。

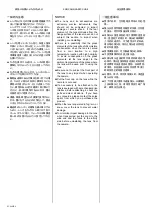
IRIS  OPERATION 

There are two iris operation modes: auto 
iris mode and manual mode.  For the 
operating instruction in each mode, refer to 
the description on each mode. 

AUTO IRIS MODE

Set the iris mode select switch to “A.”  The 
iris of the lens will automatically be 
adjusted responding to the object 
brightness. 

MANUAL MODE

a. Set the iris mode select switch to “M.”

b. Rotate the iris ring by hand to adjust

the  iris.   

From  the  camera  side,

c

lockwise  rotation  of  the  ring


causes

the iris to move toward the


closed

side 

and 

counterclockwise

rotation toward the open side.

Note 1.  Although the iris operation mode 

is in Manual, the iris is adjusted 
automatically while the iris 
momentary switch is being 
pressed. 

Note 2. The positions of the auto iris 

mode and the manual mode in the 
iris mode select switch can be 
interchanged by setting the iris 
A-M position change switch (refer 
to page 

20

) to ON.  When the 

positions are interchanged, apply 
the mode indication label, 
enclosed with the lens, onto the 
mode indication part of the lens so 
as not to cause confusion. 

光  圈  操  作

光圈模式有两种:自动光圈和手动光圈。在
各种模式中的操作说明请参阅各种模式的
相关介绍。

■ 自动光圈模式

将光圈模式选择开关设为“

A

”。镜头光圈

将根据拍摄目标的亮度自动调节。

■ 手动光圈模式

a.

将光圈模式选择开关设为“

M

”。

b.

通过手动旋转光圈环来调节光圈。

从摄

像机一端

顺时针旋转将缩小光圈;逆时

针转动旋转将放大光圈。

1


即使光圈模式为手动,如果按光圈手

 / 

自动切换开关

在按着的时侯

变为自动调节光圈。

2


将光圈

A-M

位置转换开关(参见

20

页)

设为

ON

,可以在光圈模式选择开关的

自动光圈模式位置与手动光圈模式位
置之间切换。


切换位置时,请将镜头

附带的模式指示标签贴在镜头的模式
指示部位,以防止引起混淆。

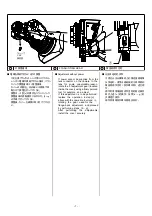
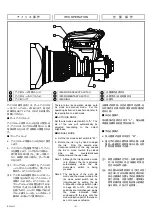
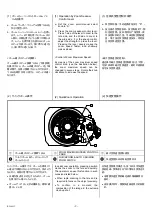
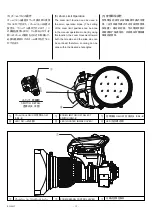
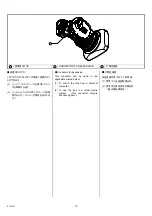
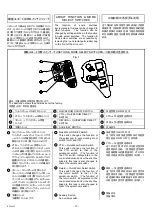
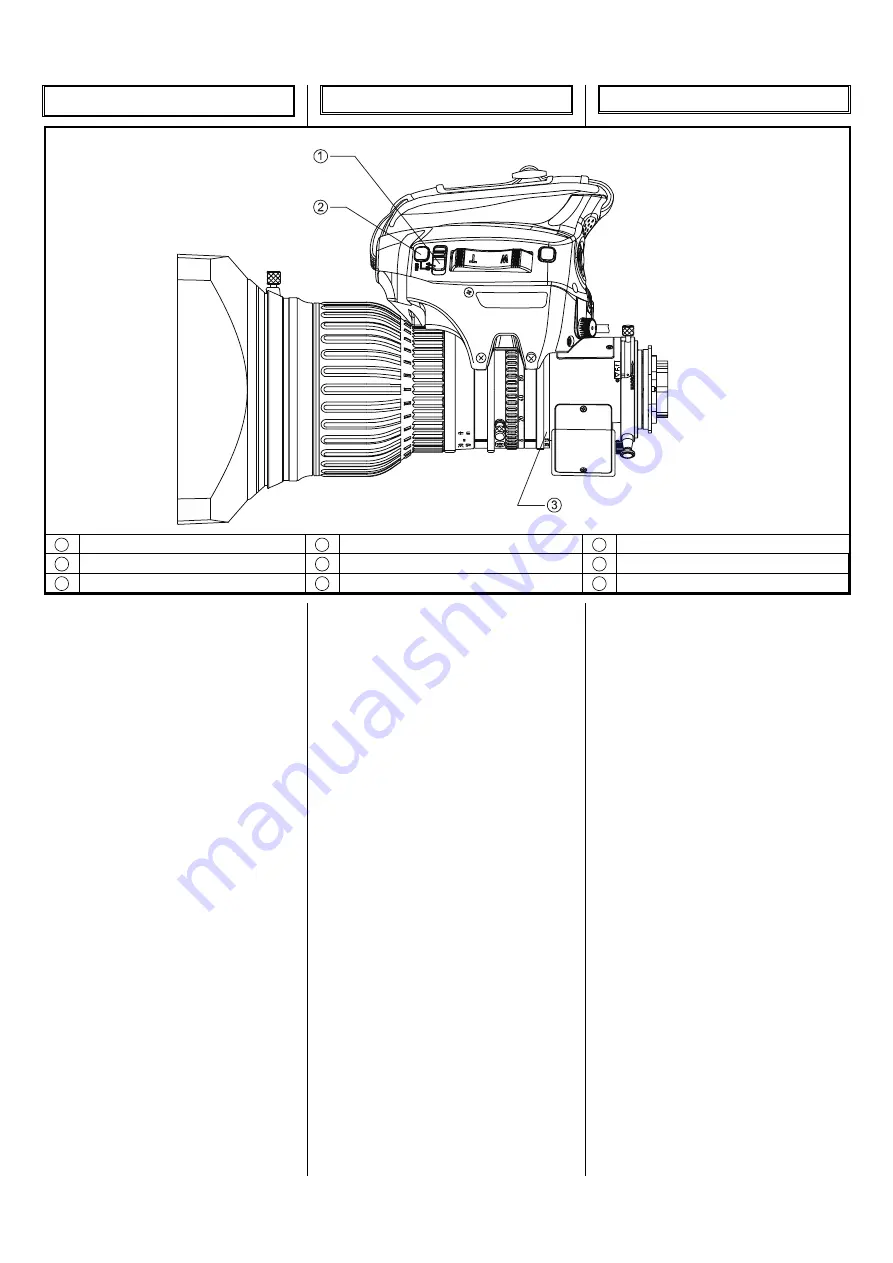
1

アイリスモード切替スイッチ

1

IRIS MODE SELECT SWITCH 

1

光圈模式选择开关

2

アイリスモーメンタリスイッチ

2

IRIS MOMENTARY SWITCH 

2

光圈手动

 / 

自动切换开关


3

アイリスリング

3

IRIS RING 

3

光圈环

Summary of Contents for Fujinon UA22x8BERD-S8

Page 1: ...H BB00031483 101 LP750A S8 2804 UA22 8BERD S8...

Page 2: ......

Page 3: ...ories is able to supply sufficient electric power to the lens system If not the lens system may not work normally and the camera may be damaged The specifications of the power consumption of the lens...

Page 4: ...let the lens adjust to the ambient temperature of the place where the lens will be used prior to using the lens Be sure not to subject the front part of the lens to any impact when operating the came...

Page 5: ...10 SJ T11364 GB T26572 GB T26572...

Page 6: ...l interference to radio or television reception which can be determined by turning the equipment off and on the user is encouraged to try to correct the interference by one or more of the following me...

Page 7: ...Iris Operation 6 Focus Operation 7 Zoom Operation 8 2 9 3 11 4 12 5 13 2 QuikZoom Operation 9 3 Auto Cruising Zoom Operation 11 4 Manual Operation 12 5 Zoom Limit Operation 13 1 9 1 Operation by Zoom...

Page 8: ...off b Rotate the mount clamp ring on the camera fully counterclockwise c Fit the mounting surface of the lens to that of the camera aligning the pin on the lens with the slot in the camera d Rotate th...

Page 9: ...nstalling the lens to a camera for the first time or installing it to another camera CONDITIONS OF OBJECT AND DIAPHRAGM 1 Object Cut off the Siemens Star the chart made up of radial black and white li...

Page 10: ...ly 3 meters away The position where the radial black and white lines become sharpest is the optimum focus position d Operate the zoom to set it to the telephoto end e Operate the focus to bring the ob...

Page 11: ...eason rotate the F f adjustment gear located inside the cover using a finely pointed tool for example and adjust If this adjustment is to be performed replace the operation in step c above with the op...

Page 12: ...ring causes the iris to move toward the closed side and counterclockwise rotation toward the open side Note 1 Although the iris operation mode is in Manual the iris is adjusted automatically while the...

Page 13: ...era side to focus on an object on the near side The remote control operation is also available with optional accessories Set the focus servo manual select knob to S when using a servo control accessor...

Page 14: ...Zoom Operation 11 4 Manual Operation 12 5 Zoom Limit Operation 13 For the operating instruction in each mode refer to the description on each mode The remote control operation is also available with o...

Page 15: ...um Speed By means of the zoom maximum speed control knob see the illustration below the zoom maximum speed can be changed in seven steps Rotate the knob clockwise to increase the speed 2 QuickZoom Ope...

Page 16: ...om returns to its former position the quickzoom movement restarts After this operation if the switch is released the zoom will move to its former position quickly Note 1 By setting an appropriate swit...

Page 17: ...at is determined when the quickzoom auto cruising zoom switch is pressed Note By setting an appropriate switch in the area of Function Mode Select Switches see page 19 the return switch and the VTR sw...

Page 18: ...mode will be released immediately and the zoom will stop 4 Manual Operation a Set the zoom servo manual select knob to M b Rotate the zoom ring directly or using the zoom lever Clockwise rotation of t...

Page 19: ...in the servo operation mode The setting of the zoom limit positions can be done in the manual operation mode By using this function the zoom movement toward both the tele side and the wide side can be...

Page 20: ...control lever and the quickzoom a u t o c r u i s i n g z o o m s w i t c h simultaneously for more than 3 seconds refer to Note 4 The wide side zoom limit position will be set Note1 Either side of th...

Page 21: ...nd the wide side zoom limit positions when the seesaw control lever is operated the zoom will move only toward the zoom limit positions not toward the opposite side of them a M S b ON OFF OFF ON c T W...

Page 22: ...as it goes c Focus the lens by controlling the zoom PROCEDURE TO CANCEL Rotate the macro ring in the opposite direction of the arrow until the macro lever automatically returns to its original positio...

Page 23: ...ly arranged this switch works as a quickzoom switch or a quickzoom auto cruising zoom switch refer to page 19 Return Switch Fig B While pressing this switch the return video picture can be seen throug...

Page 24: ...nsion This connector can be used in two applications listed below 1 To control the lens from a personal computer 2 To use the lens in a virtual studio system This connector outputs encoder signals 2 1...

Page 25: ...to that of the quickzoom switch The function of the VTR switch incorporated in the zoom rate demand unit or the shot box linked to this lens is also changed to that of the quickzoom switch 3 Return Qu...

Page 26: ...tion prevent this happening 7 Iris A M Position Change Switch The positions of the auto iris mode and the manual mode set in the iris mode select knob can be interchanged by setting this switch 8 Zoom...

Page 27: ...elect Switches Zoom Mode Function ON ON ON ON OFF OFF OFF ON ON OFF OFF OFF To operate the zoom with the lens mounted on a pan tilt head use these settings When the camera is powered ON with these set...

Page 28: ...Seesaw Control Lever can be selected from ten modes Refer to the following figure 10 FUNCTION MODE SELECT SWITCHES Fig 4 The illustration shows the positions set at the factory 1 1 ZOOM MODE SELECT SW...

Page 29: ...Mode Select Switches 2 VTR Q Z 5 C Z ON Function of VTR Switch OFF VTR Switch ON ON Quickzoom auto cruising zoom switch ON OFF Quickzoom Switch QuickZoom Auto Cruising Zoom Switch Settings of Function...

Page 30: ...mes visible inside the drive unit by removing the cap at the front of the drive unit Use a small screwdriver or similar implement to rotate the trimmer IRIS SENSITIVITY ADJUSTMENT Rotate the iris sens...

Page 31: ...ttaching knob counterclockwise to loosen it b Insert the lens hood until the mating surfaces of the lens hood and the lens body contact with each other c Rotate the lens hood so that the index mark on...

Page 32: ...Then put it together with desiccant into a vinyl bag for sealing to remove the moisture inside STORAGE If it is assumed that the lens will not be used for a long term store it in a place where high t...

Page 33: ...Control unit for focus operation Operation angle of the knob is two turn Focus Position Demand Unit REMARKS MODEL Note The speed of the zoom achieved by operating the ZOOM RATE DEMAND UNIT is the spee...

Page 34: ...ol by Personal Computer 2 Configuration 2 All Servo System 2 2 ACCESSORY NAME MODEL REMARKS 1 EXTENSION CABLE SA 206D 005 Required when a personal computer is used to control the iris focus and zoom o...

Page 35: ...0 04 m in Macro Operation 0 04 m Field Angle Hor Ver Diag 61 52 3 07 37 14 1 45 69 01 3 35 33 22 1 34 19 07 0 53 37 56 1 47 at Wide End Object Area at M O D at Tele End 905 mm 509 mm 43 mm 24 mm 472...

Page 36: ...14 17 19 23 20 QUICKZOOM AUTO CRUISING ZOOM SWITCH 9 10 11 12 14 17 19 20 23 21 ON OFF QUICKZOOM ON OFF SWITCH ON OFF 19 22 CONNECTOR FOR ZOOM CONTROL 8 21 23 ZOOM SERVO MANUAL SELECT KNOB 8 9 10 11 1...

Page 37: ...ILLUSTRATIONS...

Page 38: ......

Page 39: ...MEMO...

Page 40: ...EXTENDER SELECT LEVER INDEX MARK VTR CRUISING ZOOM SWITCH P GLASS ELEMENTS CONNECTOR FOR EXPANSION P F f F f F f 2 76 F f 65 03 48 IN AIR B f 56 99 39 96 IN AIR B f 56 99 39 96 IN AIR GLASS ELEMENTS...

Page 41: ...mm UNLESS OTHERWISE SPECIFIED UNIT mm Outline drawing UA22 X 8BERD S8 Fig 1 1 GLP750AS800 11...

Page 42: ......

Page 43: ...Drive unit wiring diagram Fig 2 2 AMPLIFIER AMPLIFIER P C B P C B SS00001799 00...

Page 44: ......

Page 45: ...SIEMENS STAR CUT LINE...

Page 46: ......

Page 47: ...http www fujifilm eom cn products optical_devices FUJIFILM China Investment Co Ltd Optical Devices Division Beijing Branch Room 2606 No 1 Taikang financial Tower No 38 East Third Ring North Road Chao...

Page 48: ......
Reviews: