9
Installation
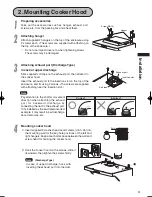
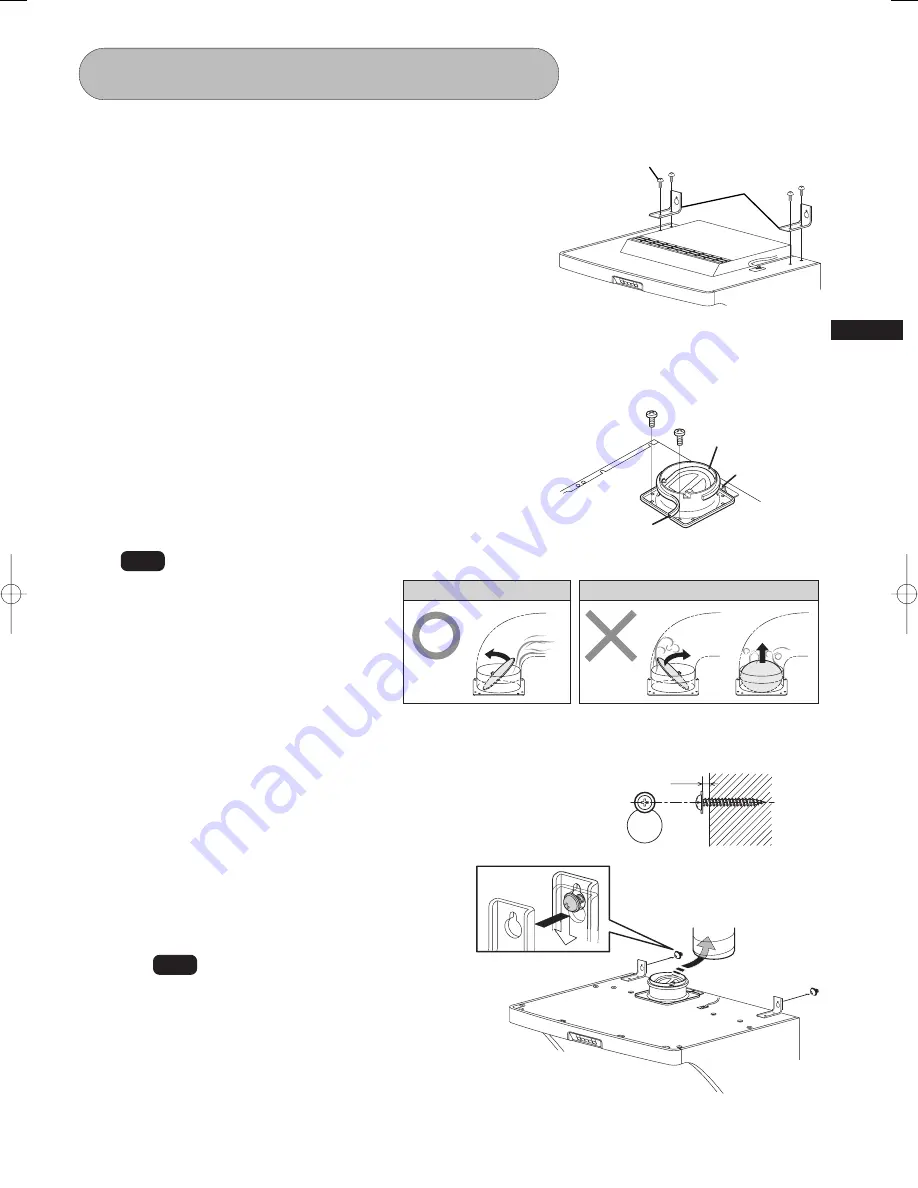
Soft tape
Exhaust port
Insertion slot
3
Attaching exhaust port (Discharge Type)
In case of upper discharge
Stick supplied soft tape on the exhaust port, then attach it to
the cooker hood.
Insert the exhaust port to the insertion slot on the top of the
enclosure, and fix using 2 screws. (The screws are supplied
with attaching near the insertion slot.)
Incorrect
Correct
Note
Pay attention to the shatter movement
direction when attaching the exhaust
p o r t fo r b a ck wa r d d i s c h a r g e by
connecting the duct to the exhaust port.
If it's installed as the illustrated incorrect
example, it may result in bad discharge,
abnormal noise, etc.
4
Mounting cooker hood
1) Insert supplied 2 washer-head wood screws (
∅
5.1
×
45) into
the mounting wall for the key-hole positions of the left and
right hangers. Keep about 5mm space between the wall and
screw-head for hooking the cooker hood.
Note
(Discharge Type)
In case of upper discharge, hook with
inserting the exhaust port into the duct.
5mm
2) Hook the cooker hood on the screws, slide it
downward, then tighten the screws firmly.
2. Mounting Cooker Hood
1
Preparing accessories
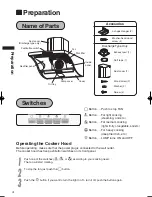
Take out the accessories such as hanger, exhaust port,
screws, etc. from the packing box and check them.
2
Attaching hanger
Attach supplied 2 hangers on the top of the enclosure using
2 screws each. (The screws are supplied with attaching on
the top of the enclosure.)
* Do not use impact driver etc. when tightening screws.
The screws may be damaged.
Screw (M5
×
10)
Hanger


