1
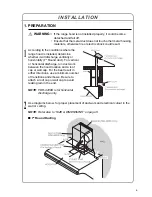
Remove the front panel of the supplied
duct cover by pulling out its bottom end
(roller catch fastened).
Note: The duct cover is supplied with its
top plate assembled. Remove the
top plate when it’s unnecessary.
2
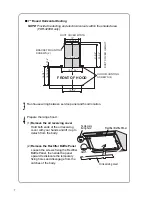
Temporarily insert 4 supplied FT screws
into the holes on the top of the body.
Allow about 1/10” space between the top
plate and screwheads.
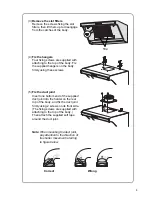
3
Put the duct cover with aligning its 4
bottom cutouts with the 4 screws, slide it
backward, then tighten the screws firmly.
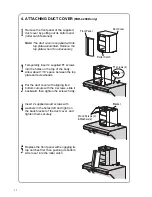
4
Insert 2 supplied wood screws with
washers in the holes (left and right) on
the back bracket of the duct cover, and
tighten them securely.
5
Replace the front panel with engaging its
top notches first, then pushing its bottom
side to set into the roller catch.
4. ATTACHING DUCT COVER
(FDR-4200D only)
Front Panel
Roller Catch
Duct Cover
FT screws (4)
Wood Screws (2)
& Washers (2)
Bracket
11


