6
Exhaust
outlet
8
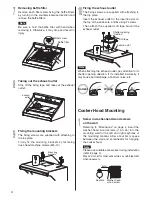
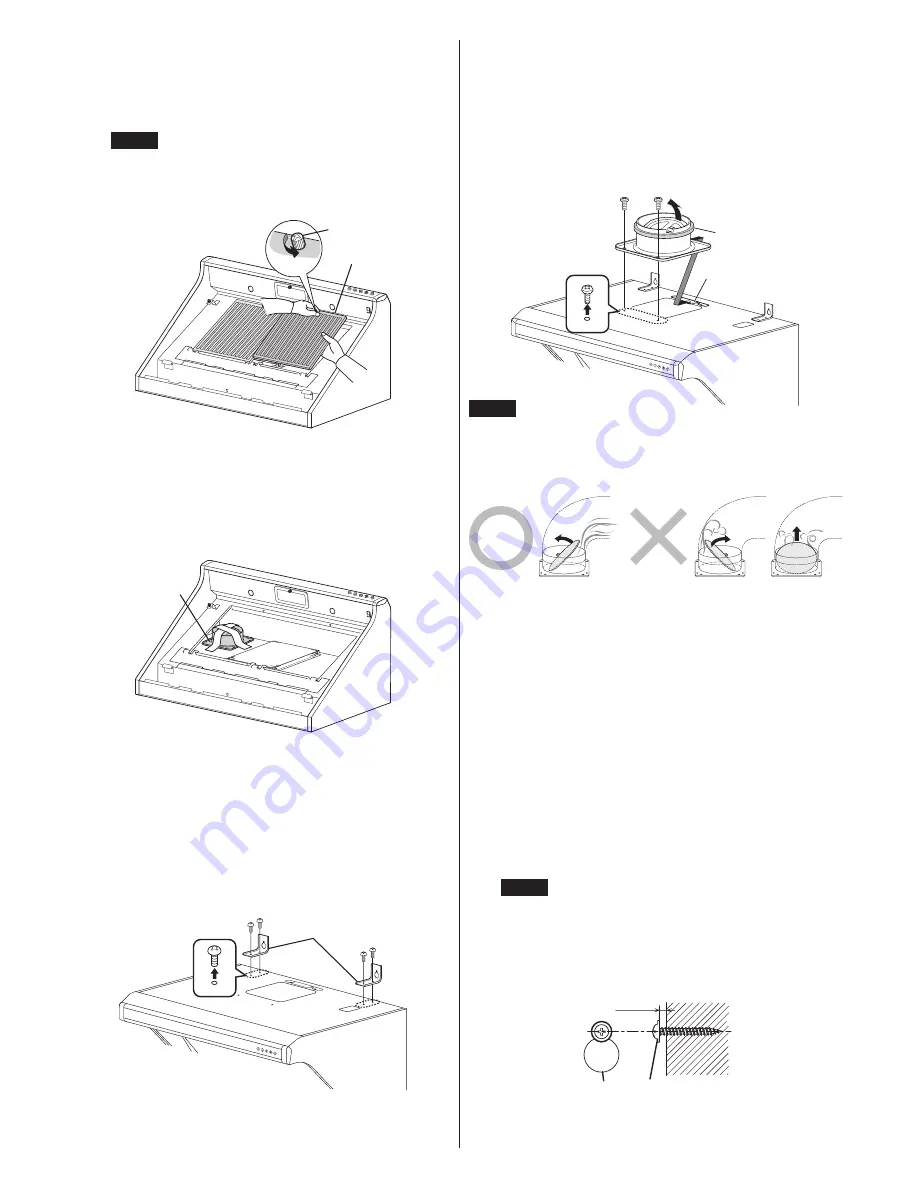
Taking out the exhaust outlet
Strip off the fixing tape and take out the exhaust
outlet.
9
Fixing the mounting brackets
The fixing screws are supplied with attaching to
the top plate.
Firmly fix the mounting brackets by fastening
truss head machine screws (M5
×
10).
Mounting
brackets
10
Fixing the exhaust outlet
The fixing screws are supplied with attaching to
the top plate.
Insert the exhaust outlet to the insertion slot on
the top of the enclosure, and fix using 2 screws.
Then attach the supplied soft tape around the
exhaust outlet.
Soft tape
Shutter opening
direction
Insertion slot
Note
When attaching the exhaust outlet, pay attention to its
shutter opening direction. If it's installed incorrectly, it
may cause bad discharge, abnormal noise, etc.
Correct
Wrong
7
Removing baffle filter
Remove each filter screw fixing the baffle filters
by turning in the counterclockwise direction and
remove the baffle filters.
Note
Be sure to hold the baffle filter with hand when
removing it. Otherwise, it may drop and result in
injury.
Baffle filter
Filter screw
Loosen
Cooker Hood Mounting
1
Screw in washer-head wood screws
on the wall
Referring to "Dimensions" on page 4, insert the
washer-head wood screws (
∅
5.1
×
45) into the
mounting wall for the left and right keyholes of
the mounting bracket. Allow about 5mm space
between the wall and screwheads for hanging
the cooker hood.
Note
Please use suitable accessories during installation
(refer to page 3).
May add or opt for other accessories as reinforcement
when necessary.
Washer-head
wood screw
Keyhole
5mm


