LCD monitor
Connecting the monitor
!
Please take note of the safety information in the "Important notes" chapter.
CE conformance and optimum picture quality are guaranteed only if you use the data cable
supplied.
Do not cover the ventilation openings of the monitor.
The computer power plug must be pulled out!
►
Be sure that the monitor and the computer are switched off.
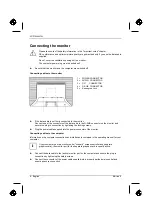
Connecting cables to the monitor
►
If the data cable is not firmly connected to the monitor:
Connect one of the connectors of the data cable to the D-SUB connector on the monitor and
secure the plug-in connection by tightening the locking screws.
►
Plug the power cable supplied into the power connector of the monitor.
Connecting cables to the computer
Information on the computer connections and interfaces is contained in the operating manual for your
computer.
i
If your computer has two monitor ports ("onboard" screen controller and separate
graphics card), the monitor port for the separate graphics card is usually active.
►
Connect the data cable to the (active) monitor port on the computer and secure the plug-in
connection by tightening the safety screws.
►
Connect the connector of the power cable supplied into a properly earthed mains outlet and
ensure a secure connection.
6 - English
Edition 2
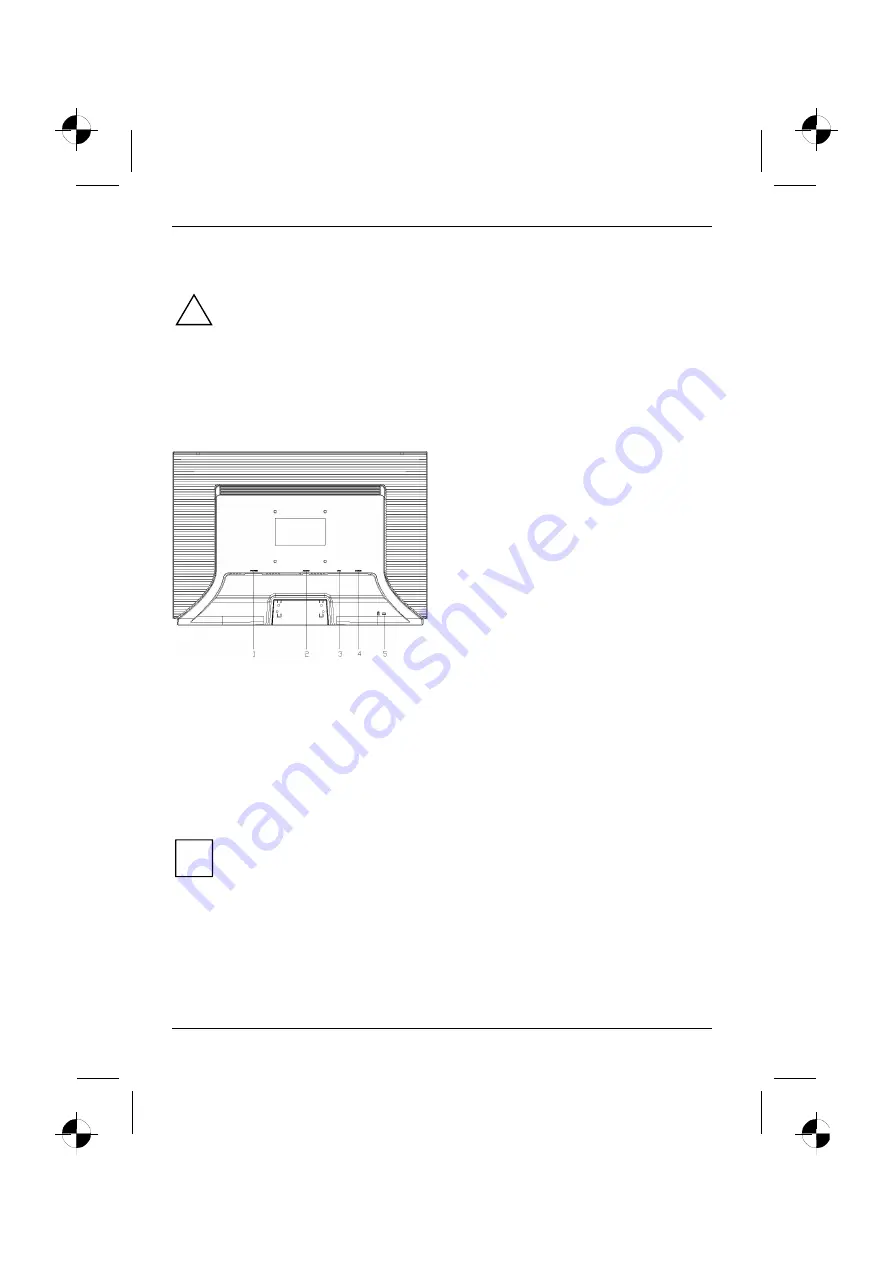
1 = POWER CONNECTOR
2 = AUDIO CONNECTOR
4
= D-SUB CONNECTOR
3
= DVI CONNECTOR
5
= Kensington Lock
Summary of Contents for 3220W
Page 2: ......
Page 4: ......
Page 10: ......
Page 20: ......
Page 22: ......
Page 34: ......
Page 44: ......
Page 46: ......
Page 56: ......
Page 58: ......
Page 68: ......
Page 70: ......
Page 80: ......
Page 82: ......
Page 92: ......
Page 94: ......
Page 104: ......
Page 106: ......
Page 116: ......
Page 118: ......
Page 128: ......
Page 129: ...1 1 2 2 3 4 4 5 5 6 7 8 10 2...
Page 130: ......
Page 131: ...VGA Help Desk i 2 1...
Page 132: ...Help Desk 100 240 CE 2 2...
Page 133: ...Help Desk 0 Landscape IEC60320 CEE 22 VDE HAR VDE HAR SVT SJT 3 2 3...
Page 134: ...4 2...
Page 135: ...2004 108 EG 73 23 EWG i 2 5...
Page 137: ...i 1 OSD On Screen Display 2 3 2 7...
Page 139: ...AUTO OSD AUTO OSD AUTO OSD AUTO OSD OSD 2 9...
Page 142: ......
Page 152: ......
Page 154: ......
Page 164: ......
Page 165: ...1 1 2 2 3 3 4 CE 4 4 5 6 7 9 2...
Page 166: ......
Page 167: ...LCD LCD VGA o Help Desk i 2 1...
Page 168: ...O LCD Help Desk LCD Newton 100 V 240 V CE 2 2...
Page 169: ...O LCD Help Desk 0 Landscape IEC60320 CEE 22 VDE HAR VDE HAR SVT SJT LCD 2 3...
Page 170: ...O LCD LCD CE 2004 108 E 73 23 LCD LCD i 4 2...
Page 172: ...O LCD i 1 OSD On Screen Display 2 3 LCD 6 2...
Page 175: ...O LCD LCD 2 9...
Page 176: ......
Page 178: ......
Page 188: ......
Page 190: ......
Page 200: ......
Page 202: ......
Page 212: ......
Page 214: ......
Page 224: ......
Page 226: ......
Page 236: ......
Page 238: ......
Page 248: ......
Page 250: ......
Page 260: ......
Page 261: ...1 1 2 2 3 3 4 CE 4 4 5 6 7 9 2...
Page 262: ......
Page 263: ...LCD LCD VGA Hotline Help Desk i 2 1...
Page 264: ...LCD Help Desk LCD 100 V 240 V CE Help Desk 2 2...
Page 265: ...LCD 0 IEC60320 CEE 22 VDE HAR VDE HAR SVT SJT 3 LCD 2 3...
Page 266: ...LCD LCD CE 2004 108 EG 2006 95 EG LCD LCD i 4 2...
Page 268: ...LCD i 1 Buttons for the OSD menu On Screen display 2 Power indicator 3 ON OFF switch LCD 6 2...
Page 270: ...LCD AUTO OSD AUTO OSD AUTO OSD AUTO OSD AUTO OSD 8 2...
Page 272: ......
Page 274: ......
Page 284: ......
Page 286: ......
Page 296: ......


