Working with the notebook
10600444862
25
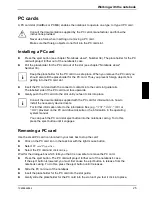
PC cards
A PC card slot (CardBus or PCMIA) enables the notebook to operate one type I or type II PC card.
!
Consult the documentation supplied by the PC card's manufacturer and follow the
instructions provided.
Never use force when inserting or removing a PC card.
Make sure that foreign objects do not fall into the PC card slot.
Installing a PC card
►
Press the eject button (see chapter "Notebook views", Number 34). The placeholder for the PC
card will project further out of the notebook's case.
►
Pull the placeholder for the PC card out of the slot (see chapter "Notebook views",
Number 33).
i
Keep the placeholder for the PC card in a safe place. When you remove the PC card you
should also refit the placeholder for the PC card. Thus you prevent foreign objects from
getting into the PC card slot.
►
Insert the PC card end with the connector contacts into the card slot guide rails
The labelled side of the PC card must face upwards.
►
Gently push the PC card into the slot until you feel it click into place.
i
Consult the documentation supplied with the PC card for information on how to
install the necessary device drivers.
For further information refer to the information files (e.g.
*.TXT
,
*.DOC
,
*.WRI
or
*.HLP
) provided on the PC card driver diskette or the information in the operating
system manual.
You can push the PC card slot eject button into the notebook casing. To do this,
press the eject button until it engages.
Removing a PC card
Use the small PC card icon located in your task bar to stop the card:
►
Click on the PC card icon in the task bar with the right mouse button.
►
Select
PC card Properties
.
►
Select the PC card and click on
Stop
.
Wait for the dialogue box which tells you that it is now safe to remove the PC card.
►
Press the eject button. The PC card will project further out of the notebook's case.
If the eject button is lowered, you must first cause the eject button to release from the
notebook casing. To do this, press the eject button until it releases.
►
Slide the PC card out of the notebook.
►
Insert the placeholder for the PC card into the slot guide.
►
Gently slide the placeholder for the PC card into the slot until you feel it click into place.
Summary of Contents for AMILO A
Page 1: ...EasyGuide AMILO D Series English answers2...
Page 3: ......
Page 13: ...Notebook views 10600444862 5 Under side 35 36 35 Battery release latch 36 Battery compartment...
Page 14: ......
Page 40: ......
Page 48: ......
Page 56: ......


