background image

Working with the notebook


30


10600444862


Adjusting AutoPlay function of optical drive 

With the AutoPlay function you can specify whether or not a program or action is to be run/carried 
out depending on the CD/DVD content type of Windows XP. For example, you can specify that 
when an Audio CD is inserted, the Media Player is automatically started and automatically plays the 
Audio CD. 
You can set the AutoPlay function of the optical drive according to your needs. Proceed as follows: 


Click on the Start menu with the right mouse button or touchpad key. 

A context menu appears. 

 Click 

on 

Explorer


Click on the corresponding drive with the right mouse button or touchpad key. 

A context menu appears. 

 Click 

on 

Properties


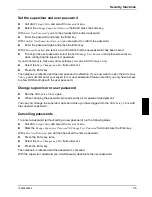
Click on the 

AutoPlay

 tab. 


Adjust the AutoPlay function to meet your needs. 


i


Please note that you must select the desired action and confirm it with 

Apply

 for each 

individual CD/DVD content type. 

Audio: Setting volume 


To adjust the volume use the Windows volume control from the 

Start

 menu 

- Programs - 

Accessories - Multimedia - Volume Control

Integrated 56k modem 

The integrated 56k modem supports all data communication applications, such as: 


Modem operation: High-speed downloads at up to 56,000 bit/s (V.90). Downward-compatible 
to V.34 modems. 


Fax mode: Transmitting and receiving at up to 14,400 bit/s 


Simple country adaptation with programme 

The modem complies with the EU Directive 91/263/EEC (Telecommunications terminal equipment 
directive) and has been checked in agreement with the guideline TBR-21.  
The modem can be operated in the following countries: 
Multifrequency (MFC) dialling 
Belgium, Denmark, Germany, Finland, France, Greece, Great Britain, Holland, Ireland, Iceland, 
Italy, Luxembourg, Norway, Austria, Portugal, Sweden, Switzerland and Spain. 
Pulse dialling: 
Belgium, France, Holland and Italy. 
Also in: Poland, Slovenia, South Africa and Hungary. 

Summary of Contents for AMILO A

Page 1: ...EasyGuide AMILO D Series English answers2...

Page 2: ...r sales partner your sales outlet Additional information is provided on the Help Desk list and in the Warranty manual the Warranty manual is included on the Drivers Utilities CD provided The latest in...

Page 3: ......

Page 4: ...ido impreso sobre papel reciclado Questo manuale stato stampato su carta da riciclaggio Denna handbok r tryckt p recyclingpapper Dit handboek werd op recycling papier gedrukt Herausgegeben von Publish...

Page 5: ...duction Index Notebook views Important notes Preparing the notebook for use Working with the notebook Security functions Connecting external devices Settings in BIOS Setup Utility Troubleshooting and...

Page 6: ...corporated All other trademarks referenced are trademarks or registered trademarks of their respective owners whose protected rights are acknowledged Copyright Fujitsu Siemens Computers GmbH 2004 All...

Page 7: ...he notebook 12 Preparing the notebook for use 13 Unpacking and checking the delivery 13 Selecting a location 14 Connecting the power adapter 14 Working with the notebook 15 Switching the notebook on a...

Page 8: ...stem 36 Connecting external devices 37 Connecting an external monitor 37 Using the parallel port 38 Connecting USB devices 38 Connecting external audio devices 39 Connecting an external device to S Vi...

Page 9: ...ds keyboard or mouse via three USB ports 2 0 An audio controller and two internal loudspeakers provide your AMILO with an audio capability You can also connect an external microphone and an external l...

Page 10: ...loss of data invalidate your warranty destroy the notebook or endanger your life i Indicates important information which is required to use the system properly Text which follows this symbol describe...

Page 11: ...tart to work with your notebook Opened Notebook 1 5 6 7 8 9 10 11 2 4 3 12 1 Built in microphone 2 Status indicators 3 LCD screen 4 Easy Launch keys 5 On Off switch for Wireless LAN 6 ON OFF switch of...

Page 12: ...21 S Video out Right side panel 22 23 24 25 26 22 Battery compartment 23 Optical drive 24 Insert Eject button 25 Opening for manual ejection 26 DC jack DC IN Left side panel 27 28 29 30 31 32 33 34 2...

Page 13: ...Notebook views 10600444862 5 Under side 35 36 35 Battery release latch 36 Battery compartment...

Page 14: ......

Page 15: ...ls of a battery Used batteries must be disposed of in accordance with local regulations special waste There is a lithium battery button cell installed in the notebook for real time buffering The lithi...

Page 16: ...ase contact your sales point or our hotline help desk Notes on installing and removing boards and modules Only qualified technicians should repair the device Unauthorised opening or incorrect repair m...

Page 17: ...ses only unless otherwise authorised by Macrovision Corporation Reverse engineering or disassembly is prohibited Energy saving If you will not be using your notebook switch it off Make use of the devi...

Page 18: ...rliament and Commission from 9 March 1999 governing Radio and Telecommunications Equipment and mutual recognition of conformity This device is approved for use in Belgium Denmark Germany Finland Greec...

Page 19: ...If this is not the case obtain the appropriate power adapter for your notebook Do not use any other voltage converter i If you travel in another country check whether the local power supply and the s...

Page 20: ...aning agents that contain abrasives or may corrode plastic The use of improper cleaning agents can damage the markings on the keyboard and the notebook the paintwork of the device or the device itself...

Page 21: ...You can increase the battery s life by enabling the system s energy saving functions If you use the notebook in a normal office situation run it from the mains using the power adapter Please see the C...

Page 22: ...wer adapter Do not expose the notebook to extreme environmental conditions Protect the notebook from dust humidity and heat For wireless data transfer you must align the notebook s infrared interface...

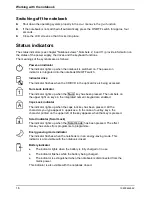
Page 23: ...ok Please take note of the information in the Important notes chapter Switching the notebook on and off Switching on the notebook Slide the release on front of notebook to the right and fold up the LC...

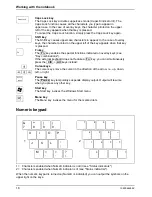
Page 24: ...or The indicator lights up when the Num key has been pressed The numbers on the upper right on keys in the integrated numeric keypad are enabled A Caps Lock indicator The indicator lights up when the...

Page 25: ...ription of keys refers to Windows Additional functions supported by the keys are described in the relevant manuals supplied with your application programmes The figure below shows how to access the di...

Page 26: ...ons indicated on overlay keys see Key combinations If the external keyboard does not feature a Fn key you can simultaneously press the Ctrl Alt keys instead Cursor keys The cursor keys move the cursor...

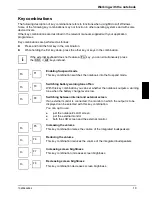
Page 27: ...ombination switches the notebook into the Suspend mode Fn F3 Switching battery warning tone off on With this key combination you can set whether the notebook outputs a warning tone when the battery ch...

Page 28: ...following applications by pressing a single key E mail Use this button to start the standard e mail programme for your system Internet With this button you can start the standard internet browser for...

Page 29: ...touchpad scroll button to scroll up or down The information texts above or below the display area appear Scrolling with the touchpad scroll bar Move your finger upwards or downwards on the scroll bar...

Page 30: ...e i e a total of 17 faulted subpixels That is approx 0 0002 of the entire subpixel Background lighting TFT monitors are operated with background lighting The luminosity of the background lighting can...

Page 31: ...t notes chapter Charging caring for and maintaining the battery The notebook battery can only be charged when the ambient temperature is between 5 C and max 35 C You can charge the battery by connecti...

Page 32: ...tebook uses less power when the power management features are enabled You will then be able to work longer when using the battery before having to recharge it i If you are connected to a network or us...

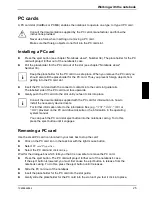
Page 33: ...he slot until you feel it click into place i Consult the documentation supplied with the PC card for information on how to install the necessary device drivers For further information refer to the inf...

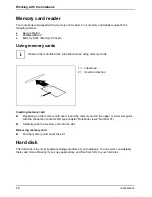
Page 34: ...1 Label area 2 Insertion direction Inserting memory card Depending on the memory card used insert the memory card in the upper or lower slot guide with the connection contacts first see chapter Notebo...

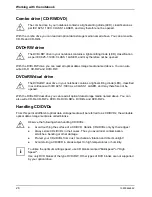
Page 35: ...of data a virtually unlimited number of times This means the data can be deleted and changed DVD DVD ROM and DVD video Abbreviation for Digital Versatile Disc or Digital Video Disc A DVD is an optical...

Page 36: ...EC 825 1 1993 as a CLASS 1 LASER and may therefore not be opened With the DVD RW dual drive you can read all optical data storage media named above You can also write CD Rs CD RWs DVD Rs DVD RWs DVD R...

Page 37: ...The regional codes of DVD films and DVD players must match so that the DVD film can be played back There are six different regional codes Regional code 1 USA and Canada Regional code 2 Egypt Europe Ja...

Page 38: ...t the desired action and confirm it with Apply for each individual CD DVD content type Audio Setting volume To adjust the volume use the Windows volume control from the Start menu Programs Accessories...

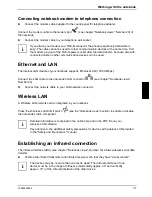
Page 39: ...nnector see chapter Notebook views Number 30 Connect the network cable to your LAN network connector Wireless LAN A Wireless LAN network card is integrated in your notebook Press the Wireless Lan On O...

Page 40: ......

Page 41: ...not a warranty case and is therefore subject to charge Overview of all security functions The following sections contain a brief description of the security functions that are provided with your note...

Page 42: ...tup Utility and or your system any longer if you forget both the user password and the supervisor password The loss of passwords is not a warranty case and is therefore subject to charge Back up your...

Page 43: ...d and the new password is effective If you now want to open the BIOS Setup Utility you must first enter your supervisor or user password Please note that you only have access to a few BIOS settings wi...

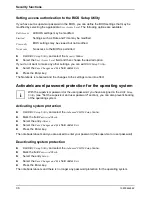
Page 44: ...Notebook is rebooted and the changes to the settings come into effect Activate cancel password protection for the operating system i With the supervisor password or the user password you have assigne...

Page 45: ...lity sockets 5 Plug all power cables into the mains supply Disconnecting devices from notebook 1 Turn off all power and equipment switches 2 Remove all power plugs from the mains outlets 3 Unplug all...

Page 46: ...switch the printer on then the notebook Connecting USB devices You can connect external devices to the USB ports see chapter Notebook views Numbers 20 27 and 28 which also have a USB interface e g a p...

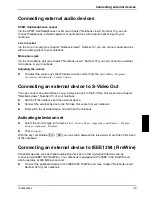
Page 47: ...can connect an external device e g a television set to the S Video Out socket see chapter Notebook views Number 21 of your notebook Switch off the notebook and the external device Connect the external...

Page 48: ......

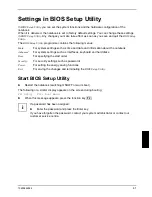
Page 49: ...notebook Advanced For system settings such as interfaces keyboard and hard disks Boot For specifying the start order Security For security settings such as passwords Power For setting the energy savi...

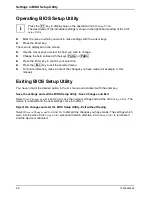
Page 50: ...to exit the selected menu For future reference make a note of the changes you have made for example in this manual Exiting BIOS Setup Utility You have to mark the desired option in the Exit menu and a...

Page 51: ...vers and software utilities will be reinstalled For this reason you should try to save important data to a backup medium before you restore the hard disk contents Insert the Windows Recovery CD into t...

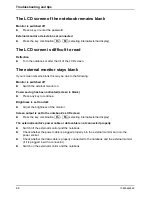
Page 52: ...the external monitor on Power saving has been activated screen is blank Press any key to continue Brightness is set too dark Adjust the brightness of the monitor Screen output is set to the notebook s...

Page 53: ...rrect monitor under Start Control Panel Appearance and Themes Display Settings Advanced Display The notebook cannot be started The battery is not installed correctly Switch the notebook off Check whet...

Page 54: ...ntinue to play Should the picture freeze when playing some DVD films deactivate the accelerated hardware decryption it is activated in the default setting this can be recognised from the checkmark in...

Page 55: ...lid data Switch the notebook off Switch the notebook on Enter the BIOS Setup Utility programme by pressing F2 Select the Load Optimal Defaults entry in the Exit menu to restore the default settings Pr...

Page 56: ......
Page 57: ...isk drives Hard disk drive Optical drive Electrical data Regulations complied with CE Maximum power draw notebook on with battery charging approx 160 W LCD screen Display diagonal 15 4 inch WXGA TFT G...

Page 58: ...bi directional ECP capable Infrared interface Fast IrDA 4Mbits s Kensington Lock Environmental conditions Environment class 7K1 Environment class 7M2 Temperature Operation 7K1 Transport 2K2 5 C 35 C...

Page 59: ...tarting 41 Blank 28 Buffer battery load 43 C Caps Lock indicator 3 16 CardBus see PC card CD blank 28 CD DVD AutoPlay function 30 emergency removal 29 inserting 29 removing 29 working with 28 CD R 27...

Page 60: ...MicroSaver 33 34 Key Backspace 17 Caps Lock 18 cursor control keys 18 Enter 17 Fn key 18 Fn F4 19 Return 17 Key Shift 18 Shift Tab 20 Tab key 17 Key combination 19 Keyboard 17 Keys 17 L LCD screen inc...

Page 61: ...dicator 16 Printer connecting 38 does not print 46 R Recovery CD 43 Regional codes 29 Restoring operating system 43 S S Video Out socket 39 Safety 3 Screen brightness decreasing 19 increasing 19 Scrol...

Page 62: ...2 U USB port 3 38 V VGA port see monitor port Video devices connecting 39 Video output see S Video Out socket Volume adjustment 30 39 decreasing 19 increasing 19 W Warm boot 20 Wireless data transfer...

Reviews: