background image

Connecting external devices

Connecting external devices

Always refer to the safety information provided in

"Important notes", Page 4

before

connecting or disconnecting any devices to or from your notebook.

Always read the documentation supplied with the device you wish to connect.

Never connect or disconnect cables during a thunderstorm.

Never pull at a cable when disconnecting it. Always grasp the plug.

Follow the steps below in order, when connecting or disconnecting
devices to your notebook:

Connecting devices to the notebook

1. Turn off your notebook and all external devices.
2. Unplug your notebook and all devices from the mains sockets.
3. Connect the cables for your external devices following the instructions.
4. Plug all power cables into the mains sockets.

Devices

Peripheraldevices

Disconnecting devices from the notebook

1. Turn off your notebook and all external devices.
2. Unplug your notebook and all devices from the mains sockets.
3. Disconnect the cables for your external devices following the instructions.

Devices

Peripheraldevices

Some of the external devices require special drivers (see the operating
system and external device documentation).

10600906461, edition 1

49

Summary of Contents for AMILO Pi Series

Page 1: ...Notebook English EasyGuide AMILO Pi Series...

Page 2: ...pdesk Your authorised distributor Your sales office Additional information is contained in the Help Desk list and the Warranty manual You can find the Warranty manual on your notebook under Start symb...

Page 3: ......

Page 4: ...This manual was produced by Xerox Global Services Published by Fujitsu Siemens Computers GmbH Edition 1 September 2007 Order no 10600906461 Order no 440 N00602...

Page 5: ...your notebook for the first time 8 Working with the notebook 11 Security functions 46 Connecting external devices 49 Removing and installing components during servicing 56 Settings in BIOS Setup Utili...

Page 6: ...ctronics Inc All other trademarks referenced are trademarks or registered trademarks of their respective owners whose protected rights are acknowledged Copyright Fujitsu Siemens Computers GmbH2007 All...

Page 7: ...ching on the Notebook 11 Switching off the Notebook 12 Status indicators 13 Keyboard 15 Virtual numeric keypad 17 Key combinations 18 Country and keyboard settings 19 Easy Launch keys 20 Touchpad and...

Page 8: ...ices 49 Ports 50 Connecting an external monitor 51 Setting the refresh rate for your external monitor 52 Connecting USB devices 52 USB connection with charging function 53 Connecting external audio de...

Page 9: ...ed 67 The notebook stops working 67 The printer does not print 68 The radio connection to a network does not work 68 Technical data 69 Notebook 70 Battery 70 Mains adapter 70 Manufacturer s notes 71 D...

Page 10: ...Contents 10600906461 edition 1...

Page 11: ...igital screen port to allow two external screens to be connected a CD DVD burner for watching DVD movies or recording your own CDs and DVDs several USB ports which provide easy expansion with webcams...

Page 12: ...ur password Name123 or a command to launch a program start exe This style refers to information displayed by a program on the screen e g Installation is completed This style is for terms and texts in...

Page 13: ...e notebook Please familiarise yourself with these components before you start to work with your notebook 2 1 22 20 19 21 3 4 5 6 9 23 24 25 26 23 13 10 10 11 12 15 17 18 16 14 8 7 27 1 Memory card slo...

Page 14: ...ith a wireless component you must also observe the additional safety precautions for devices with wireless components in the Safety manual Please refer to the notes in the chapter Removing and install...

Page 15: ...ies kit on your notebook or on our website at www fujitsu siemens com support EasyGuide manual PDF file Detailed instructions for startup operation and technical information Warranty manual PDF file G...

Page 16: ...itions Do not use a connection adapter for electrical devices to connect the notebook Enquire with the corresponding government office of the country you will be travelling in as to whether you may op...

Page 17: ...splay is very sensitive to scratching Only clean the display surface with a very soft slightly damp cloth Switch the notebook off Cleaning Notes Notebook Keyboard Touchpad LCDscreen CrystalViewdisplay...

Page 18: ...uns on its built in battery You can increase the battery s life by enabling the system s energy saving functions When you use your notebook in your home or office we recommend you use the mains adapte...

Page 19: ...er cover the ventilation slots on the notebook or the mains adapter Do not expose the notebook to extreme environmental conditions Protect the notebook against dust humidity and heat Connecting the po...

Page 20: ...ooted when you are requested to do so Your operating system is pre installed on the hard disk to facilitate the procedure when you use your notebook for the first time Switch the notebook on see Switc...

Page 21: ...evices Page 49 for instructions on how to connect devices such as a mouse and a printer to the notebook Please refer to the notes in Important notes Page 4 Switching on the Notebook 2 1 Slide the rele...

Page 22: ...ystem properly in Windows via the Start menu by clicking Start Shut Down Shut Down OK Notebook If the notebook is not switched off automatically press the ON OFF switch 1 for approx five seconds 1 Clo...

Page 23: ...tion about the status of the power supply the drives and the keyboard functions These indicators are also visible with the notebook closed Power on indicator Drive indicator Touchpad indicator Num Loc...

Page 24: ...k is in power saving mode Power savingmodeindicator Power savingmode Battery indicator The charging state of the battery is shown by the battery indicator Indicator lights up The battery is fully char...

Page 25: ...ctions supported by the keys are described in the relevant manuals supplied with your application programs The figure below shows how to access the different characters on keys with overlaid functions...

Page 26: ...rinted on the upper left of the key appears when that key is pressed Shiftkey Shift Fn button The Fn key enables the special functions indicated on overlay keys see Key combinations Page 18 If the ext...

Page 27: ...c keypad are recognisable by the numbers and symbols printed in the upper right corner of each key If you have switched on the virtual numeric keypad you can type the characters shown on the upper rig...

Page 28: ...akers This key combination switches your notebook s loudspeaker off and on Fn F3 Loudspeakers Loudspeakers Decrease volume This key combination reduces the volume of the integrated loudspeakers Fn F4...

Page 29: ...ower options for the behaviour during mains operation or when closing the laptop as described in chapter Using the power management features Page 28 Fn F12 Power savingmode Switching between open appl...

Page 30: ...utton Multimedia Use this key to start Windows Vista Media Player Multimedia EasyLaunchkey Silent Mode whisper mode This key reduces the speed of the internal fan When the Silent Mode is switched on t...

Page 31: ...the touchpad with dirty fingers Do not rest heavy objects e g books on the touchpad or the touchpad buttons 1 2 1 Touchpad 2 touchpad buttons The touchpad enables you to move the mouse pointer on the...

Page 32: ...g a command Move the pointer to the field you wish to select Touchpad Tap the touchpad twice or press the left button twice The command will be executed Dragging an object Select the desired object To...

Page 33: ...x 1050 WXGA 1440 x 900 UXGA 1600 x 1200 WSXGA 1680 x 1050 WUXGA 1920 x 1200 The screen resolution of the LCD screen of your notebook is optimally set at the factory Permanently unlit or lit pixels The...

Page 34: ...ust Font Size DPI in the left pane Continue Synchronising the display on the LCD screen and an external monitor LCDscreen Monitor Synchronisation screendisplay Your notebook supports simultaneous disp...

Page 35: ...vie The webcam automatically adjusts itself to the current light level For this reason the LCD screen may flicker while the light level is adjusted The picture quality depends on the lighting conditio...

Page 36: ...aintain long life from your battery by allowing it to discharge fully before you recharge it again To do this leave your notebook turned on when it is operated with the battery Once the battery is run...

Page 37: ...nect all cables connected to the notebook Turn your notebook over and place it on a stable sturdy flat surface If necessary lay an anti slip cloth on this surface to prevent the notebook from being sc...

Page 38: ...10 minutes After 5 minutes Turn off hard disk s After 15 minutes After 10 minutes Energy saving S3 After 20 minutes After 15 minutes Hibernate mode S4 After 1 hour After 30 minutes Activate the power...

Page 39: ...er saving mode if necessary via the mouse or keyboard or by switching on the notebook Close all opened programs and switch the notebook off Hard disk Harddisk The hard disk is the most important stora...

Page 40: ...ace If you decide to remove the ExpressCard again you will need to insert the placeholder for the ExpressCard into the slot again This prevents foreign objects from getting into the ExpressCard slot P...

Page 41: ...pressCard you want to stop and remove Press the Enter key Wait for the dialogue box that tells you that it is now safe to remove the ExpressCard Pull the ExpressCard out of the slot 2 Insert the place...

Page 42: ...k Memory Stick pro Sony MemoryCard MemoryStickPro Please read the documentation supplied with the memory card for any special instructions MemoryCard Inserting the memory card Carefully push the memor...

Page 43: ...D DVD ROM and DVD video DVDvideo DVD ROM DVD Abbreviation for Digital Versatile Disc or Digital Video Disc A DVD is an optical data storage medium that can contain a maximum of 17 GBytes of data These...

Page 44: ...e or High Definition Digital Video Disc Recordable An HD DVD is an optical data storage medium which can only be written once with a maximum of 15 to 30 GBytes of data 15 GBytes per layer This data ca...

Page 45: ...rt Multi formatDVDburner With the multi format DVD burner with double layer support you can read all optical data storage media named above except HD DVD and Blu ray You can also write CD Rs CD RWs DV...

Page 46: ...n inserted CD DVD Push in the drive tray until you feel it lock into place Removing the CD DVD by hand emergency removal CD DVD Removingbyhand CD DVD Emergencyremoval CD DVD In the event of a power fa...

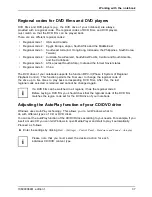
Page 47: ...n permits the final user to change the regional code of the drive up to five times to play back corresponding DVD films After this the last regional code selected is retained and cannot be changed aga...

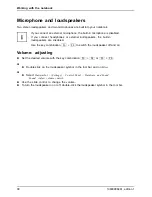
Page 48: ...speakers are disabled Use the key combination Fn F3 to switch the loudspeaker off and on Volume adjusting Set the desired volume with the key combination Fn F4 or Fn F5 or Double click on the loudspea...

Page 49: ...nd Italy Luxembourg Norway Austria Portugal Sweden Switzerland and Spain Pulse dialling Belgium France Holland and Italy Also in Poland Slovenia South Africa and Hungary Connecting notebook modem to t...

Page 50: ...sh a connection to a local network LAN Local Area Network 2 1 Connect the LAN cable to the notebook s LAN connector 1 Connect the LAN cable to your network connector 2 Your network administrator can h...

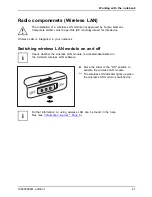
Page 51: ...ok Switching wireless LAN module on and off Check whether the wireless LAN module is activated deactivated in the installed wireless LAN software WirelessLAN WirelessLAN Move the slider to the ON posi...

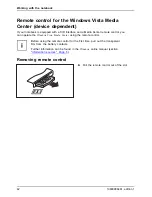
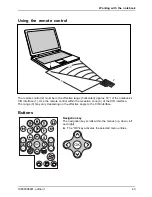
Page 52: ...mote control you can operate the Windows Vista Media Center using the remote control Before using the remote control for the first time pull out the transparent film from the battery contacts Further...

Page 53: ...of the notebook s CIR interface 1 Use the remote control within the reception zone 3 of the CIR interface The range 3 may vary depending on the effective angle to the CIR interface Buttons Navigation...

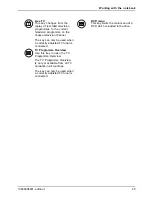
Page 54: ...y This key starts the playback Jump forward This key starts playback of the next track picture or next film sequence Fast forward This key advances the playback Information This key gives you extra in...

Page 55: ...be used when a correctly adjusted TV tuner is connected DVD menu This key starts the main menu of a DVD which is loaded in the drive TV Programme Overview Use this key to open the TV Programme Overvi...

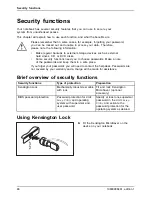
Page 56: ...orget your passwords you will need to contact the help desk Passwords are not covered by your warranty and a charge will be made for assistance Brief overview of security functions Security functions...

Page 57: ...e of the functions with the user password You can only set a user password if a supervisor password has already been assigned Please refer to Settings in BIOS Setup Utility Page 62 for information abo...

Page 58: ...our notebook will now restart and the password is cancelled With the supervisor password you simultaneously deactivate the user password Password protection of operating system With the supervisor pas...

Page 59: ...k Connecting devices to the notebook 1 Turn off your notebook and all external devices 2 Unplug your notebook and all devices from the mains sockets 3 Connect the cables for your external devices foll...

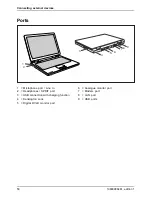
Page 60: ...2 4 5 6 9 8 7 1 Microphone port Line In 2 Headphones SPDIF port 3 USB connection with charging function 4 Kensington Lock 5 Digital DVI D monitor port 6 Analogue monitor port 7 Modem port 8 LAN port...

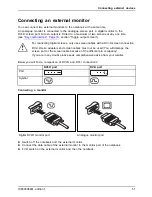
Page 61: ...screen cables with a DVI D screen connection DVI I screen adapters and screen cables must not be used You will damage the screen port or the screen cable because of the different pin occupancy If you...

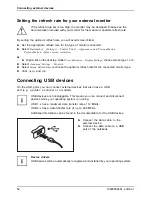
Page 62: ...d Settings Monitor Select Screen Refresh Rate to choose the optimum refresh rate for the connected monitor type Click Apply and OK Connecting USB devices USBports On the USB ports you can connect exte...

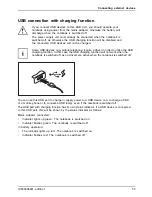
Page 63: ...this case the USB charging function will not work when the notebook is switched off as no drivers are active when the notebook is switched off You can use this USB port to charge or supply power to a...

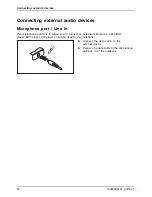
Page 64: ...ne In Audiodevices connecting Audioports Microphone connecting The microphone port Line In allows you to connect an external microphone a MiniDisc player MP3 player CD player or a tape deck to your no...

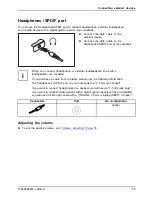
Page 65: ...external loudspeakers the built in loudspeakers are disabled If you purchase a cable from a retailer please note the following information The headphones SPDIF port on your notebook is a 3 5 mm jack...

Page 66: ...e battery Take care when you use the locking mechanisms on the battery and any other component Never use sharp objects such as screwdrivers scissors or knives as leverage to remove covers Notes Board...

Page 67: ...notebook Turn your notebook over and place it on a stable sturdy flat surface If necessary lay an anti slip cloth on this surface to prevent the notebook from being scratched Remove the battery see R...

Page 68: ...e edge of the hard disk along Fasten the screws 3 2 1 Slide the cover in the direction of the arrow to its mounting position 1 Fasten the cover with the screw 2 Install the battery again see Inserting...

Page 69: ...nts are exposed These components should be removed and replaced only by authorised specialists Therefore be sure to observe the following Individual components e g the processor heat sink can become v...

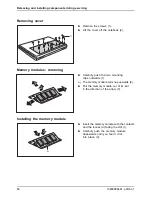
Page 70: ...ps outwards 1 Memoryexpansion Memorymodule The memory module will snap upwards 2 Pull the memory module out of its slot in the direction of the arrow 3 Installing the memory module 2 a 1 Insert the me...

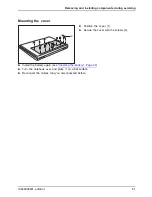
Page 71: ...e cover 2 1 Position the cover 1 Cover Secure the cover with the screws 2 Install the battery again see Inserting the battery Page 27 Turn the notebook over and place it on a flat surface Reconnect th...

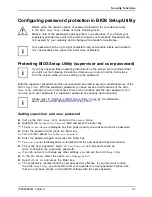
Page 72: ...p Utility Starting the BIOS Setup Utility Reboot the notebook switch off on or reboot the operating system BIOSSetupUtility The following or a similar display appears on the screen at start up F2 BIOS...

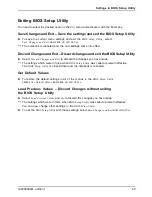
Page 73: ...changes you have made The settings which were in force when BIOS Setup Utility was called up remain effective The BIOS Setup Utility is closed down and the notebook is rebooted Get Default Values To r...

Page 74: ...to your system Your sales contract Our notebooks have been designed primarily with mobile applications in mind This means that considerable effort has been made to optimise components and equipment i...

Page 75: ...time are repeatedly incorrect when you switch on the notebook the built in battery that supplies the internal clock has failed Please contact your sales outlet or our hotline help desk A beep sounds...

Page 76: ...xternal monitor if it is plugged in with a connector Switch on the external monitor and the notebook The external monitor is blank or the image is unstable Screen Monitor Cause Troubleshooting The wro...

Page 77: ...er is not connected correctly Switch the notebook off Check whether the mains adapter is connected correctly to the notebook Switch the notebook on The notebook stops working Notebook Energysavingmode...

Page 78: ...necting the notebook and the printer is connected properly Check whether the correct printer driver is loaded see printer documentation The radio connection to a network does not work Theradioconnecti...

Page 79: ...find the correct technical data for your device see the device information plate The device information plate is located on the underside of the device AMILO Pi 2550 Reg No P55IM5 CM 2 Type designati...

Page 80: ...ou can find the data sheet on your notebook or you can download it from the Internet at www fujitsu siemens com Battery Technicaldata Time Charging time when not in operation approx 3 hours Operating...

Page 81: ...essential requirements and other relevant provisions of Directive 1999 5 EC Copyright protected technology Copyright protectedtechnology This product incorporates copyright protection technology that...

Page 82: ...requirements of Directive 1999 5 EC of the European Parliament and Commission from 9 March 1999 governing Radio and Telecommunications Equipment and mutual recognition of conformity This equipment ca...

Page 83: ...ay function 37 emergency removal 36 handling 34 inserting 36 overview 33 removing 36 CD DVD drive 3 35 CD R 33 CD ROM 33 CD RW 33 CE marking 72 Changing the font size 24 Charging capacity battery 26 C...

Page 84: ...ortant notes 4 Incorrect date time 65 Indicator disk drives 14 Information sources 5 Infrared interface remote control 3 K Kensington Lock 3 Kensington MicroSaver 46 Key combinations 18 Keyboard 15 cl...

Page 85: ...ing on 11 Notebook operation 11 Notes 4 boards 56 cleaning 7 disposal recycling 71 energy saving 4 LCD screen 23 security 4 transport 6 Num Lock indicator 14 17 Num Lock indicator 14 Numeric keypad 15...

Page 86: ...ey 15 Technical data 69 70 battery 70 notebook 70 The radio connection to a network does not work 68 Time not correct 65 Time daylight savings 65 Tips 64 Toggle output screen 19 Touchpad 3 21 buttons...

Reviews: