background image


A26391-K168-Z120-1-7619, edition 2 

61 

Settings in BIOS Setup 

In 

BIOS Setup

 you can set the system functions and the hardware configuration of the notebook. The 

settings can only be changed via the keyboard. 
When it is delivered, the notebook is set to factory default settings. You can change these settings in 

BIOS Setup

. Any changes you make take effect as soon as you save and quit the 

BIOS Setup

The 

BIOS Setup

 programme contains the following menus: 

Main

for system settings as time, date, hard disk and monitor selection 

Advanced

for system settings such as ports and keyboard 

Security

for password settings and safety functions 

Boot

for configuring the boot sequence 

Info

for displaying the system configuration (e.g. processor and memory configuration) 

Exit

to exit the 

BIOS Setup


Start BIOS Setup 


Restart the notebook (switching ON/OFF or warm boot). 

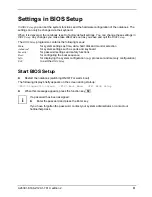
The following display briefly appears on the screen during start-up: 

<ESC> Diagnostic screen   <F12> Boot Menu   <F2> BIOS Setup 


When this message appears, press the function key 

 F2 


i


If a password has been assigned: 


Enter the password and press the Enter key. 

If you have forgotten the password, contact your system administrator or contact our 
hotline/help desk. 


Summary of Contents for AMILO Pro V8010

Page 1: ...Professional Notebook EasyGuide English AMILO Pro V8010...

Page 2: ...ww fujitsu siemens com support helpdesk html your sales partner your sales outlet Additional information is contained in the Help Desk list and the Warranty manual The Warranty manual can be found on...

Page 3: ......

Page 4: ...This manual was produced by cognitas Gesellschaft f r Technik Dokumentation mbH www cognitas de Published by Fujitsu Siemens Computers GmbH AG 02 05 Edition 2 Order no A26391 K168 Z120 1 7619...

Page 5: ...data Important notes Manufacturer s notes Preparing the notebook for use Index Using your notebook Security functions Connecting external devices Memory expansion Energy saving functions Settings in B...

Page 6: ...logies AG The SD Logo is a trademark of Secure Digital Sony and Memory Stick are registered trademarks of Sony Electronics Inc All other trademarks referenced are trademarks or registered trademarks o...

Page 7: ...he notebook 13 Switching off the notebook 14 Indicators 15 Keyboard 17 Virtual numeric keypad 19 Key combinations 19 Touchpad and touchpad buttons 21 LCD screen 23 Information on LCD monitor 23 Monito...

Page 8: ...allel port 53 Connecting USB devices 54 Connecting external audio devices 54 Memory expansion 55 Installing and removing the memory extension 55 Energy saving functions 59 Standby mode 59 Settings in...

Page 9: ...y 74 Power adapter 65 W 75 Manufacturer s notes 77 Copyright protected technology 77 Energy Star 77 CE marking 77 Regulatory notices 78 Regulatory information for notebooks without radio device 78 FCC...

Page 10: ......

Page 11: ...1394 FireWire connection for high speed devices such as digital camcorders Four USB ports which provide easy expansion with webcams game pads printers and more An internal modem for connecting to the...

Page 12: ...may lead to loss of data invalidate your warranty destroy the notebook or endanger your life i Indicates important information which is required to use the system properly Text which follows this symb...

Page 13: ...to the environment You should dispose of them following guidance from your local District Council If a lithium battery button cell is installed in the notebook for real time buffering please note tha...

Page 14: ...pacemaker may be impaired by radio waves Do not let the notebook near flammable gases or into hazardous environments e g paintshops with radio components switched on as the transmitted radio waves can...

Page 15: ...you install or remove boards Always hold boards with ESDs by their edges Never touch pins or conductors on boards fitted with ESDs Energy saving If you will not be using your notebook switch it off Ma...

Page 16: ...data stored on your hard disk Switch off the radio component Wireless LAN Bluetooth for security reasons when youn cannot exclude that the transmitted radio waves can negatively affect electrical and...

Page 17: ...ters offers a number of solutions for transporting your notebook The current offering can be viewed on the Internet at http www e shop2 de Protect the notebook from severe shocks and extreme temperatu...

Page 18: ......

Page 19: ...riginal packing material of the devices You may need the packaging in the future if you need to transport your device Selecting a location Select a suitable location for the notebook before setting it...

Page 20: ...ns adapter s AC cable should only be connected to a mains socket if the notebook is connected to the mains adapter Do not use the power adapter for other notebooks or devices Do not use a power adapte...

Page 21: ...mpleted and connect the notebook to the mains outlet using the power adapter During installation the notebook may only be rebooted when you are requested to do so Switch the notebook on see Using your...

Page 22: ......

Page 23: ...devices chapter for instructions on how to connect devices such as a mouse and a printer to the notebook Please take note of the information in the Important notes chapter Switching on the notebook 2...

Page 24: ...Advanced If you have assigned a password you must enter this when requested to do so in order to start the operating system password Detailed information can be found in Security functions chapter Swi...

Page 25: ...ator Scroll indicator Scroll Lock CD DVD indicator Wireless LAN Bluetooth indicator The meaning of the symbols are as follows Battery indicator The charging state of the battery is shown with the batt...

Page 26: ...oth indicator The indicator lights up the key combination Fn F12 has been pressed The wireless LAN Bluetooth module is switched on The indicator is dark the key combination Fn F12 has been pressed The...

Page 27: ...designed to provide all the functions of an enhanced keyboard Some enhanced keyboard functions are mapped with key combinations The following description of keys and key combinations refers to Window...

Page 28: ...erlay keys the character printed on the upper left of the key appears when that key is pressed Alt Gr Alt Gr key The Alt Gr key allows one to type the characters printed on the lower right of the keyc...

Page 29: ...tion 2 Characters enabled when Num Lock indicator is lit see Indicators Key combinations The following description of key combinations refers to functions when using Microsoft Windows Some of the foll...

Page 30: ...e output is to be displayed can be selected with this key combination You can opt to use just the notebook s LCD screen just the external monitor both the LCD screen and the external monitor Fn F12 Sw...

Page 31: ...enables you to move the mouse pointer on the screen The touchpad buttons 2 allow the selection and execution of commands The touchpad buttons correspond to the buttons on a conventional mouse Keep the...

Page 32: ...ou wish to select Tap the touchpad twice or press the left button twice The command will be executed Dragging an object Select the desired object Press and hold the left button and drag the object to...

Page 33: ...80 x 1024 SXGA 1400 x 1050 UXGA 1600 x 1200 The correct monitor resolution for your notebook is specified in the corresponding section in the chapter Technical data Permanently unlit or lit pixels The...

Page 34: ...book supports the simultaneous display on the LCD screen and an external monitor If the picture does not appear correctly on the LCD monitor press the key combination Fn F10 several times or switch th...

Page 35: ...attery indicator begins to flash orange 1 second on 1 second off The battery should not be charged before this point If you do not connect the power adapter within five minutes of the signals describe...

Page 36: ...e battery compartment Switch the notebook off Place the notebook on a flat surface Close the LCD screen Turn the notebook over Removing battery 1 2 Slide the release button in the direction of the arr...

Page 37: ...at it locks into place Unplug the power adapter from the mains outlet Disconnect all cables connected to the notebook Place the notebook upside down on a flat surface Remove the battery see Removing b...

Page 38: ...m dust scratches and other damage Protect your CDs DVDs from dust mechanical vibration and direct sunlight Avoid storing a CD DVD in areas subject to high temperatures or humidity You may use both 8 c...

Page 39: ...VD The notebook must be switched on 2 1 Push the insert eject button 1 The drive tray will open Pull the drive tray all the way out 2 Place the CD DVD in the drive tray with the label facing upwards o...

Page 40: ...n the event of a power failure or damage to the drive it may be necessary to manually remove the CD DVD Switch the notebook off 2 1 Press a pen or a piece of wire e g a paperclip firmly into the openi...

Page 41: ...mory card of the type Secure Digital MultiMediaCard or Memory Stick Using memory cards Please read the documentation supplied with the memory card for any special instructions Inserting memory card Ca...

Page 42: ...notebook 32 A26391 K168 Z120 1 7619 edition 2 Removing memory card 2 1 Press on the edge of the memory card 1 so that the memory card jumps out of the slot slightly Slide the memory card out of the n...

Page 43: ...g or removing a PC card Make sure that foreign objects do not fall into the PC card slot Installing a PC card 2 1 Press the eject button 1 The placeholder for the PC card will project further out of t...

Page 44: ...lick into place i Consult the documentation supplied with the PC card for information on how to install the necessary device drivers You should also read the help files supplied on CD the information...

Page 45: ...d remove Press the Enter key Wait for the dialogue box which tells you that it is now safe to remove the PC card 2 1 Press the eject button 1 The PC card will project further out of the notebook s cas...

Page 46: ...your notebook 36 A26391 K168 Z120 1 7619 edition 2 Insert the placeholder for the PC card into the slot guide Gently slide the placeholder for the PC card into the slot until you feel it click into p...

Page 47: ...ble to V 34 modems Fax mode Transmitting and receiving at up to 14 400 bit s Simple country adaptation with programme The modem complies with the EU Directive 91 263 EEC Telecommunications terminal eq...

Page 48: ...essories Connect the modem cable to the modem port of the notebook 1 Connect the modem cable to your telephone wall socket 2 i If you attach your modem to a telephone wall socket the phone respectivel...

Page 49: ...p i Pay attention to the additional safety precautions for devices with wireless LAN Bluetooth provided in the Safety manual Details on using the wireless LAN are contained in the online help for your...

Page 50: ...notebook to the Port Replicator during operation problems can occur We recommend that you switch off the notebook beforehand Switch the notebook off Unplug the power adapter from the mains outlet Pull...

Page 51: ...power adapter 2 Plug the power cable into the mains outlet 3 i If the notebook is connected to a Port Replicator the operating system creates an hardware profile for the Docked mode In this profile fo...

Page 52: ...sconnect the notebook from the Port Replicator during operation problems can occur We recommend that you switch off the notebook beforehand Switch the notebook off Unplug the power adapter from the ma...

Page 53: ...pplied help desk list Passwords are not covered by your warranty and a charge will be made for assistance Overview of all security functions The following sections contain a brief description of the s...

Page 54: ...ngton MicroSaver accessory BIOS password protection Password protection for BIOS Setup operating system and hard disk with Supervisor and User password The passwords consist of a maximum of eight alph...

Page 55: ...BIOS Setup supervisor and user password We recommend that you print out the following instructions as these cannot be displayed while setting the password You prevent unauthorised opening of the BIOS...

Page 56: ...tings with the user password Change supervisor or user password Open the BIOS Setup again and there the Security menu When changing the password proceed exactly as for password assignment You can only...

Page 57: ...you are asked to enter your password the supervisor or user password Deactivating system protection Call BIOS Setup and select the Security menu Mark the Password on Boot field and press the Enter ke...

Page 58: ...Password Entry on Boot is set to Enabled in the default setting If you do not want to make any other settings you can exit BIOS Setup Select the Exit Saving Changes option in the Exit menu The notebo...

Page 59: ...onnecting or disconnecting devices to your notebook Connecting devices to notebook 1 Turn off all power and equipment switches 2 Remove all power plugs from the mains outlets 3 Connect all the cables...

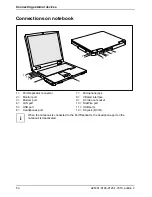
Page 60: ...12 1 Port Replicator connector 2 Monitor port 3 Modem port 4 LAN port 5 USB port 6 Headphones port 7 Microphone jack 8 Infrared interface 9 S Video out socket 10 FireWire port 11 USB ports 12 DC jack...

Page 61: ...3 4 5 6 7 8 9 1 DC jack DC IN 2 PS 2 port for keyboard or mouse 3 Monitor port 4 Serial port 5 Parallel port 6 USB ports 7 LAN port 8 Headphones port 9 Plug for connection to notebook i Some of the d...

Page 62: ...Adjust the refresh rate and then click Apply If the refresh rate set is too high the monitor may be damaged Please see the documentation included with your monitor for the maximum possible refresh rat...

Page 63: ...Please see the documentation included with your monitor for the maximum possible refresh rate Connecting an external keyboard You do not need to switch your notebook off Connect the external keyboard...

Page 64: ...nnect the data cable to a USB port of the notebook or Connect the data cable to a USB port on the Port Replicator i Device drivers The devices you connect to the USB ports usually require no driver of...

Page 65: ...es it must not be in Suspend mode Use only memory extensions of the manufacturer which have been approved for your notebook 256 512 Mbyte modules or 1 Gbyte modules of the type DDR2 533 SDRAM Never us...

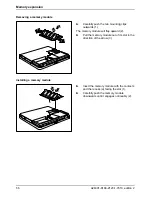
Page 66: ...ting clips outwards 1 The memory module will flap upward 2 Pull the memory module out of its slot in the direction of the arrow 3 Installing a memory module a 1 2 Insert the memory module with the con...

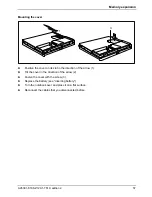
Page 67: ...ion the cover on its slot in the direction of the arrow 1 Tilt the cover in the direction of the arrow 2 Fasten the cover with the screw 3 Replace the battery see Inserting battery Turn the notebook o...

Page 68: ......

Page 69: ...t of an energy saving mode and then turn off as normal If the notebook is in an energy saving mode mode Do not connect any external devices Do not disconnect any external devices Do not disconnect the...

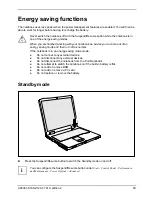
Page 70: ...r a certain time When you resume work your notebook returns to the place at which you discontinued working i If you use an integrated LAN Modem a PC LAN card or a PC modem card we do not recommend swi...

Page 71: ...nd monitor selection Advanced for system settings such as ports and keyboard Security for password settings and safety functions Boot for configuring the boot sequence Info for displaying the system c...

Page 72: ...tions You must mark the required option and activate it with the Enter key Exit Saving Changes Select Exit Saving Changes and Yes to save the current settings and exit the BIOS Setup The device is reb...

Page 73: ...guration and all peripheral devices connected to your system Your sales contract Reinstalling Windows XP You can reinstall the Windows XP operating system with the Windows XP Recovery CD and the Drive...

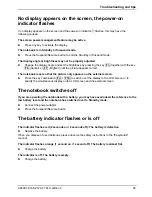
Page 74: ...notebook off Check whether the power adapter is connected correctly to the notebook Check whether the power cable is plugged properly into the power adapter and into the mains outlet Switch the noteb...

Page 75: ...t so that the picture only appears on the external screen Press the key combination Fn F10 to switch over the display to the LCD screen or to specify the simultaneous display on the LCD screen and the...

Page 76: ...F6 to reduce the power consumption The power management features have been deactivated Check the settings in the BIOS Setup in the Power menu and adjust the parameters Wake on LAN Resume on LAN is ac...

Page 77: ...Brightness control is set to dark Set the brightness control of the LCD screen to bright The external monitor stays blank If your screen remains blank this may be due to the following Monitor is swit...

Page 78: ...CD DVD does not function Check whether the CD DVD has been properly inserted into the drive Check whether the CD DVD is scratched warped dirty or damp Make sure that you use a CD DVD that complies wit...

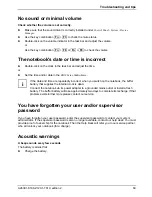
Page 79: ...ect when you switch on the notebook the buffer battery that supplies the internal clock is dead Connect the notebook via its power adapter to a grounded mains outlet or install a fresh battery The buf...

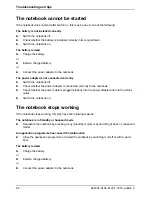
Page 80: ...he notebook off Switch the notebook on Enter the BIOS Setup programme by pressing F2 Select the Exit menu in the BIOS Setup Select the entry Load Setup Defaults Select OK and press the Enter key If th...

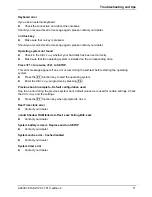
Page 81: ...me F2 to SETUP This error message appears if an error occurs during the self test before starting the operating system Press the F1 function key to start the operating system Enter the BIOS Setup prog...

Page 82: ......

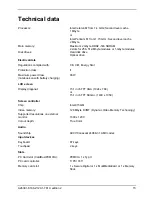
Page 83: ...class II Maximum power draw notebook on with battery charging 65 W LCD screen Display diagonal 15 1 inch TFT XGA 1024 x 768 or 15 1 inch TFT SXGA 1400 x 1050 Screen controller Chip Intel 915GM Video m...

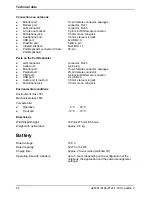
Page 84: ...port 9 pin plug Monitor port 15 pin female connector analogue Parallel port 25 pin female connector PS 2 port 6 pin mini DIN female connector USB port 2 x USB 2 0 Audio port Line Out 3 5 mm stereo mi...

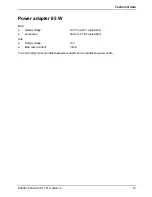
Page 85: ...edition 2 75 Power adapter 65 W Main Rated voltage 100 V to 240 V automatic Frequency 50 Hz to 60 Hz automatic Sub Rated voltage 19 V Max rated current 3 42 A You can readily order an additional power...

Page 86: ......

Page 87: ...also prevent the emission of 20 million tons of carbon dioxide into the atmosphere the equivalent of 5 million automobiles As an Energy Star Partner Fujitsu Siemens Computers GmbH has determined that...

Page 88: ...urning the equipment off and on the user is encouraged to try to correct the interference by one or more of the following measures Reorient or relocate the receiving antenna Increase the separation be...

Page 89: ...ection to party lines is subject to state tariffs Contact your state s public utility commission public service commission or corporation commission for more information This equipment includes automa...

Page 90: ...d be aware that compliance with the certification standards does not prevent service degradation in some situations Repairs to telecommunication equipment should be made by a Canadian authorized maint...

Page 91: ...ger que l utilisateur d connecte l quipement de la ligne t l phonique AVIS L indice d quivalence de la sonnerie IES du pr sent mat riel est de 0 0 L IES assign chaque dispositif terminal indique le no...

Page 92: ...urning the equipment off and on the user is encouraged to try and correct the interference by one or more of the following measures 1 Reorient or relocate the receiving antenna 2 Increase the distance...

Page 93: ...n provided with the product Any changes or modifications made to this device that are not expressly approved by the manufacturer may void the user s authority to operate the equipment The manufacturer...

Page 94: ......

Page 95: ...DVD emergency removal 30 inserting 29 removing 29 working with 28 CD DVD indicator 16 28 CE marking 77 Charging capacity battery 25 Cleaning 7 Combo drive 28 indicator 16 Configuration BIOS Setup 61 C...

Page 96: ...r Scroll 16 Indicators 15 Infrared interface 50 K Kensington Lock applying 44 Kensington MicroSaver 44 Key Backspace 17 Caps Lock 18 cursor control keys 18 Fn key 18 Fn F12 20 Return 17 Shift 18 Shift...

Page 97: ...ing for 10 Optical drive 28 P Packing material 9 Parallel port 51 Pause key 18 PC card 33 installing 33 removing 35 PCMCIA see PC card Peripherals see devices Pointer changing the speed 24 Port Port R...

Page 98: ...orrect 69 Tips 63 Touchpad 21 buttons 21 cleaning 7 does not work 68 dragging items 22 executing commands 22 moving the pointer 22 scrolling 22 selecting items 22 Transport 6 7 Travel preparations 6 T...

Reviews: