background image

Working with the notebook

Quick Start buttons

QuickStartbuttons

Your notebook is equipped with quick start buttons.

Depending on con

fi

guration, there may be a variety of quick start

buttons on your AMILO Notebook.

You can start the following applications or functions by pressing a single key.

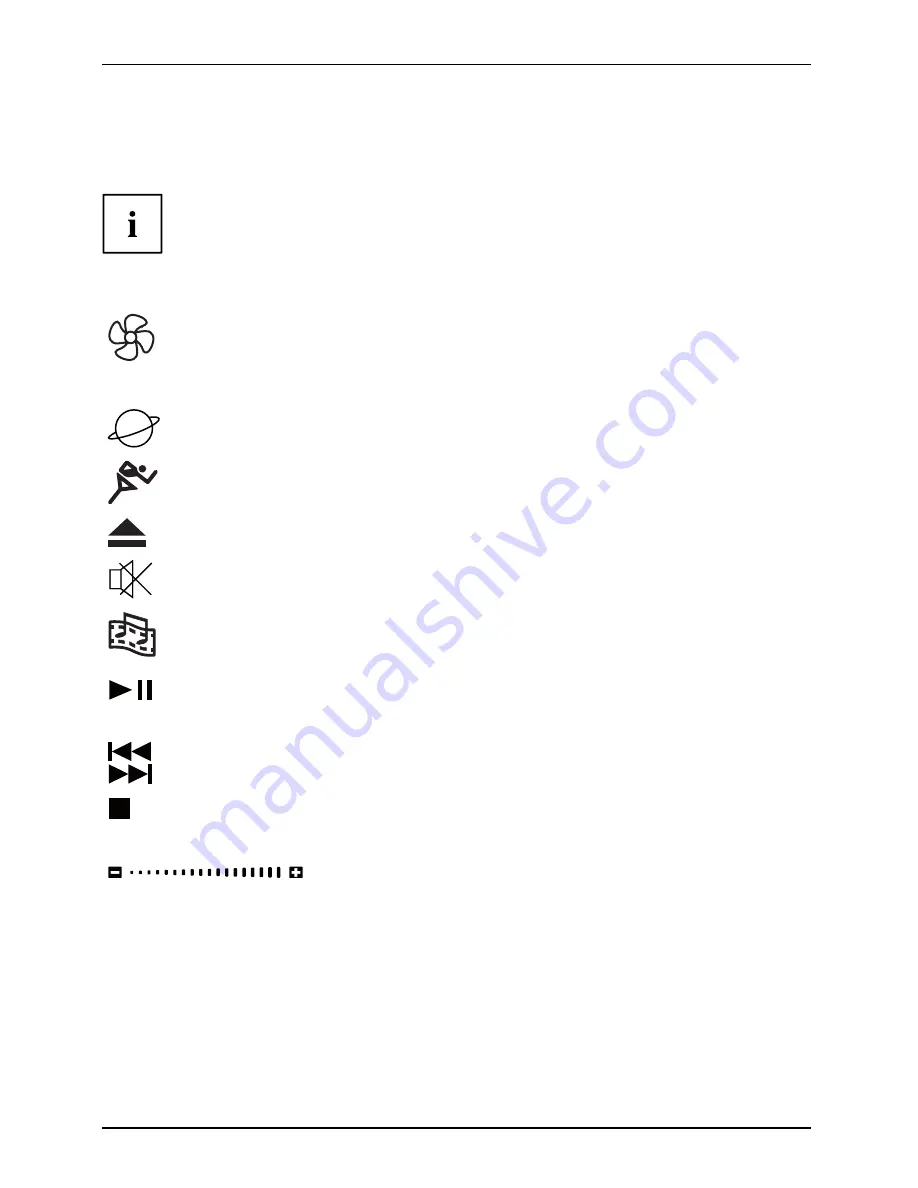
Silent Mode (whisper mode)

This key reduces the speed of the fan.

When the Silent Mode is switched on, the processor and graphics do not operate at
the full performance level.

Whispermode,QuickStartbutton

Silentmode,QuickStartbutton

Internet

Internet,QuickStartbutton

With this button you can start your default Internet browser.

Hybrid VGA

This key allows you to switch between an external and an internal graphics card.

ODD eject

This key allows you to eject a CD/DVD from the drive.

Mute

This key switches the loudspeakers of your AMILO Notebook on and off.

Multimedia

You can use this button to launch the software for playing back multimedia

fi

les which is

installed on your system.

Multimedia,QuickStartbutton

Play/Pause

Play

Pause

This key allows you to pause and resume the playback in your multimedia player. The
playback then resumes at the point where it was paused.

Skip reverse, Skip forward

Skip

Skip

You can use these keys to skip to the previous or next title in your multimedia player.

Stop

Stop

This key allows you to stop or restart the playback in your multimedia player.

Playback will then restart from the beginning of the item.

Volume

Volume

This key allows you to set the volume level of your AMILO Notebook
during replay.

22

AMILO Notebook operating manual, edition 3

Summary of Contents for AMILO

Page 1: ...Consumer Mobile English Operating Manual AMILO Notebook...

Page 2: ...su siemens com helpdesk your sales partner your sales outlet Additional information is contained in the Help Desk list and the Warranty manual You will find the Warranty manual on your device under St...

Page 3: ......

Page 4: ...This manual was produced by Xerox Global Services Published by Fujitsu Siemens Computers GmbH Edition 3 October 2008...

Page 5: ...r notebook for use 7 Working with the notebook 11 Security functions 52 Connecting external devices 56 Removing and installing components during servicing 64 Settings in BIOS Setup Utility 72 Troubles...

Page 6: ...rks referenced are trademarks or registered trademarks of their respective owners whose protected rights are acknowledged Copyright Fujitsu Siemens Computers GmbH 2008 All rights reserved including ri...

Page 7: ...sm 12 Switching off the notebook 13 Devices with a release mechanism 13 Devices without a release mechanism 14 Status indicators 14 On Screen display OSD 15 Keyboard 15 Virtual numeric keypad notebook...

Page 8: ...net and LAN 51 Security functions 52 Brief overview of security functions 52 Using a Kensington Lock 52 Configuring password protection in BIOS Setup Utility 53 Protecting BIOS Setup Utility superviso...

Page 9: ...hooting and tips 74 Restoring installed software 74 Restoring the operating system drivers manuals and special software 75 The notebook s date or time is incorrect 75 When certain characters are enter...

Page 10: ...Contents AMILO Notebook operating manual edition 3...

Page 11: ...formance from your computing experience The user friendly BIOS Setup Utility offers powerful password protection functions which can be used to control your notebook s hardware and protect your system...

Page 12: ...d Name123 or a command to launch a program start exe This style refers to information displayed by a program on the screen e g Installation is completed This style is for terms and texts in a software...

Page 13: ...section Cleaning the notebook Page 6 Pay attention to the additional safety notes for devices with radio components provided in the Safety manual Please refer to the notes in the chapter Removing and...

Page 14: ...device before using it for the first time technical information Accessories kit on your notebook or at our website www fujitsu siemens com support Warranty manual PDF file General guarantee condition...

Page 15: ...local conditions Do not use a connection adapter for electrical devices to connect the notebook Enquire with the corresponding government office of the country you will be travelling in as to whether...

Page 16: ...hes Only clean the display surface with a very soft slightly damp cloth Switch the notebook off Cleaning Notes Notebook Keyboard Touchpad LCDscreen CrystalViewdisplay Remove the mains plug for the mai...

Page 17: ...will need to charge the battery On delivery the battery can be found in the battery compartment or in the accessories kit The battery must be charged if you want to operate your notebook with the batt...

Page 18: ...to overheating Do not place the notebook directly on your legs for extended periods The underside of the notebook heats up during normal operation Extended contact with the skin can become unpleasant...

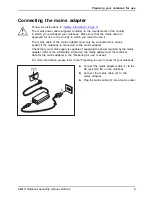
Page 19: ...y be connected to a mains socket if the notebook is connected to the mains adapter Check that your mains supply is capable of supplying the power required by the mains adapter refer to the information...

Page 20: ...perating system This backup copy can be used later to restore your notebook to its delivery configuration You can find information on how to restore the operating system drivers manuals and special so...

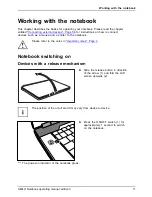
Page 21: ...nd a printer to the notebook Please refer to the notes in Important notes Page 3 Notebook switching on Devices with a release mechanism 2 1 Slide the release button in direction of the arrow 1 and fol...

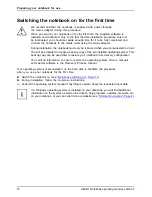
Page 22: ...d up the LCD screen 1 Notebook The position of the on off switch may vary from device to device 1 Press the ON OFF switch 1 for approximately 1 second to switch on the notebook The power on indicator...

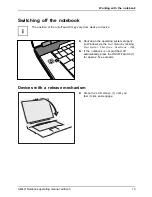
Page 23: ...g system properly in Windows via the Start menu by clicking Start Symbol Shut Down Shut Down OK Notebook If the notebook is not switched off automatically press the ON OFF switch 1 for approx five sec...

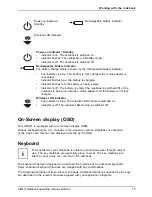
Page 24: ...nformation about the status of the power supply the drives and the keyboard functions Three indicators are visible when the device is closed Power on indicator wireless LAN indicator battery indicator...

Page 25: ...dicator Wireless LAN indicator The indicator is blue The wireless LAN module is switched on Indicator is off The wireless LAN module is switched off WirelessLANindicator On Screen display OSD Your AMI...

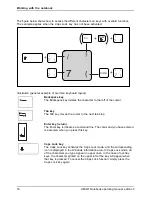
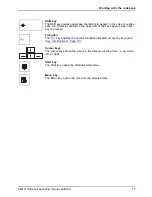
Page 26: ...t tab stop Tabkey Enter key return The Enter key terminates a command line The command you have entered is executed when you press this key Enterkey Return Enter Linefeed Caps Lock key The Caps Lock k...

Page 27: ...Fn button The Fn key enables the special functions indicated on overlay keys see Key combinations Page 19 Fnkey Cursor keys The cursor keys move the cursor in the direction of the arrow i e up down le...

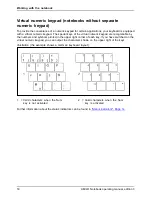
Page 28: ...pad are recognisable by the numbers and symbols printed in the upper right corner of each key If you have switched on the virtual numeric keypad you can output the characters shown on the upper right...

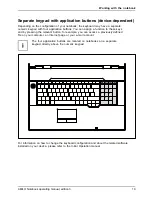
Page 29: ...elevant button for example you can access a previously defined file on your computer an Internet page or your e mail account The four application buttons are located on notebooks on a separate keypad...

Page 30: ...mbination to switch the TV tuner on and off Fn F2 TVtuner Switching the loudspeaker on and off This key combination switches your notebook s loudspeaker off and on Fn F3 Loudspeakers Loudspeakers Decr...

Page 31: ...en applications Use this key combination to switch between several open applications Alt Tab Alt Ctrl Del SysRq Perform warm reboot This key combination restarts the notebook First press and hold both...

Page 32: ...internal graphics card ODD eject This key allows you to eject a CD DVD from the drive Mute This key switches the loudspeakers of your AMILO Notebook on and off Multimedia You can use this button to la...

Page 33: ...nventional mouse Using touchpad buttons Moving the pointer Move your finger on the touchpad Touchpad The pointer will move accordingly Selecting an item Move the pointer to the item you wish to select...

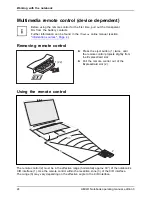
Page 34: ...x 2 Press the eject button 1 twice until the remote control projects slightly from the ExpressCard slot Remotecontrol Pull the remote control out of the ExpressCard slot 2 Using the remote control Usi...

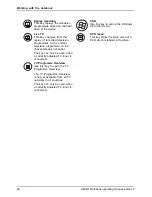
Page 35: ...nt playback Rewind This key rewinds the playback Jump back This key starts playback of the previous track picture or previous film sequence Replay This key starts the playback Jump forward This key st...

Page 36: ...elevision programme on the chosen television channel The key can only be used when a correctly adjusted TV tuner is connected DVD menu This key starts the main menu of a DVD which is loaded in the dri...

Page 37: ...0 x 1200 pixels Each pixel consists of three so called subpixels of the colours red green and blue As a result a WUXGA monitor consists of 1920 x 1200 x 3 6 912 000 subpixels Screen resolutions Number...

Page 38: ...tebook However you can set the brightness of your monitor individually Screen settings Setting the resolution LCDscreen The screen resolution of the LCD monitor of your notebook is optimally set at th...

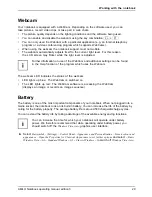
Page 39: ...d on The LED lights up red The WebCam software is accessing the WebCam displays an image or records an image sequence Battery Battery Battery Life battery Rechargeablebattery Rechargeablebattery The b...

Page 40: ...aring for use monitoring the battery charging level Battery Batterystatusmeter Windows also has a Battery status meter in the taskbar for monitoring the battery capacity When you place the mouse point...

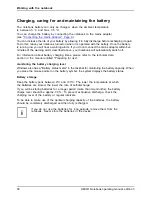
Page 41: ...off your notebook and disconnect the power plug from the mains socket Battery Close the LCD screen so that it locks into place Disconnect all cables connected to the notebook Turn your notebook over a...

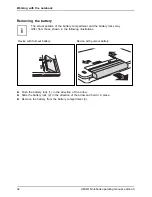
Page 42: ...se shown in the following illustrations Device with fold out battery Device with pull out battery 2 3 1 2 3 1 Push the battery lock 1 in the direction of the arrow Slide the battery lock 2 in the dire...

Page 43: ...e shown in the following illustrations Device with fold out battery Device with pull out battery 1 2 2 1 Insert the battery in the battery compartment 1 Carefully push the battery into the battery com...

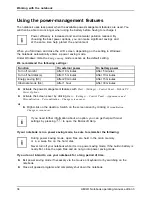
Page 44: ...After 1 hour After 30 minutes Activate the power management features with Start Settings Control Panel Mobile PC Power Options Activate the screen saver by clicking Start Settings Control Panel Appea...

Page 45: ...nnected to an HDMI port of your notebook FullHD resolution device dependent can only be activated in performance mode via the external graphics unit Click the Quick Start button Hybrid VGA on the Mult...

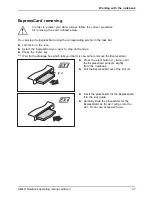
Page 46: ...until it pops out 1 2 x 2 Press the eject button 1 twice to make the placeholder for the card protrude from the notebook s case Pull the placeholder for the ExpressCard out of the slot 2 ExpressCard...

Page 47: ...nt to stop and remove Press the Enter key Wait for the dialogue box which tells you that it is now safe to remove the ExpressCard 2 1 2 x 2 Press the eject button 1 twice until the ExpressCard project...

Page 48: ...ture CardTM With adapter RS MMC MMC Micro miniSD MicroSD MS Duo MS PRO Duo MS PRO HG MS PRO HG Duo M2 Observe the manufacturer s instructions when handling the memory cards Memorycard Inserting the me...

Page 49: ...s such as CDs DVDs or USB storage media to your hard disk Second hard disk in RAID group device dependent RedundantArrayofIndependentDisks RAID Removal and installation of a second hard disk must only...

Page 50: ...Capacity Benefits RAID 0 Striping 2 Number of hard drives x smallest size Highest performance without data protection RAID 1 Mirroring 2 Smallest size Data protection SPAN JBOD 2 Up to 4 total of all...

Page 51: ...a cannot be changed CD R CD R Abbreviation for Compact Disc Recordable A CD R is an optical data storage medium that can only be written once with a maximum of 700 Mbytes of data Then these data canno...

Page 52: ...d but can be read as often as desired DVD R LF with Label Flash support DVD RLF Abbreviation for Digital Versatile Disc Recordable Label Flash A DVD R LF is an optical data storage medium that can onl...

Page 53: ...urner with double layer support CD DVDdrive Multi formatDVDburner doublelayersupport DLsupport Multi formatDVDburner With the multi format DVD burner with double layer support you can read all optical...

Page 54: ...DVD eject function is provided emergency removal If there is a CD DVD in the drive press the ODD eject sensor button see also Quick Start buttons Page 22 and remove the CD DVD Place the CD DVD in the...

Page 55: ...he drive tray until you feel it lock into place Manual removal of data carriers emergency removal CD DVD Removingbyhand CD DVD Emergencyremoval CD DVD In the event of a power failure or damage to the...

Page 56: ...ll be set This function permits the final user to change the regional code of the drive up to five times to play back corresponding DVD films After this the last regional code selected is retained and...

Page 57: ...used to generate the middle and high frequency tones while the bass loudspeaker is used to generate the low frequency tones As it is impossible to detect the exact direction of low frequency sounds o...

Page 58: ...mmend that you use the Fujitsu Siemens Wireless USB S1 adapter If you have purchased a computer with Wireless USB functions from Fujitsu Siemens Computers the necessary drivers are already pre install...

Page 59: ...iled information on how to install and start up the drivers please see the documentation regarding the adapter Install the required drivers Connect the adapter to the computer and establish the connec...

Page 60: ...r the wireless LAN module is activated deactivated in the installed wireless LAN software WirelessLAN WirelessLAN You can activate or deactivate the wireless LAN module with the key combination Fn F1...

Page 61: ...network LAN Local Area Network 2 1 Connect the network cable to the LAN port of the notebook 1 Connect the network cable to your network connection 2 Your network administrator can help you to configu...

Page 62: ...will need to contact the help desk Deletion or resetting of passwords are not covered by your warranty and a charge will be made for assistance Brief overview of security functions Security functions...

Page 63: ...e functions You can only set a user password if a supervisor password has already been assigned Please refer to the Settings in BIOS Setup Utility Page 72 section for a description of how to call up a...

Page 64: ...pt Press the Enter key twice In the Exit menu select the option Save Changes Exit Select Yes and press the Enter key The notebook will now reboot with the password removed Removing the supervisor pass...

Page 65: ...ssword on Boot option and press the Enter key Select the Disabled option and press the Enter key If you do not want to change any other settings you can exit BIOS Setup Utility Select the Save Changes...

Page 66: ...rmation about whether or not devices need to be switched off please refer to the documentation supplied with the external device Some of the external devices require special drivers see the operating...

Page 67: ...eenport Monitorport Digital DVI I monitor port Analogue VGA monitor port Switch off the notebook and the external monitor Connect the data cable of the external monitor to the monitor port of the note...

Page 68: ...ormats Deactivate the settings DTS audio and Dolby digital Confirm the settings with OK Setting the refresh rate for your external monitor Monitor If the refresh rate set is too high the monitor may b...

Page 69: ...our operating system is running USB 1 x has a maximum data transfer rate of 12 Mbit s USB 2 x has a data transfer rate of up to 480 Mbit s Additional information can be found in the documentation for...

Page 70: ...t retailer for advice The data transfer rate is up to 2 400 Mbit s eSATA Connect the data cable to the external device Connect the data cable to the eSATA USB combination port of the computer Device d...

Page 71: ...rophone connecting The microphone port Line In allows you to connect an external microphone a MiniDisc player MP3 player CD player or a tape deck to your notebook Connect the data cable to the externa...

Page 72: ...l speakers the built in speakers are disabled If you purchase a cable from a retailer please note the following information The headphones SPDIF port on your notebook is a 3 5 mm jack socket If you wa...

Page 73: ...ction it is recognised by the Windows operating system and can be operated immediately Requirement Your AMILO Notebook has the port to the AMILO Graphic Booster available and all drivers are correctly...

Page 74: ...ery Take care when you use the locking mechanisms on the battery and any other component Never use sharp objects such as screwdrivers scissors or knives as leverage to remove covers Notes Board ESD Bo...

Page 75: ...osed These components should be removed and replaced only by authorised specialists Therefore always observe the following Individual components e g the processor heat sink can become very hot during...

Page 76: ...es with separate compartments for memory and hard disk 2 1 Remove the screws 1 Lift the cover off the notebook in the direction of the arrow 2 Removing memory modules 3 2 1 1 Carefully push the two mo...

Page 77: ...riant of notebook you have it may have a shared compartment for memory and hard disk or these components may be housed in two separate compartments Devices with a joint compartment for memory and hard...

Page 78: ...Removing and installing the battery Page 30 Turn the notebook the right way up and place it on a flat surface Reconnect the cables that you disconnected previously Removing and installing the hard di...

Page 79: ...disk out of the frame Installing the hard disk When installing the hard disk ensure that the contacts in the hard disk compartment do not bend or become damaged Harddisk Slide the hard disk into the f...

Page 80: ...the notebook Turn your notebook over and place it on a flat surface Remove the battery see Chapter Removing and installing the battery Page 30 Harddisk 1 2 Remove the screws 1 Slide off the cover in t...

Page 81: ...he direction of the arrow 1 into the hard disk compartment Pull the hard disk by the pulling aid a straight in the direction of the arrow 2 until the contacts engage 2 1 Slide the cover in the directi...

Page 82: ...up Utility Reboot the notebook switch off on or reboot the operating system BIOSSetupUtility The following or a similar display appears on the screen at start up F2 BIOS Setup F12 Boot Menu Press the...

Page 83: ...oted Load Setup Defaults Copy Standard Entries To copy the standard entries for all menus of the BIOS Setup Utility choose Load Setup Defaults and Yes Discard Changes Discard changes without exiting t...

Page 84: ...ystem Your sales contract Our notebooks have been designed primarily with mobile applications in mind This means that considerable effort has been made to optimise components and equipment in terms of...

Page 85: ...ery Process manual The notebook s date or time is incorrect Summertime Time daylightsavings Timenotcorrect Timenotcorrect Incorrectdate time Dateisincorrect Bufferbattery load Cause Troubleshooting Ti...

Page 86: ...blank Monitor Cause Troubleshooting Monitor is switched off Switch the external monitor on Power saving has been activated monitor is blank Press any key to continue Brightness is set to dark Adjust...

Page 87: ...on Personalization Adjust the screen resolution as required Select monitor Right click on the desktop Under Personalization Display Settings choose monitor 1 or 2 and under Advanced Settings Monitor c...

Page 88: ...Check that the cable connecting the notebook and the printer is connected properly The printer driver is faulty or not correctly installed or it is the wrong printer driver Check that the cable conne...

Page 89: ...and other relevant provisions of Directive 1999 5 EC Copyright protected technology Copyright protectedtechnology This product incorporates copyright protection technology that is protected by method...

Page 90: ...nts of Directive 1999 5 EC of the European Parliament and Commission from 9 March 1999 governing Radio and Telecommunications Equipment and mutual recognition of conformity This equipment can be used...

Page 91: ...witching on 20 Caps Lock 16 CD blank 43 CD DVD AutoPlay function 46 emergency removal 45 handling 43 overview 41 CD DVD drive 43 CD R 41 CD ROM 41 CD RW 41 CE marking 80 Changing the font size 28 Char...

Page 92: ...ghtness 20 difficult to read 76 notes 27 reflected glare 76 remains blank 76 Setting the font size 28 settings 28 synchronising the display 28 LCD screen is too dark 76 Life battery 29 Line feed 16 Lo...

Page 93: ...disconnecting 56 Play 22 Power power consumption 34 power management features 34 Power adapter setting up 8 Power on indicator 15 Preparing for operation 9 Printer does not print 78 Q Quick Start butt...

Page 94: ...ad 20 23 cleaning 6 dragging items 23 executing commands 23 moving the pointer 23 selecting an item 23 switching off 20 Touchpad buttons 20 Transport Transport damage 7 Transportation 5 Travel noteboo...

Reviews: