background image


edition 1 

English - 1 


Introduction 

This manual contains important information for correct set-up of your LCD monitor.  

A screen controller with VGA interface is required to control the LCD monitor. The monitor processes 
the data supplied to it by the screen controller. The screen controller/the associated driver software is 
responsible for setting the modes (resolution and refresh rate). 

When putting the monitor into operation for the first time, the screen display should be optimally 
adapted to the screen controller used and adjusted in accordance with your needs.  

Target group 

You don't need to be an "expert" to perform the operations described here. However, please observe 
the safety information given in the operating instructions of the computer and in this manual! 

In the event of any problems occurring, please contact your sales outlet or our help desk. 

Notational conventions 

The meanings of the symbols and fonts used in this manual are as follows: 


!


Pay particular attention to text marked with this symbol. Failure to observe this warning 
endangers your life, destroys the device, or may lead to loss of data. 


i


Supplementary information, remarks, and tips follow this symbol. 


Text which follows this symbol describes activities that must be performed in the order shown. 

"Quotation marks" indicate names of chapters or terms. 

This font

 indicates filenames and menu items. 

This font

 indicates screen outputs. 

Additional information 

Details of how you set the resolution and refresh rate are provided in the documentation on your 
screen controller/the associated driver software. 

Downloaded from ManualMonitor.com Manuals

Summary of Contents for L22W-6SA

Page 1: ...Important notes 2 Safety notes 2 Power cable 3 Transport 3 Cleaning 4 CE marking 4 Checking the contents of the consignment 4 Connecting the monitor 5 Operation of the monitor 6 Troubleshooting 7 Asse...

Page 2: ...Downloaded from ManualMonitor com Manuals...

Page 3: ...e operating instructions of the computer and in this manual In the event of any problems occurring please contact your sales outlet or our help desk Notational conventions The meanings of the symbols...

Page 4: ...ies within these limits Ensure that the power socket on the device or the grounded mains outlet is freely accessible The ON OFF switch does not disconnect the device from the mains voltage To complete...

Page 5: ...device If you pass the device on to third parties you should pass this manual on with it Power cable To guarantee safe operation use the cable supplied Use the following guidelines if it is necessary...

Page 6: ...this device complies with the requirements of the EEC directives 89 336 EEC Electromagnetic compatibility and 73 23 EEC Low voltage directive Checking the contents of the consignment The display surf...

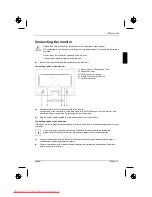
Page 7: ...of the connectors of the data cable to the D SUB connector on the monitor and secure the plug in connection by tightening the locking screws Plug the power cable supplied into the power connector of...

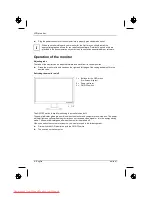
Page 8: ...hands on the right and left edge of the casing and adjust it to the desired rake Switching the monitor on off 1 Buttons for the OSD menu On Screen display 2 Power indicator 3 ON OFF switch The ON OFF...

Page 9: ...ing mode Alter the brightness and or contrast until you get a picture Message No Video Input Check whether the data cable for the monitor is correctly attached to the monitor port on the computer Chec...

Page 10: ...pply satisfactory results Permanently unlit or lit pixels The standard of production techniques today cannot guarantee an absolutely fault free screen display A few isolated constant lit or unlit pixe...

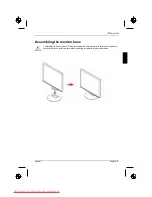
Page 11: ...ssembling the monitor base The display surface of the LCD monitor is sensitive to pressure and scratches Therefore lay the monitor on a soft surface when mounting or removing the monitor base Download...

Reviews: