background image

LCD monitor 


8 - English 

edition 1 


Having this problem? 

Check the following points: 

Picture is shaking 


Check whether the data cable for the monitor is 
correctly attached to the monitor port on the 
computer. 


Carry out the auto-adjustment of the monitor (with 
the AUTO button - if present - or via the OSD menu). 

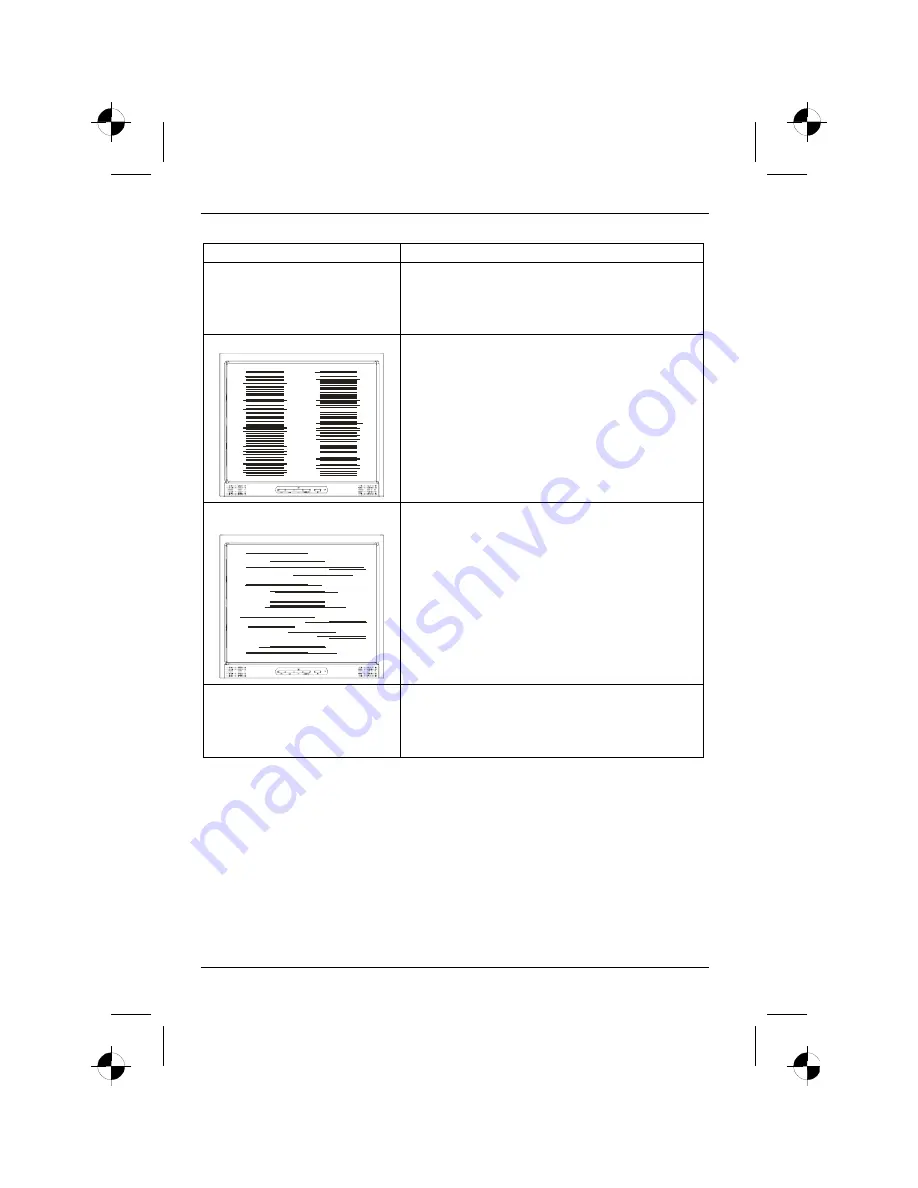
Picture disturbances (vertical lines) 


Carry out the auto-adjustment of the monitor (with 
the AUTO button - if present - or via the OSD menu). 

Picture disturbances 
(horizontal lines, picture noise) 


Carry out the auto-adjustment of the monitor (with 
the AUTO button - if present - or via the OSD menu). 

Picture too light or too dark 


Carry out the auto-adjustment of the monitor (with 
the AUTO button - if present - or via the OSD menu). 


Correctly set the contrast and brightness with the 
OSD menu if the auto-adjustment function does not 
supply satisfactory results. 

Permanently unlit or lit pixels 

The standard of production techniques today cannot guarantee an absolutely fault-free screen 
display. A few isolated constant lit or unlit pixels may be present. The maximum permitted number of 
pixels faults is stipulated in the stringent international standard ISO 13406-2 (Class II). 
Example: a 17"/19” flat-screen monitor with a resolution of 1280 x 1024 has 1280 x 1024 = 1310720 
pixels. Each pixel consists of three subpixels (red, green and blue), so there are almost 4 million dots 
in total. According to ISO 13406-2 (Class II), a maximum of 6 pixels and 7 subpixels may be 
defective. 
A 20" flat-screen monitor with a resolution of 1600 x 1280 has 1600 x 1200 = 1920000 pixels. Each 
pixel consists of three subpixels (red, green and blue), so there are almost 6 million dots in total. 
According to ISO 13406-2 (Class II), a maximum of 8 pixels and 10 subpixels may be defective. 

Summary of Contents for SCALEOVIEW L17-6

Page 1: ...ste Schritte Getting Started Deutsch English Fran ais Espa ol Portugu s Italiano Svenska Nederlands Dansk Suomi Pycck Norsk Eesti keel Lietuvi kas Latviski Polski Slovensko Slovensk esky Magyar SCALEO...

Page 2: ...unseren Produkten Tipps Updates usw finden Sie im Internet http www fujitsu siemens com Are there any technical problems or other questions you need clarified Please contact our Help Desk see Warrant...

Page 3: ...wer supply switches automatically 100 V 240 V 50 Hz 60 Hz 0 9 A max Total power consumption 45 W 2 W in the energy saving modes standby mode suspend mode 1 W in the off mode Environmental conditions E...

Page 4: ......

Page 5: ......

Page 6: ...cognitas Gesellschaft f r Technik Dokumentation mbH www cognitas de Herausgegeben von Published by Fujitsu Siemens Computers GmbH Printed in Taiwan AG 0107 01 07 Ausgabe Edition 1 Bestell Nr Order No...

Page 7: ...6 Erste Schritte Getting Started English TCO Norsk Fran ais WEEE Eesti keeles Espa ol Portugu s Lietuvi kas Italiano Latviski Svenska Polski Nederlands Slovensko Dansk Slovensk Suomi esky Ausgabe Jan...

Page 8: ...ieferm glichkeiten und technische nderungen vorbehalten Keine Haftung f r Inhalt und Druckfehler Copyright Fujitsu Siemens Computers GmbH 2005 VESA DDC and DPMS are registered trademarks of Video Elec...

Page 9: ...tional information 1 Important notes 2 Safety notes 2 Power cable 3 Transport 3 Cleaning 4 CE marking 4 Checking the contents of the consignment 4 Connecting the monitor 5 Operation of the monitor 6 T...

Page 10: ......

Page 11: ...ation given in the operating instructions of the computer and in this manual In the event of any problems occurring please contact your sales outlet or our help desk Notational conventions The meaning...

Page 12: ...local mains voltage lies within these limits Ensure that the power socket on the device or the grounded mains outlet is freely accessible The ON OFF switch does not disconnect the device from the main...

Page 13: ...ual close to the device If you pass the device on to third parties you should pass this manual on with it Power cable To guarantee safe operation use the cable supplied Use the following guidelines if...

Page 14: ...he shipped version of this device complies with the requirements of the EEC directives 89 336 EEC Electromagnetic compatibility and 73 23 EEC Low voltage directive Checking the contents of the consign...

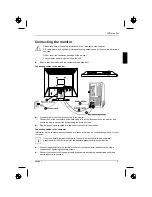
Page 15: ...SUB connector on the monitor and secure the plug in connection by tightening the locking screws Plug the power cable supplied into the power connector of the monitor Connecting cables to the computer...

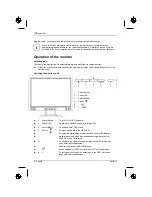
Page 16: ...eft edge of the casing and adjust it to the desired rake Switching the monitor on off 1 Power Switch 2 Power LED 3 Select MENU 4 Select 5 6 AUTO 1 Power Switch To turn ON or OFF the power 2 Power LED...

Page 17: ...key on the computer keyboard the computer may be in energy saving mode Alter the brightness and or contrast until you get a picture Message No Video Input Check whether the data cable for the monitor...

Page 18: ...D menu if the auto adjustment function does not supply satisfactory results Permanently unlit or lit pixels The standard of production techniques today cannot guarantee an absolutely fault free screen...

Page 19: ...tor edition 1 9 Assembling the monitor base The display surface of the LCD monitor is sensitive to pressure and scratches Therefore lay the monitor on a soft surface when mounting or removing the moni...

Reviews: