background image


SCENICVIEW  
A17-2A / A19-2A 

Operating Manual 


April 2006 edition 


Downloaded from ManualMonitor.com Manuals

Summary of Contents for SCENICVIEW A17-2A

Page 1: ...Monitor Operating Manual English SCENICVIEW A17 2A A19 2A Downloaded from ManualMonitor com Manuals ...

Page 2: ...stions which you would like to be clarified Please contact our help desk see Warranty Booklet The latest information on our products tips updates etc can be found on the internet at www fujitsu siemens com Downloaded from ManualMonitor com Manuals ...

Page 3: ...Downloaded from ManualMonitor com Manuals ...

Page 4: ...This manual was produced by Xerox Global Services Published by Fujitsu Siemens Computers GmbH Order No A26361 K1098 Z120 1 7619 Edition 1 AG 04 06 Downloaded from ManualMonitor com Manuals ...

Page 5: ...SCENICVIEW A17 2A A19 2A Operating Manual April 2006 edition Downloaded from ManualMonitor com Manuals ...

Page 6: ...g or similar methods in part or in whole are reserved Offenders will be liable for damages All rights including rights created by patent grant or registration of a utility model or design are reserved Delivery subject to availability Right of technical modification reserved Copyright Fujitsu Siemens Computers GmbH 2006 Downloaded from ManualMonitor com Manuals ...

Page 7: ...Mounting monitor base 8 Connecting the monitor 9 Connecting cables to the monitor 9 Connecting cables to the computer 10 Operation of the monitor 11 Adjusting rake 11 Switching the monitor on off 11 Notes on power management 12 Changing the monitor settings 13 Troubleshooting 18 Notes regarding the DIN EN ISO 13406 2 standard 20 Technical data 21 VESA DDC compatible VGA interface 22 Preset operati...

Page 8: ...Downloaded from ManualMonitor com Manuals ...

Page 9: ...pliance with the recommendations in accordance with TCO 03 In normal screen mode dark characters against a light background the monitor satisfies the ergonomic requirements for the GS symbol This operating manual contains important information you require to start up and run your LCD monitor A screen controller with VGA interface is required to control the SCENICVIEW A17 2A A19 2ALCD monitor The m...

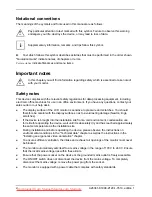
Page 10: ...th the display surface so as to avoid lasting damage Newton rings scratches If the device is brought into the installation site from a cold environment condensation can form Before operating the device wait until it is absolutely dry and has reached approximately the same temperature as the installation site During installation and before operating the device please observe the instructions on env...

Page 11: ...n the Technical data chapter Otherwise you may damage your monitor If you are in any doubt contact your sales outlet or our help desk Use a screen saver with moving images and activate the power management for your monitor to prevent still images from burning in Keep this operating manual together with your device If you pass on the device to third parties you should include this manual We recomme...

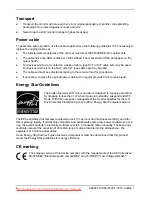
Page 12: ...jitsu Siemens LCD colour monitor is designed to conserve electricity by dropping to less than 1 W when it goes into standby suspend and OFF mode With this new power management the monitor qualifies for the U S Environmental Protection Agency s EPA Energy Star Computers award The EPA estimates that computer equipment uses 5 percent of all business electricity and that this is growing rapidly If all...

Page 13: ...not responsible for any radio or television interference caused by unauthorised modifications of this equipment or the substitution or attachment of connecting cables and equipment other than those specified by Fujitsu Siemens Computers GmbH The correction of interferences caused by such unauthorised modification substitution or attachment will be the responsibility of the user The use of shielded...

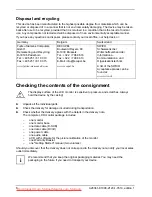
Page 14: ...ations Kommunikations und Organisationstechnik A list of the SWICO Acceptance places can be found at www swico ch Checking the contents of the consignment The display surface of the LCD monitor is sensitive to pressure and scratches Always hold the device by the casing Unpack all the individual parts Check the delivery for damage incurred during transportation Check whether the delivery agrees wit...

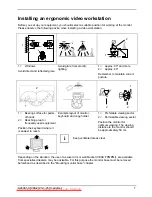
Page 15: ... frequently used equipment Position the keyboard where it is easiest to reach Example layout of monitor keyboard and copy holder 1 Preferable viewing sector 2 Permissible viewing sector Position the monitor for optimum viewing The viewing distance to the monitor should be approximately 50 cm i Keep ventilated areas clear Depending on the situation the use of a swivel arm or wall bracket VESA FPMPM...

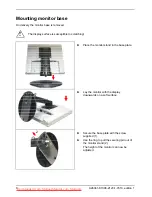
Page 16: ...r stand in the base plate Lay the monitor with the display downwards on a soft surface 1 2 Secure the base plate with the screw supplied 1 Use the ring to pull the securing pin out of the monitor stand 2 The height of the monitor can now be adjusted 8 A26361 K1098 Z120 1 7619 edition 1 Downloaded from ManualMonitor com Manuals ...

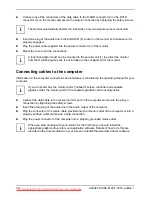
Page 17: ...g must be pulled out Be sure that the monitor and the computer are switched off Connecting cables to the monitor 1 2 3 4 5 1 Security slot for Kensington Lock 2 Power connector 3 DVI D connector 4 D SUB connector ANALOG 5 AUDIO IN connector The data cables supplied have two 15 pin D SUB connectors two 24 pin DVI connectors for connection to the monitor and to the computer Select the suitable data ...

Page 18: ...ting manual for your computer If your computer has two monitor ports onboard screen controller and separate graphics card the monitor port for the separate graphics card is usually active i Connect the data cable to the active monitor port on the computer and secure the plug in connection by tightening the safety screws Insert the other plug of the audio line in the audio output of the computer Pl...

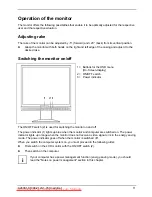
Page 19: ... switch 2 is used for switching the monitor on and off The power indicator 1 lights up blue when the monitor and computer are switched on The power indicator lights up orange when the monitor does not receive a video signal or is in the energy saving mode The power indicator goes off when the monitor is switched off When you switch the computer system on you must proceed in the following order Fir...

Page 20: ...ropriate signal to the monitor to reduce the power consumption energy saving mode The power indicator of the monitor changes colour to indicate the status change Once an input is made at the computer the screen contents are redrawn and full power is restored For detailed information on how energy saving mode operates refer to the operating manual or technical manual of the computer i When the moni...

Page 21: ...monitor settings with the buttons of the control panel Use the buttons of the control panel to make the following monitor settings directly while the OSD menu is switched off Performing auto adjustment of the monitor Press the AUTO button for approx 1 second while the OSD menu is switched off The Auto Processing message is displayed Picture quality and position are set to optimum values for your s...

Page 22: ...essary press the or button to mark another icon e g Press the MENU button to select the highlighted icon The correspondending setting window is displayed The first function AUTO ADJUSTMENT is highlighted If necessary press the or button to mark another function Press the MENU button to select the highlighted function Press the or button to adjust the value for the selected function Press the AUTO ...

Page 23: ...or Picture quality and position are set to optimum values for your system H Position Adjusting the horizontal position With this function you move the picture to the left or to the right V Position Adjusting the vertical position With this function you move the picture up or down Clock Setting synchronisation With this function you adjust the picture width to eliminate vertical picture disturbance...

Page 24: ... basic colours red green blue as required Setting display of the OSD menu Calling the setting window OSD H Position Setting the horizontal position of the OSD menu With this function you move the OSD menu to the left or to the right OSD V Position Setting the vertical position of the OSD menu With this function you move the OSD menu up or down OSD Timeout Setting the display duration of the OSD me...

Page 25: ...the digital input or whether the input to be used should be set automatically Speaker Volume Adjusting the volume With this function you adjust the volume for the playback via the integrated loudspeakers With this function information e g Resolution H V frequency is displayed Information Activating the factory settings Activating the factory settings With this function all settings are reset to th...

Page 26: ...d the computer may be in energy saving mode Alter the brightness and or contrast until you get a picture Message Check Signal Cable Check whether the data cable for the monitor is correctly attached to the monitor port on the computer Check whether the computer is switched on Message Out of Frequency Please change the display mode to 1280x1024 with 60 Hz The input signal horizontal frequency and r...

Page 27: ...t of the screen Picture disturbances vertical lines Press the AUTO button to conduct the auto adjustment of the screen Picture disturbances horizontal lines picture noise Press the AUTO button to conduct the auto adjustment of the screen The screen becomes darker The background lighting has a limited lifetime If your monitor display should become too dark the background lighting will have to be ex...

Page 28: ...24 1310720 pixels Each pixel consists of three subpixels red green and blue so there are almost 4 million subpixels in total In accordance with ISO 13406 2 Class II a maximum of 8 pixels and 10 subpixels may be faulty Pixel A pixel consists of 3 subpixels normally red green and blue A pixel is the smallest element that can be generated by complete functionality of the display Subpixel A subpixel i...

Page 29: ... cable 1 8 m Electrical data Video analogue positive 0 7 Vpp 75 Ω Digital DVI D Synchronisation Separate Sync TTL positive or negative Horizontal frequency 31 kHz 81 kHz multi scanning Refresh rate 56 Hz 75 Hz Maximum pixel rate 135 MHz Power supply switches automatically 100 V 240 V 50 Hz 60 Hz 2 Hz 1 2 A 0 6 A Total power consumption 40 W 17 in normal mode 50 W 19 in normal mode 1 W in the energ...

Page 30: ... values at the factory for the operating modes listed above Depending on the screen controller used it may be necessary to adjust the display position and size In this case you can change and save the settings see Operation of the monitor i The following are the most frequently used of the preset operating modes Horizontal frequency Refresh rate Screen resolution 31 5 kHz 31 5 kHz 37 5 kHz 37 9 kH...

Page 31: ...digital input 1 9 17 Pin Meaning Pin Meaning Pin Meaning 1 TMDS Data2 9 TMDS Data1 17 TMDS Data0 2 TMDS Data2 10 TMDS Data1 18 TMDS Data0 3 TMDS Data 2 4 Shield 11 TMDS Data 1 3 Shield 19 TMDS Data 0 5 Shield 4 not connected 12 not connected 20 not connected 5 not connected 13 not connected 21 not connected 6 DDC Clock 14 5V Power 22 TMDS Clock Shield 7 DDC Data 15 Earth 23 TMDS Clock 8 Analogue V...

Reviews: