128
4
Handling the Rack after Installation
This section explains how to handle the rack after installation.
4.1
Inserting and Removing Cage Nuts
4.1.1
Insertion procedure
1
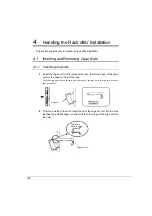
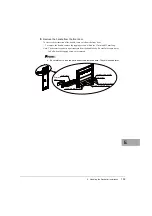
Install the cage nut from the inside of the rack. Insert one edge of the cage
nut into the cage nut hole of the rack.
The following figure shows the case where the edge of the cage nut is inserted into the lower
edge of the hole.
’
2
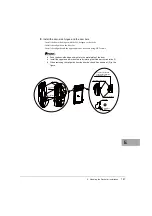
From the outside of the rack, insert the tip of the cage nut tool into the hole
that has the installed cage nut, and snap the other edge of the cage nut into
the hole .
’
Cage nut
Cage nut tool
(appearance)
Cage nut tool
Direction in
which to tilt tool
Summary of Contents for 19R-261A2
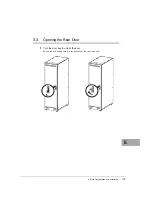
Page 20: ...20 3 3 後扉の開き方 1 扉用キーを回し解除します ラックハンドルを手前に引き上げ 矢印の方向にハンドルを回転し 手前に引きま す ...
Page 32: ...32 1 マイナスドライバの先端をケージナットの爪とラック柱の間に挿入して ケージナットの爪に押し込みます 2 マイナスドライバを押し下げて取り外します ...
Page 72: ...72 5 0 5 0 ࡢሙྜ ࢣ ࣈࣝ ࣝࢲ 0 ࢥ ࣛࢵࢺ 0 ࢧࣛࢿࢪ 5 0 5 0 ࡢሙྜ ࢣ ࣈࣝ ࣝࢲ 0 ࢥ ࣛࢵࢺ 0 ࢧࣛࢿࢪ ...
Page 73: ...4 ラック設置後の取り扱いについて 73 J 5 0 5 0 ࡢሙྜ ࢣ ࣈࣝ ࣝࢲ 0 ࢥ ࣛࢵࢺ 0 ࢧࣛࢿࢪ 5 0 5 0 ࡢሙྜ ࢣ ࣈࣝ ࣝࢲ 0 ࢥ ࣛࢵࢺ 0 ࢧࣛࢿࢪ ...
Page 84: ...84 3 背面より M5 サラネジで取り付けプレートとラック およびスタビライ ザー本体を固定します 4 前面の M5 サラネジを本締めします 0 ࢧࣛࢿࢪ ྲྀ ࡅࣉࣞ ࢺ 㠃ഃ ...
Page 88: ...88 ...
Page 92: ...92 ...
Page 100: ......
Page 186: ......
Page 188: ......

