U s i n g Y o u r L i f e B o o k 4 0 0 S e r i e s
L i f e B o o k 4 0 0 S e r i e s f r o m F u j i t s u
33
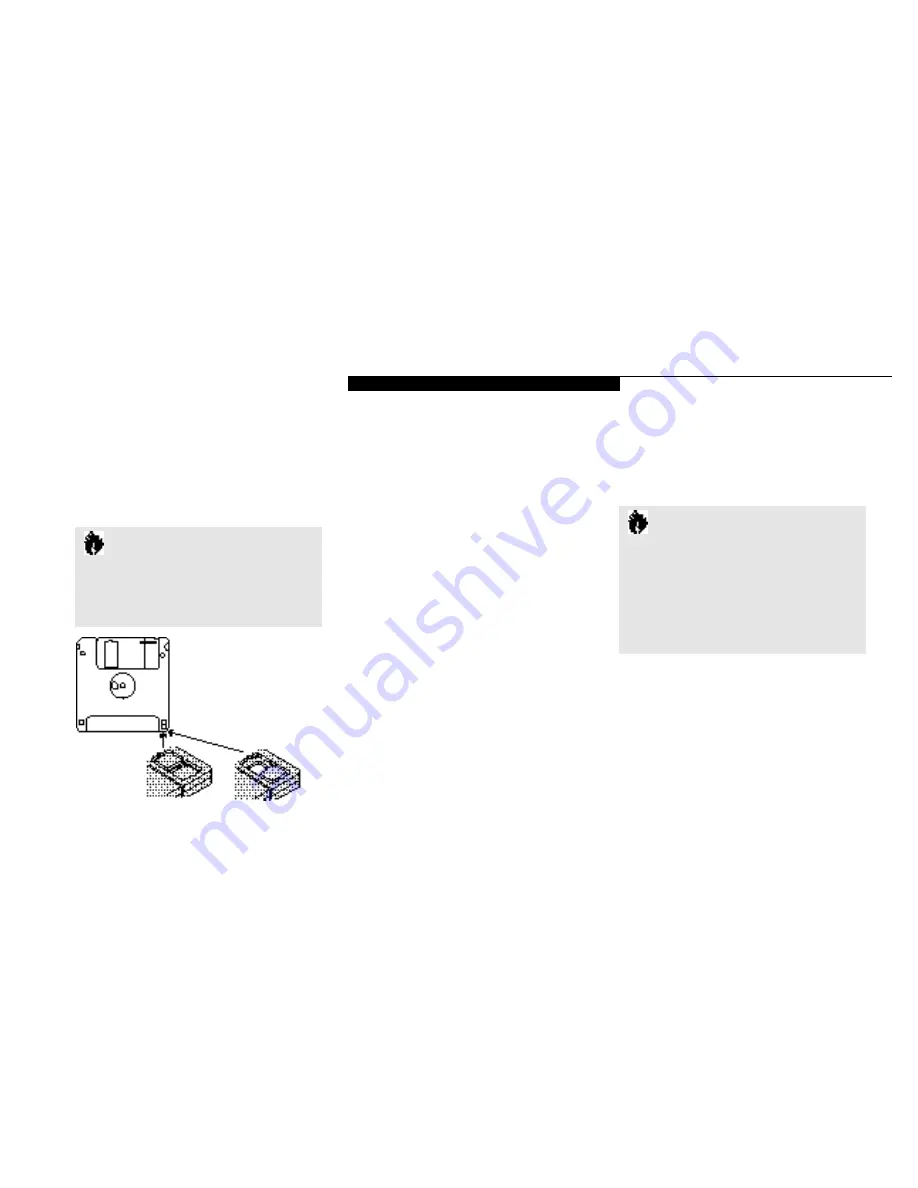
To prevent data stored on a floppy disk from
being erased,slide the write protect tab on the
floppy disk to open up the small hole. This
makes the disk write-protected. When you want
to write data to that disk,slide the write-protect
tab the other way to close the small hole.
Care of Floppy Disk Drives and Disks
■
Avoid storing the floppy disk drive and disks
in ex trem ely hot and cold loc a ti on s , or in loc a-
ti ons su bj ect to severe tem pera tu re ch a n ge s .
■
Keep the floppy disk drive and disks out of
direct sunlight and away from heating
equipment.
■
Avoid storing the floppy disk drive in loca-
tions subject to shock and vibration.
■
Avoid using the floppy disk drive and disks
in damp and dusty locations.
■
Never use the floppy disk drive with any
liquid, metal, or other foreign matter inside
the floppy disk drive or disk.
■
Never store a floppy disk near a magnet or
other magnetic field.
■
To clean, wipe the floppy disk drive clean
with a dry soft cloth or with a soft cloth
dampened with water or a solution of neutral
detergent. Never use benzene,paint thinner,
or other volatile material.
■
Never disassemble or dismantle the floppy
disk drive.
CD-ROM Drive
The modular CD-ROM Drive is a 10-speed re ader.
C A U T I O N
Formatting a previously used floppy disk
is an effective method of clearing a disk
as long as you realize that ALL the infor-
mation on the disk will be erased.
Figure 2-13 Floppy Disk Write Protect
C A U T I O N
Do not operate the CD-ROM drive unless
your notebook is sitting on a flat surf a c e
and the tilt adjustment feet a re folded
against the bottom of your notebook.
Using a CD when the drive is not level
may damage the drive or prevent pro p e r
o p e r a t i o n .
Loading a CD
■
Make sure that the tilt adjustment f eet
(Figure 1-9 on page 8) on the bottom of your
notebook are folded against the bottom.
■
Make sure there is power to your notebook.
■
Push, gently but firmly, and release the eject
button on the front of the CD-ROM drive to
Summary of Contents for 420D
Page 3: ...T a b l e o f C o n t e n t s ...
Page 149: ...I n d e x ...


