background image

Index

H

Handling

data carriers 26

Hard disk:

restoring the contents 54

Hardware con

fi

guration 51

I

Important notes 6
Incorrect date/time 55
Indicator

Caps Lock 14
drive 14
Num Lock 14
Scroll Lock 14

Inserting

a data carrier 27

K

Key combinations 19
Keyboard 16

cleaning 8

L

LCD screen

cleaning 8
decrease brightness 19
dif

fi

cult to read 55

notes 23
re

fl

ected glare 55

remains blank 55

LCD screen is too dark 55
Life, battery 24
Line feed 17
Loudspeakers 33

switch off 19
switch on 19

M

Main memory

see Adding memory 44

Mains adapter

connecting 10
setting up 10

Manual removal of data carrier 27
Memory card

handling 30
inserting 30
removing 31
Secure Digital 30

Memory expansion

installing 46
removing 45

Memory module

important notes 44
installing 46
removing 45

Microphone 33
Microphone, connecting 42
Mobile operation 7
Monitor

connecting 40
drifting display 56
refresh rate 40
remains blank 56

Monitor port

see VGA connection socket 40

N

Notebook

before you travel 7
cannot be started 57
cleaning 8
stops working 57
switching off 16
transporting 7
using 12

Notebook, operation 12
Notes 6

boards 43
cleaning 8
disposal / recycling 60
energy saving 6
LCD screen 23
Safety 6
transport 7

Num Lock

indicator 14, 18

Numeric keypad 16

see Virtual numeric keypad 18

O

Operating system

activating system protection 38
cancel system protection 38
protecting with password 37

Operating system, restoring 54
Optical drive 26

P

Packaging 9

62

A26391-K214-Z200-1-7619, edition 1

Summary of Contents for A1130 - Lifebook T6500 4GB 500GB

Page 1: ...LIFEBOOK A1130 Operating Manual ...

Page 2: ...lease contact our Hotline Help Desk refer to the Help Desk list or go to http ts fujitsu com helpdesk your sales partner your sales office Latest information about our products useful tips updates etc is available on our website http ts fujitsu com ...

Page 3: ......

Page 4: ...Published by Fujitsu Technology Solutions GmbH A26391 K214 Z200 1 7619 Edition 1 2009 08 Produced by XEROX Global Services ...

Page 5: ...t time setup of your device 9 Working with the notebook 12 Security functions 36 Connecting external devices 39 Removing and installing components during servicing 43 Settings in BIOS Setup Utility 51 Troubleshooting and tips 53 Technical data 59 Manufacturer s notes 60 Index 61 Operating Manual ...

Page 6: ...Vista are registered trademarks of the Microsoft Corporation All other trademarks referenced are trademarks or registered trademarks of their respective owners whose protected rights are acknowledged Copyright Fujitsu Technology Solutions GmbH2009 All rights reserved including rights of translation reproduction by printing copying or similar methods in part or in whole In the event of violations p...

Page 7: ...oard 16 Virtual numeric keypad 18 Key combinations 19 Country and keyboard settings 20 Support button 20 Programming the Support button 21 Touchpad and touchpad buttons 22 Using touchpad buttons 22 LCD screen 23 Webcam 23 Rechargeable battery 24 Charging caring for and maintaining the battery 24 Removing and installing the battery 24 Optical drive 26 Handling data carriers 26 CD DVD indicator 26 I...

Page 8: ...g a cover 45 Removing memory modules 45 Installing a memory module 46 Attaching the cover 46 Removing and installing the hard disk 47 Removing a cover 47 Removing a hard disk 48 Installing a hard disk 49 Attaching the cover 50 Finishing component removal 50 Settings in BIOS Setup Utility 51 Starting the BIOS Setup Utility 51 Operating BIOS Setup Utility 51 Exiting BIOS Setup Utility 52 Exit Saving...

Page 9: ...annot be started 57 The notebook stops working 57 The printer does not print 58 The radio connection to a network does not work 58 Technical data 59 LIFEBOOK A1130 59 Mains adapter 59 Manufacturer s notes 60 Disposal and recycling 60 Declarations of Conformity 60 CE marking 60 Index 61 A26391 K214 Z200 1 7619 edition 1 ...

Page 10: ...Contents A26391 K214 Z200 1 7619 edition 1 ...

Page 11: ...on on the connections and user components of your notebook can be found in Ports and operational controls Page 3 Further information The Windows drivers for your device can be found on our Internet website The factory installation of your device does not support any other operating system Fujitsu Technology Solutions accepts no liability whatsoever if any other operating system is used Software or...

Page 12: ... or a command used to start a program start exe This font indicates information that is displayed on the screen by a program e g Installation is complete This font indicates terms and texts used in a software interface e g Click on Save names of programs or files e g Windows or setup exe This font indicates cross references to another section e g Safety information cross references to an external ...

Page 13: ...ts before you start to work with the device 1 2 3 3 17 16 15 4 5 6 7 8 9 10 11 12 13 14 1 Webcam 2 Microphone 3 Loudspeakers 4 DC input connector DC IN 5 VGA monitor port 6 USB ports 7 Microphone port Line In 8 Headphone port 9 ExpressCard slot 10 Memory card slot 11 ON OFF switch for wireless components 12 Touchpad buttons 13 Touchpad 14 Keyboard 15 Status indicators 16 Support button 17 ON OFF s...

Page 14: ...Ports and operational controls 20 19 18 18 LAN port 19 Kensington Lock device 20 Optical drive 4 A26391 K214 Z200 1 7619 edition 1 ...

Page 15: ...Ports and operational controls 22 21 23 24 21 Rechargeable battery 22 Hard disk 23 Memory service compartment 24 Dust chamber cover A26391 K214 Z200 1 7619 edition 1 5 ...

Page 16: ...eaning the notebook Page 8 Pay attention to the additional safety notes for devices with wireless components provided in the Safety manual Please refer to the notes in the chapter Removing and installing components during servicing Page 43 This notebook complies with the relevant safety regulations for data processing equipment If you have questions about using your notebook in a particular area p...

Page 17: ...voltage and the power cable are compatible If this is not the case buy a power cable that matches the local conditions Enquire with the corresponding government office of the country you will be travelling in as to whether you may operate the radio component integrated in your notebook there see also CE marking Page 60 If you use a modem incompatibilities with the local telephone system may result...

Page 18: ...ce with a very soft slightly damp cloth Switch the notebook off Cleaning Notes Notebook Keyboard Touchpad LCDscreen CrystalViewdisplay In order to prevent accidentially switching the device on remove the power cable from the mains adaptor and remove the battery see Removing and installing the battery Page 24 The surface can be cleaned with a dry cloth If particularly dirty use a cloth which has be...

Page 19: ... in the accessories kit The battery must be charged if you want to operate your device using the battery When used on the move the built in battery provides the device with the necessary power You can increase the operating time by using the available energy saving functions For instructions on how to connect external devices e g mouse printer to your device please refer to the operating manual fo...

Page 20: ...licate surfaces Keep other objects at least 100 mm away from the device and its mains adapter to ensure adequate ventilation Never cover the ventilation slots of the device Do not expose the device to extreme environmental conditions Protect the device from dust humidity and heat Mains adapter connecting Preparingforoperation Mainsadapter Observe the safety precautions in the enclosed Safety manua...

Page 21: ...he mains adapter During the installation process DO NOT restart the device unless you are requested to do so To make it easier to use your device for the first time the operating system is pre installed on the hard disk Switch on your device During installation follow the instructions on screen Consult the operating system manual if anything is unclear about the requested input data If a Windows o...

Page 22: ...describes the basics for operating your notebook Please read the chapter entitled Connecting external devices Page 39 for instructions on how to connect devices such as a mouse and a printer to the notebook Please refer to the notes in Important notes Page 6 12 A26391 K214 Z200 1 7619 edition 1 ...

Page 23: ...t the status of the power supply the drives and the keyboard functions Power on indicator standby status indicator and ON OFF switch Num Lock indicator Battery charging indicator Mains connection Caps Lock indicator Battery indicator Scroll Lock indicator Drive indicator A26391 K214 Z200 1 7619 edition 1 13 ...

Page 24: ...tteryindicator Battery indicator Indicator is illuminated green The battery is charged to between 50 and 100 of its maximum capacity The indicator lights up orange The battery is charged to between 13 and 49 of its maximum capacity The indicator lights up red The battery is charged to between 0 and 12 of its maximum capacity Indicator flashes red An error has occured Drive indicator Drive Indicato...

Page 25: ... the notebook Switching on the notebook 1 Open the LCD screen 1 Switchingon Press the ON OFF switch for about one second to switch the notebook on The power on indicator is lit A26391 K214 Z200 1 7619 edition 1 15 ...

Page 26: ...r through normal use The key markings are especially prone to wear The key markings are liable to wear away over the life of the notebook The keyboard has been designed to provide all the functions of an enhanced keyboard Some enhanced keyboard functions are mapped with key combinations The following description of keys refers to Windows Additional functions supported by the keys are described in ...

Page 27: ...ctivates the Caps Lock mode and the corresponding icon is displayed in the Windows information area In Caps Lock mode all of the characters you type appear in upper case In the case of overlay keys the character printed on the upper left of the key will appear when that key is pressed To cancel the Caps Lock function simply press the Caps Lock key again Shiftkey CapsLock Shift key The Shift key ca...

Page 28: ...f a numeric keypad your keyboard is equipped with a virtual numeric keypad The special keys of the virtual numeric keypad are recognisable by the numbers and symbols printed in the upper right corner of each key If you have switched on the virtual numeric keypad you can output the characters shown on the upper right of the keys The keyboard layout shown below may differ from your actual device 1 C...

Page 29: ...d and the touchpad buttons on or off Fn F4 Touchpad Touchpadbuttons Touchpad Decrease screen brightness This key combination decreases the brightness of the screen Fn F6 LCDscreen Screenbrightness Increase screen brightness This key combination increases the brightness of the screen Fn F7 Screenbrightness Decrease volume This key combination reduces the volume of the internal loudspeakers Fn F8 Vo...

Page 30: ...ous tab stop Shift Tab Backtab Key combinations using the Windows keys are detailed in the manual for your operating system Country and keyboard settings If you want to change the country and keyboard settings proceed as follows Enter the settings by clicking Start Settings Control Panel Time Regional and Language Options Support button Your notebook is equipped with a Support button You can press...

Page 31: ...lication To change the application for the Support button proceed as follows Select Start Programs LifeBook Application Panel Select the Application Panel Setup option The Application Panel Setup function is displayed Select the tab for the Support button Select the Application Registration option Select Select from Start Menu Select the desired application and confirm by clicking Next Finish and ...

Page 32: ... a conventional mouse Using touchpad buttons Moving the pointer Move your finger on the touchpad Touchpad The pointer will move accordingly Selecting an item Move the pointer to the item you wish to select Touchpad Tap the touchpad once or press the left button once The item is selected Executing a command Move the pointer to the field you wish to select Touchpad Tap the touchpad twice or press th...

Page 33: ...ive subpixels That is approximately 0 0005 of the entire number of subpixels Background lighting TFT monitors are operated with background lighting The luminosity of the background lighting can decrease during the period of use of the notebook However you can set the brightness of your monitor individually Synchronising the display on the LCD screen and an external monitor For more information ple...

Page 34: ...Battery Batterystatusmeter Windows also has a Battery status meter in the taskbar for monitoring the battery capacity When you place the mouse pointer on the battery symbol the system displays the battery status Battery storage Battery Battery Self discharge battery Chargingcapacity battery Keep the battery pack between 0 C and 30 C The lower the temperature at which the batteries are stored the l...

Page 35: ...1 Press the two unlocking levers 1 Remove the battery from the battery compartment 2 Installing a battery 1 Position the battery at the edge Push the battery into the battery slot until you feel it lock into place 1 Complete the removal see chapter Finishing component removal Page 50 A26391 K214 Z200 1 7619 edition 1 25 ...

Page 36: ...toring a data carrier in areas subject to high temperatures or humidity You may use both 8 cm and 12 cm data carriers in the optical drive When using a data carrier of lesser quality vibrations and reading errors may occur CD DVD indicator CD DVDindicator The CD DVD indicator flashes when a data carrier is inserted The indicator goes out when the drive is ready for reading The indicator lights up ...

Page 37: ... a data carrier that has been inserted Push in the drive tray until you feel it lock into place Manual removal emergency removal CD DVD Manualremovalofdatacarrier Emergencyremovalofdatacarrier In the event of a power failure or damage to the drive you can remove the data carrier manually 1 2 Switch your notebook off Push a pen or a piece of wire such as a paperclip firmly into the opening 1 The dr...

Page 38: ...use a dry brush to release dust from the ventilation slots Be sure that you do not damage the ventilation blades in the process Do not use any abrasives for cleaning purposes Prepare for removal see chapter Preparing to remove components Page 44 1 2 Press on the clip of the dust chamber cover 1 and remove it from its installation location 2 Clean the dust chamber with a dry brush 1 Insert the dust...

Page 39: ...ctivate the power management features with Start Settings Control Panel Mobile PC Power Options Activate the screen saver by clicking Start Settings Control Panel Appearance and Personalization Personalization Change screen saver or Right click on the desktop Switch on the screen saver by clicking Personalization Change screen saver If you need further information about an option you can get help ...

Page 40: ...rmats Without adapter Secure Digital SDTM card Memorycard SecureDigital SDHC With adapter miniSD MicroSD Inserting the memory card Carefully slide the memory card into the slot The label should be facing upward Do not apply excessive force as otherwise the delicate contact surfaces could be damaged Memorycard Depending on the particular type used the memory card may protrude slightly from the slot...

Page 41: ...responding icon in the task bar Left click on the icon Select the card you want to stop and remove Press the Enter key Wait for the dialogue box which tells you that it is now safe to remove the memory card 1 2 On devices with card locking Press on the storage card 1 Memorycard The storage card is released and can now be removed Pull the storage card out of the slot 2 A26391 K214 Z200 1 7619 editi...

Page 42: ...ding symbol in the task bar Left click on the icon to safely remove hardware located in the taskbar Select the ExpressCard you want to stop and remove Press the Enter key Wait for the dialogue box which tells you that it is now safe to remove the ExpressCard 1 2 If the eject button is lowered you must first cause the eject button to release from the notebook casing To do this press the eject butto...

Page 43: ...t engage Do not use excessive force Depending on the particular type used the ExpressCard may protrude slightly from the ExpressCard slot Please refer to the documentation for the ExpressCard for driver installation instructions Loudspeakers and microphones Microphone Loudspeakers Bassloudspeaker subwoofer Volumecontrol Information on the exact position of the speakers and microphone can be found ...

Page 44: ...ctivate the wireless components individually in the BIOS Setup For this to occur you must either not have assigned a supervisor password or if a supervisor password has been assigned you must know this password Pay attention to the additional safety notes for devices with wireless components provided in the Safety manual Details on using Wireless LAN can be found in the online help system included...

Page 45: ...xpressCard for inserting in the ExpressCard slot of your device mobile end device e g mobile phone with Bluetooth or cable connection Ethernet and LAN EthernetLAN The internal network module of your notebook supports Ethernet LAN You can use it to establish a connection to a local network LAN Local Area Network 2 1 Connect the network cable to the LAN port of the notebook 1 Connect the network cab...

Page 46: ...ing Make a note of the passwords and keep them in a safe place If you forget your supervisor password you will not be able to access your notebook Passwords are not covered by your warranty and a charge will be made for assistance Passwordprotection Your password can be up to eight characters long and contain letters and numbers No distinction is made between uppercase and lowercase Protecting BIO...

Page 47: ...ser password You can only change the supervisor password when you have logged into the BIOS Setup Utility with the supervisor password Password Supervisorpassword Userpassword Call the BIOS Setup Utility and go to the Security menu When changing the password proceed exactly as for password assignment Removing passwords To remove a password without setting a new password perform the following steps...

Page 48: ...e prompted to enter your password the supervisor password Deactivating system protection Start the BIOS Setup Utility and go to the Security menu Operatingsystem Select the Password on Boot option and press the Enter key Select the Disabled option and press the Enter key If you do not want to change any other settings you can exit BIOS Setup Utility Select the Save Changes Exit option under Exit T...

Page 49: ... information about whether or not devices need to be switched off please refer to the documentation supplied with the external device Some of the external devices require special drivers see the operating system and external device documentation Connecting devices to the notebook 1 Turn off your notebook and all external devices 2 Unplug your notebook and all devices from the mains sockets 3 Conne...

Page 50: ...otebook s LCD screen You can display the same picture on the external monitor and the notebook LCD screen simultaneously Setting the refresh rate for your external monitor Monitor If the refresh rate set is too high the monitor may be damaged Please see the documentation included with your monitor for the maximum possible refresh rate By setting the optimum refresh rate you will avoid screen flick...

Page 51: ...entation for the USB devices Connect the data cable to the external device Connect the data cable to a USB port of the notebook Device drivers USB devices will be automatically recognised and installed by your operating system How to remove USB devices correctly Always correctly remove the device according to the rules described below to ensure that none of your data is lost Left click on the icon...

Page 52: ...e In of the notebook Headphone port Connectingaudiodevices Audioports Connectingheadphones You can connect headphones or external loudspeakers to your notebook via the headphone port Connect the audio cable to the external device Connect the audio cable to the headphone port of the notebook The internal loudspeakers are disabled If you purchase a cable from a retailer please note the following inf...

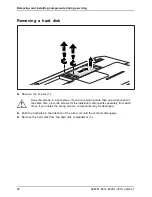
Page 53: ...ways remove the battery Take care when you use the locking mechanisms on the battery and any other component Never use sharp objects such as screwdrivers scissors or knives as leverage to remove covers Notes Board ESD Boards with electrostatic sensitive devices ESD are marked with the label shown When handling boards fitted with ESDs you must always observe the following points You must always dis...

Page 54: ...k must be switched off when installing removing memory modules and it must not be in one of the power saving modes Only use memory expansion modules that have been approved for your notebook see Technical data Page 59 Never use force when installing or removing a memory extension Make sure that foreign objects do not fall into the memory extension compartment The memory module is located underneat...

Page 55: ...ws for the individual components separate from each other If you install the wrong screws components may be damaged Lift the cover off the notebook 2 Removing memory modules 3 2 1 1 Carefully push the two mounting clips outwards 1 Memoryexpansion Memorymodule The memory module snaps upwards 2 Pull the memory module out of its slot in the direction of the arrow 3 A26391 K214 Z200 1 7619 edition 1 4...

Page 56: ...y module downwards until you feel it click into place 2 Attaching the cover 2 1 Place the cover in the correct mounting position 1 If you remove more than one component at the same time keep the screws for the individual components separate from each other and make sure that you use the correct screws If you install the wrong screws components may be damaged Tighten the screw 2 46 A26391 K214 Z200...

Page 57: ...oving a battery Page 25 1 2 Remove the screw 1 Keep the screws in a safe place If you are removing more than one component at the same time store the screws for the individual components separately from each other If you install the wrong screws components may be damaged Lift the cover off the notebook 2 A26391 K214 Z200 1 7619 edition 1 47 ...

Page 58: ...oving more than one component at the same time store the screws for the individual components separately from each other If you install the wrong screws components may be damaged Push the hard disk in the direction of the arrow 2 until the contacts disengage Remove the hard disk from the hard disk compartment 3 48 A26391 K214 Z200 1 7619 edition 1 ...

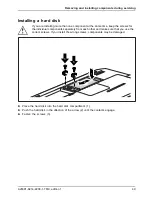
Page 59: ...for the individual components separately from each other and make sure that you use the correct screws If you install the wrong screws components may be damaged 3 3 2 1 Place the hard disk into the hard disk compartment 1 Push the hard disk in the direction of the arrow 2 until the contacts engage Fasten the screws 3 A26391 K214 Z200 1 7619 edition 1 49 ...

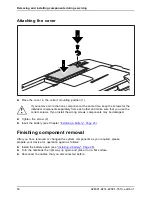
Page 60: ...u install the wrong screws components may be damaged Tighten the screw 2 Insert the battery see Chapter Installing a battery Page 25 Finishing component removal After you have removed or changed the system components as you required please prepare your device for operation again as follows Install the battery again see Installing a battery Page 25 Turn the notebook the right way up again and place...

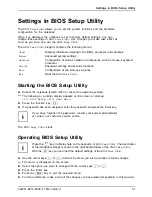
Page 61: ... BIOS Setup Utility Reboot the notebook switch off on or reboot the operating system BIOSSetupUtility The following or a similar display appears on the screen at start up F2 BIOS Setup F12 Boot Menu Press the function key F2 If a password has been assigned enter the password and press the Enter key If you have forgotten the password contact your system administrator or contact our customer service...

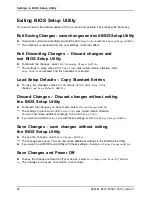
Page 62: ... for all menus of the BIOS Setup Utility choose Load Setup Defaults and Yes Discard Changes Discard changes without exiting the BIOS Setup Utility To discard the changes you have made select Discard Changes and Yes The settings in place when BIOS Setup Utility was called remain effective You can now make additional settings in the BIOS Setup Utility If you want to exitBIOS Setup Utilitywith these ...

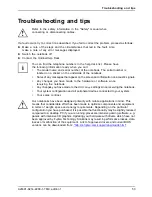
Page 63: ...o the hardware or software since receiving the notebook Any changes you have made to the BIOS Setup settings since receiving the notebook Your system configuration and all peripheral devices connected to your system Your sales contract Our notebooks have been designed primarily with mobile applications in mind This means that considerable effort has been made to optimise components and equipment i...

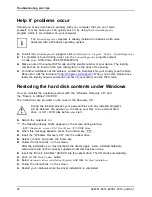
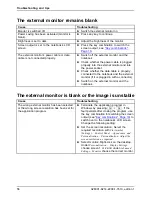
Page 64: ...isk contents under Windows Harddisk Operatingsystem restoring You can reinstall the operating system with the Windows Recovery CD and the Drivers Utilities CD DVD The instructions are provided on the case of the Recovery CD During the reinstall process your personal files and any installed programs will be deleted We advise you to backup your files to an external hard drive or CD DVD disk before y...

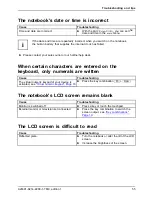
Page 65: ...cters are entered on the keyboard only numerals are written Abeepsoundseverysecond Cause Troubleshooting The virtual numeric keypad of your device is activated see Virtual numeric keypad Page 18 Press the key combination Fn Num The notebook s LCD screen remains blank LCDscreen LCDscreenistoodark Cause Troubleshooting Monitor is switched off Press a key or touch the touchpad External monitor or tel...

Page 66: ...s plugged in with a connector Switch on the external monitor and the notebook The external monitor is blank or the image is unstable Screen Monitor Cause Troubleshooting The wrong external monitor has been selected or the wrong screen resolution has been set for the application program Terminate the application program in Windows by pressing Alt F4 If the fault persists after closing the program u...

Page 67: ...ectly Switch the notebook off Check whether the mains adapter is connected correctly to the notebook Switch the notebook on The notebook stops working Notebook Energysavingmode Cause Troubleshooting Notebook is in energy saving mode Leave energy saving mode An application programme has caused the malfunction Close the application program or restart the notebook by restarting the operating system o...

Page 68: ...e data cable connecting the notebook to the printer is properly connected Check whether the correct printer driver is loaded refer to the printer documentation The radio connection to a network does not work Theradioconnectiontoanetworkdoesnotwork Cause Troubleshooting The wireless component is disabled Switch the radio components on see Switching the wireless components on and off Page 34 The wir...

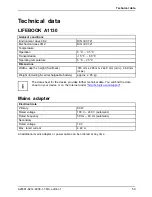
Page 69: ...in 46 9 mm max Weight including 6 cell rechargeable battery approx 2 85 kg The data sheet for the device provides further technical data You will find the data sheet on your device or on the Internet under http ts fujitsu com support Mains adapter Technicaldata Electrical data Primary 80 W Rated voltage 100 V 240 V automatic Rated frequency 50 Hz 60 Hz automatic Secondary Rated voltage 19 V Max ra...

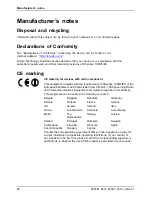
Page 70: ...999 5 EC of the European Parliament and Commission from 9 March 1999 governing Radio and Telecommunications Equipment and mutual recognition of conformity This equipment can be used in the following countries Belgium Bulgaria Denmark Germany Estonia Finland France Greece UK Ireland Iceland Italy Latvia Liechtenstein Lithuania Luxembourg Malta The Netherlands Norway Austria Poland Portugal Rumania ...

Page 71: ...ock 17 indicator 14 CD DVD indicator 26 CD DVD manual emergency removal 27 CE marking 60 Charging capacity battery 24 Cleaning 8 Components installing removing 43 Configuration BIOS Setup Utility 51 Connecting audio devices 42 Connecting headphones 42 Crystal View display cleaning 8 Ctrl Alt Del 20 Cursor control keys 18 Cursor keys 18 D Date is incorrect 55 Declaration of conformity 60 Device set...

Page 72: ... removing 31 Secure Digital 30 Memory expansion installing 46 removing 45 Memory module important notes 44 installing 46 removing 45 Microphone 33 Microphone connecting 42 Mobile operation 7 Monitor connecting 40 drifting display 56 refresh rate 40 remains blank 56 Monitor port see VGA connection socket 40 N Notebook before you travel 7 cannot be started 57 cleaning 8 stops working 57 switching of...

Page 73: ...andby indicator 14 Start key 18 Status indicators 13 Summer time 55 Supervisor password changing 37 entering 37 removing 37 Switching on the notebook 15 Switching on for the first time 11 System configuration 51 System expansion 44 see Adding memory 44 System settings BIOS Setup Utility 51 T Tab key 17 Technical data 59 Mains adapter 59 Technical specifications notebook 59 The radio connection to ...

Page 74: ...Index W Webcam 23 Wireless LAN Switching off module 34 Switching on module 34 64 A26391 K214 Z200 1 7619 edition 1 ...

Reviews: