Removing and installing components during servicing
Removing the cover
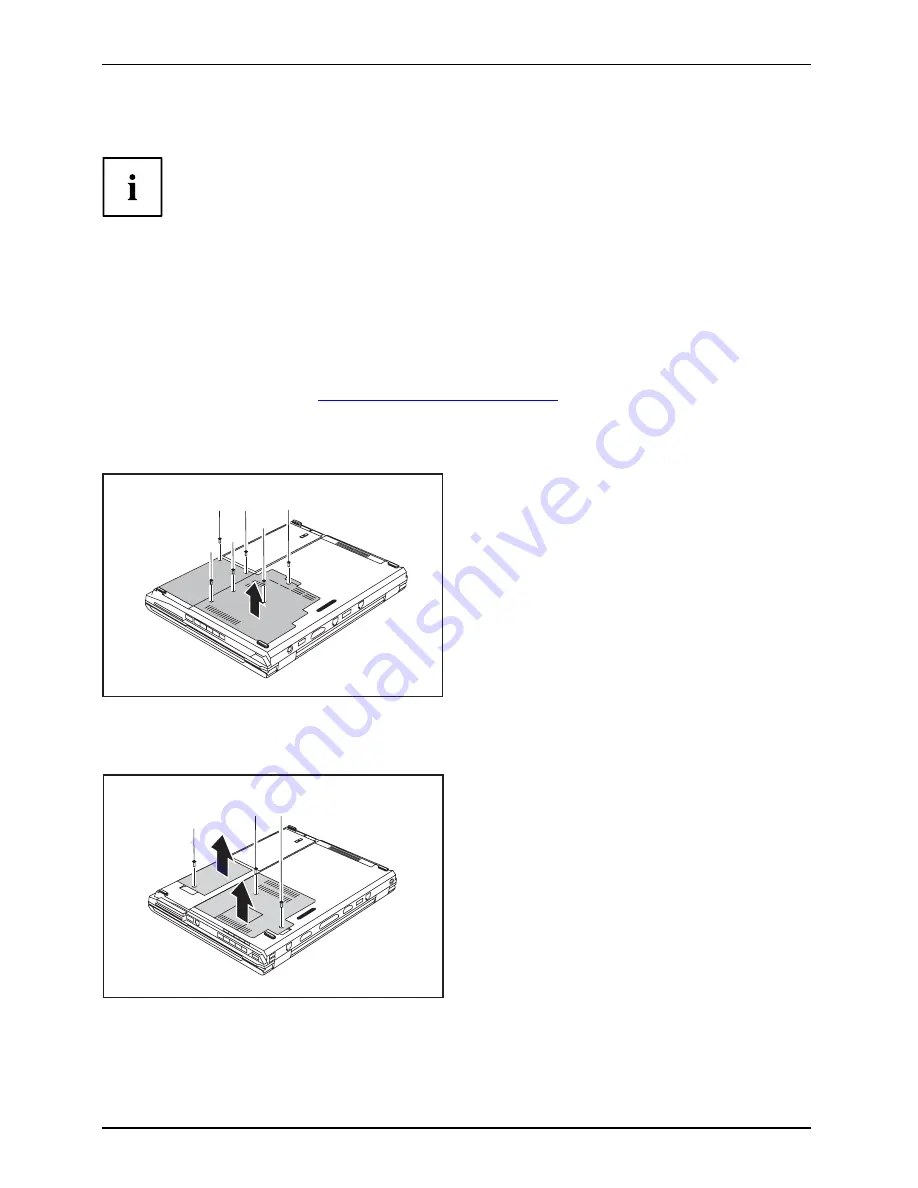
Depending on the particular variant of notebook you have, it may either
have a shared compartment for memory and hard disk or these components
may be housed in two separate compartments.
The casing covers shown here may differ from those of your notebook.
However, the steps are identical.
►
Switch off your notebook and disconnect the power plug from the mains socket.
►
Disconnect all cables connected to the notebook.
►
Close the LCD screen.
►
Turn your notebook over and place it on a stable, sturdy and
fl
at surface. If necessary, lay
a non-slip cloth on this surface to prevent the notebook from being scratched.
►
Remove the battery (see
"Removing the battery", Page 20
).
Devices with a joint compartment for memory and hard disk
1
2
1
1
1
1
1
►
Remove the screws (1).
►
Lift the cover off the notebook in the
direction of the arrow (2).
Devices with separate compartments for memory and hard disk
2
1
1
1
2
►
Remove the screws (1).
►
Lift the covers off the notebook in the
direction of the arrow (2).
28
A26391-K260-Z220-1-7619, edition 1


