Assembly Instructions
SMARTCASE S520
__________________________________________________________________________________________________________________________________________________________
Page 6 of 12
V1.1 - 07/2019
www.fujitsu.com
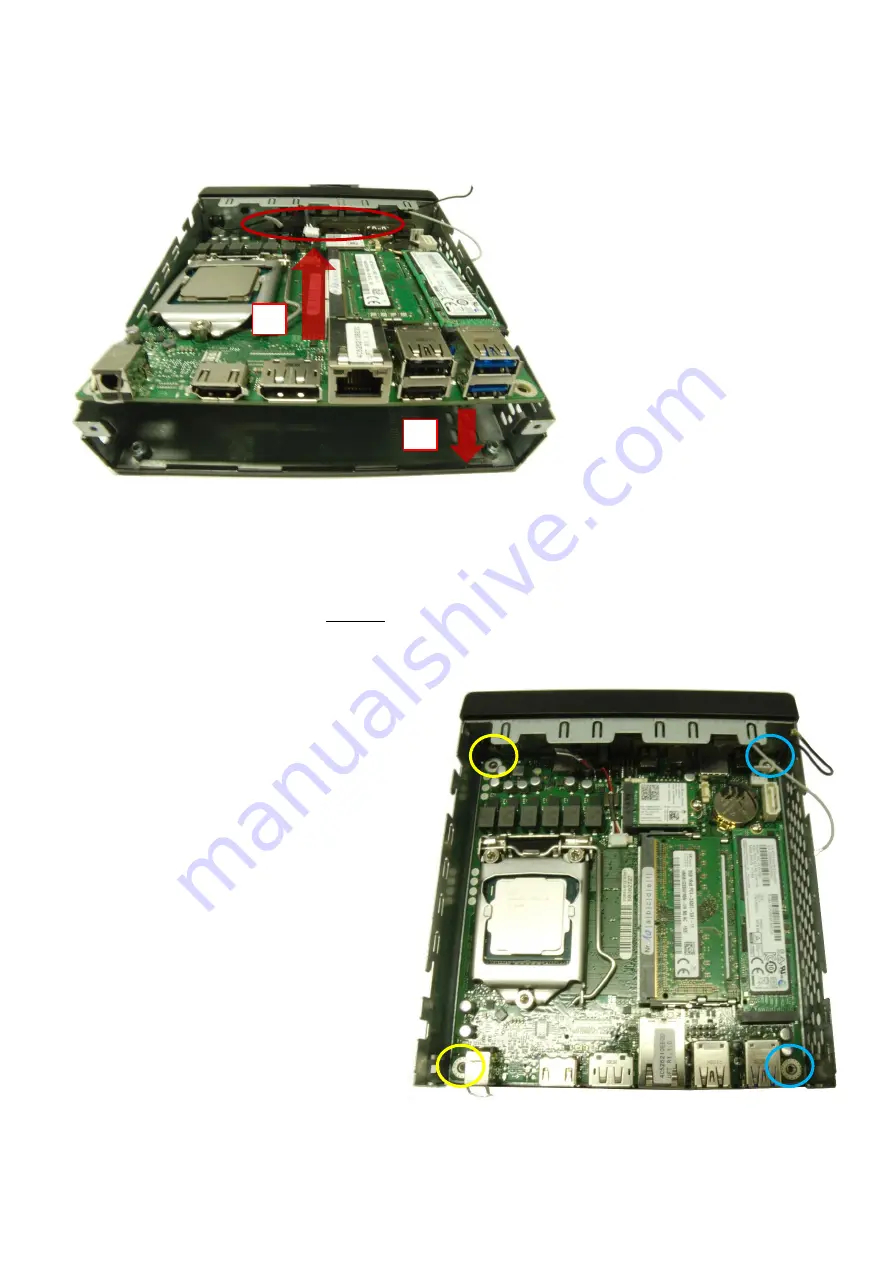
Step 3 Mainboard Assembly
1.
Slide in the mainboard carefully below the power button light towards the front I/O holes(red
circle)
2.
Move the mainboard carefully down to the final position
Take care the thermal pad
1)
and the EMI gasket
1)
stay in the right position.
1) May not be included in the first chassis
shipments due to running change
Push down the mainboard carefully while the four
mounting holes fit onto the chassis nuts.
Assemble only the yellow marked mounting
screws if you want to install the HDD tray.
Without HDD tray, you can assemble the yellow
and blue marked mounting screws (M3x4.5)
Recommeded torque = 0.6Nm
1
2


