35
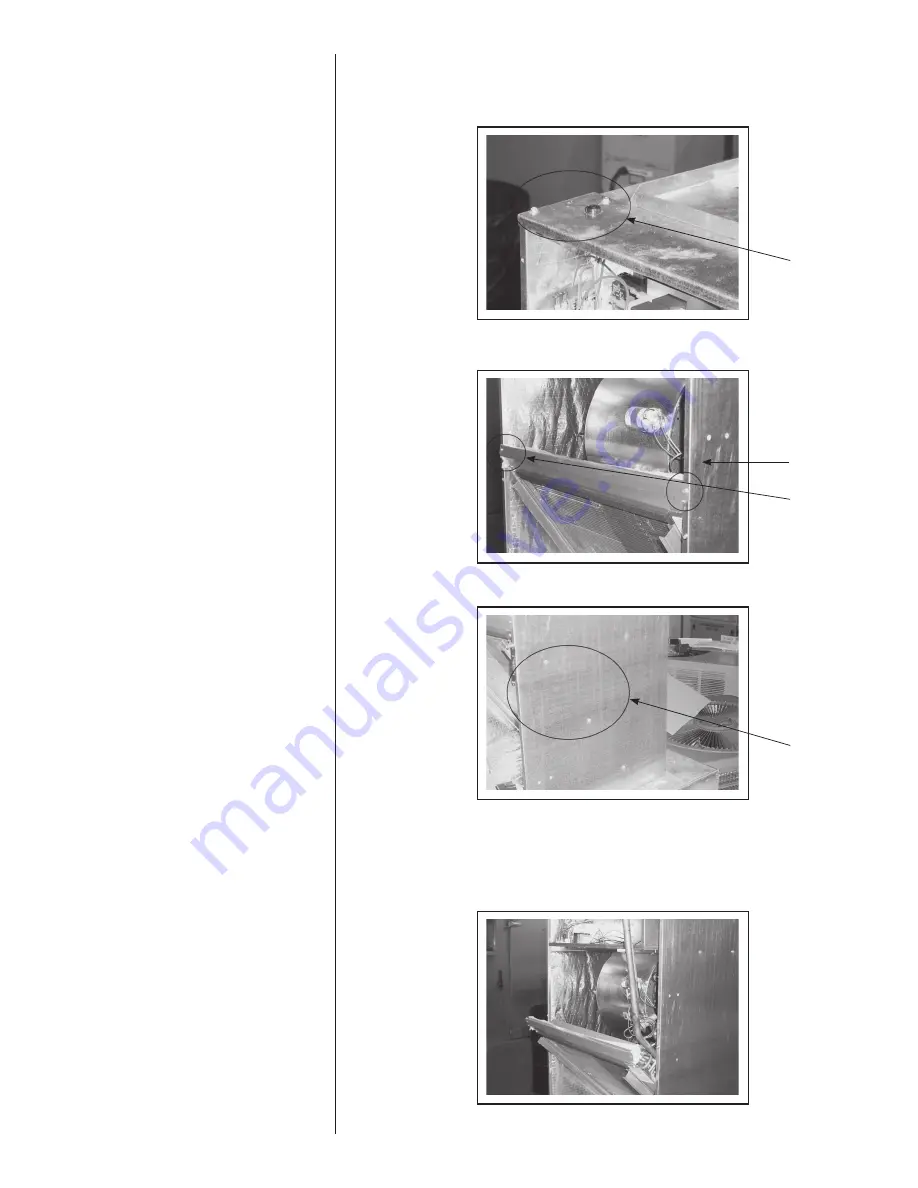
6. Remove the top plate of the air handler by removing the 6 sheet metal screws
attaching the plate to the top of the air handler. (1/4” Socket)
7. Remove 2 sheet metal screws attaching the middle brace to the air handler cabinet.
(1/4” Socket)
8. Remove 4 sheet metal screws (2 on each side of the air handler)
9. Tilt the coil assembly forward. (Note: Depending upon the amount of slack in the
refrigerant lines, the system may have to be evacuated and the suction and liquid
line of the air handler may have to be uninstalled from the system in order to prevent
damage to the refrigerant lines which could result in a total loss of refrigerant)
Remove 6 Sheet
Metal Screws
From Top Plate
Remove 2 Sheet
Metal Screws
From Middle
Brace
Remove 2 Sheet
Metal Screws
From Each Side
of Coil Assembly


