background image

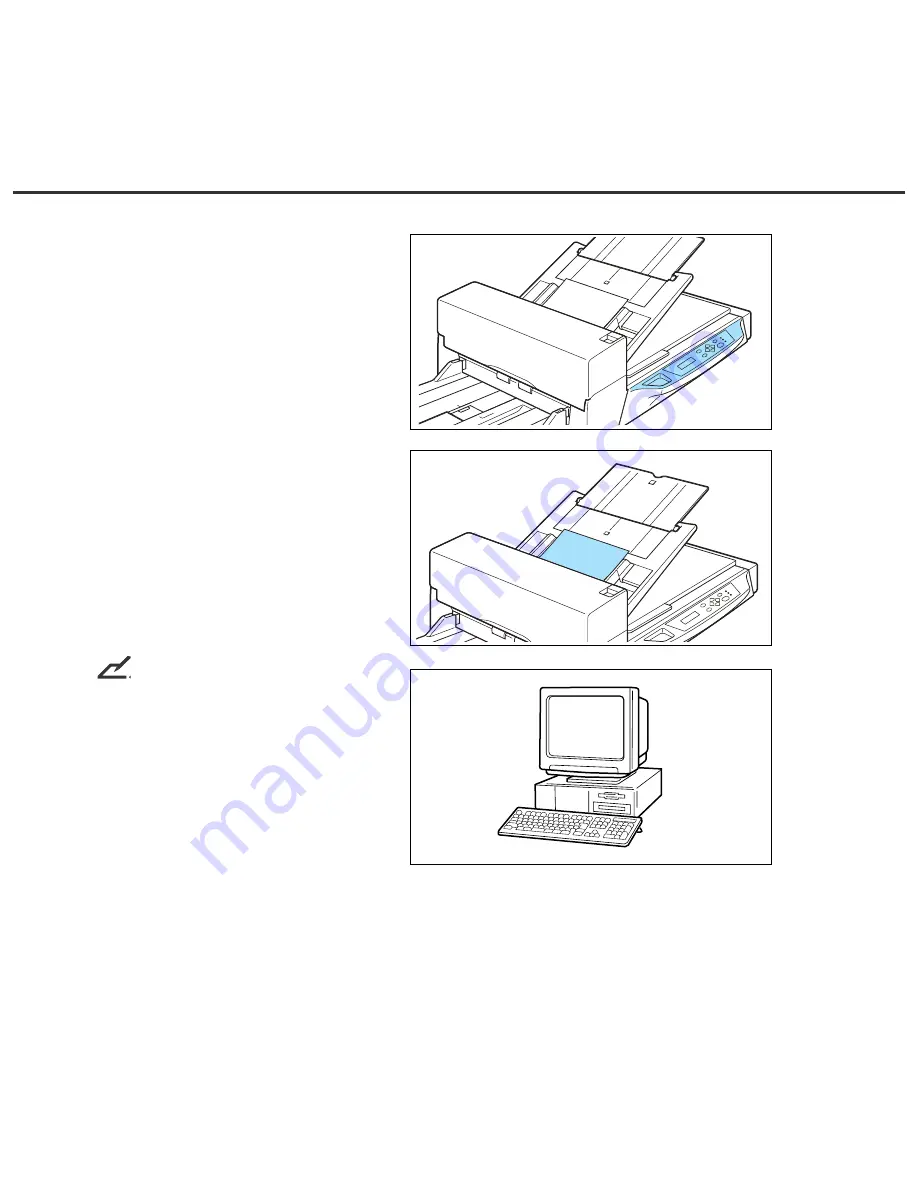
Waking up the Scanner from the Low Power Mode

This section describes how to wake up the
scanner from the Low Power Mode.

To wake up the Scanner, simply press a
button, set the papers on the ADF, or send a
command to scan from the host computer.

 NOTICE

As an E

NERGY

S

TAR

®

 partner, PFU Limited

declares that this scanner meets the
E

NERGY

S

TAR

®

 guidelines for energy efficiency.

Summary of Contents for Fi-4750c - Color Duplex Document Scanner 50ppm 90ipm Ccd/scsi

Page 1: ...fi 4750C Image Scanner Operator s Guide P3PC E672 04EN ...

Page 2: ......

Page 3: ...or design without further notice and without obligation EMC and Safety FCC declaration This equipment has been tested and found to comply with the limits for a Class B digital device pursuant to Part 15 of the FCC Rules These limits are designed to provide reasonable protection against harmful interference in a residential installation This equipment generates uses and can radiate radio frequency ...

Page 4: ...à la norme NMB 003 du Canada As an ENERGYSTAR Partner PFU Limited has determined that this scanner meets ENERGYSTAR guidelines for energy efficiency ENERGYSTAR is a U S registered mark The International ENERGY STAR Office Equipment Program is an international program that promotes energy saving through the penetration of energy efficient computers and other office equipment The program backs the d...

Page 5: ...out securing the sufficient safety required for the High Safety Required Use If you wish to use this Product for High Safety Required Use please consult with our sale person in charge before such use Warning on Reproduction Reproducing bills coins government securities and passports licenses issued by public author or civilian organizations official documents and private paper is illegal and broug...

Page 6: ...g damage to their property An alert message consists of an alert signal and alert statements The alert signals and their meanings are as follows WARNING WARNING indicates that personal injury like pinching of fingers or hands may result if you do not follow a procedure correctly CAUTION CAUTION indicates that damage to the scanner may result if you do not follow a procedure correctly Official PFU ...

Page 7: ... questions scantech fujitsu ca for technical questions Europe FUJITSU EUROPE LTD Hayes Park Central Hayes End Road Hayes Middlesex UB4 8FE U K Phone 44 208 573 4444 Fax 44 208 573 2643 Website http www fel fujitsu com FUJITSU DEUTSCHLAND GMBH Frankfurter Ring 211 80807 München Germany Phone 49 89 323 78 0 Fax 49 89 323 78 100 Website http www fdg fujitsu com E mail hotline_scanner fdg fujitsu com ...

Page 8: ...m hk FUJITSU SYSTEMS BUSINESS THAILAND LTD 12th Fl Olympia Thai Tower 444 Rachadapisek Road Samsennok Huay kwang Bangkok 10310 Thailand Phone 662 512 6066 Fax 662 512 6068 Website http th fujitsu com FUJITSU KOREA LTD Susong Tower Building 83 1 Susong Dong Jongno Gu Seoul Republic of Korea Phone 82 2 3787 6159 Fax 82 2 3787 6164 Website http kr fujitsu com E mail webmaster fkl fujitsu co kr FUJITS...

Page 9: ...CCD image sensors This scanner features duplex scanning and high quality image processing with an automatic document feeder ADF As this manual explains the basic handling of the scanner read it carefully to use the scanner properly Edition Date published Revised contents 01 October 2000 First edition 02 November 2000 Second edition 03 04 August 2003 Manual code changed Manual code P3PC E672 04EN ...

Page 10: ......

Page 11: ...Loading Documents Larger than the Document Bed 3 11 Reading a Page from a Thick Book 3 12 CHAPTER 4 ADF DOCUMENT SPECIFICATION Document Size 4 1 Document Quality 4 2 ADF Document Feeder Capacity 4 4 Areas not to be Perforated 4 5 Grounding Color Areas 4 6 Double Feed Detection Condition 4 7 Job Separation Sheet 4 8 CHAPTER 5 SCANNER SPECIFICATIONS Basic Product Specification 5 1 Installation Speci...

Page 12: ......

Page 13: ... part names operator panel arrangement and the function of parts and LED indica tors After unpacking the scanner confirm that all components have been received by checking them against the list in the first section Checking the Components Units and Assemblies Operator Panel ...

Page 14: ......

Page 15: ...t all the components shown in the following figure have been received If any component is missing please contact your sales agent Manuals Drivers and software Scanner Power cable for North America Power cable for Europe Pad ASY NOTICE The CD ROM contains Cleaning and Maintenance and this manual ...

Page 16: ... its functions Units NOTICE The shipping lock must be switched to the operating position before the scanner can be used Refer to page 2 4 fi 4750C 1 Document cover 2 Document bed Document holding pad 6 Power switch 7 Operator panel 5 Stacker 4 ADF 8 ADF paper chute 9 ADF lever 13 Third party slot 11 Interface connector 10 Power inlet 12 EXT connector ...

Page 17: ... switch Turns the power On or Off 7 Operator panel Contains indicator panel that indicates scanner status 8 ADF paper chute Holds the documents to be fed by the automatic document feeder ADF 9 ADF lever Opens closes the ADF to enable the removal of documents jammed in the feeder 10 Power inlet Connects to an AC power outlet with the power cable 11 Interface connectors Connects to the host system w...

Page 18: ...Assemblies Stacker Thumb screw Guide A ASY Pick roller 2 Pick roller 1 Pad ASY ...

Page 19: ...ator panel is located on the upper right hand side of the scanner The panel consists of an LCD display 16 characters x 2 lines LEDs and buttons Arrangement Operator panel Exit Enter Stop Previous Next Send To Start Read Check ...

Page 20: ...ts pressing this button releases the error status turns off Check and returns to the Scanner Ready screen Operational only during the reading operation stops the reading when the video interface option is used Also turns off the Check lamp LED Indicates that the scanner is On Read Indicates the scanner is reading or ready to read Check If lit this indicates that an alarm occurred Pressing the Stop...

Page 21: ...ned in the previous batch Press Right button to show the total number of sheets scanned after the scaned powered on Paper counter batch counter Abrasion counter Paper counter scan total during power on Abrasion counter To return from Fig 2 to Fig 1 press the both Left and Right button for at least one second Fig 1 Fig 2 ...

Page 22: ...ing the number of the sheets scanned in one batch When the button is pressed This counter increments each time a document is scanned It is not initialized until the power is turned off The counter can be used for example for checking the number of sheets that have been scanned in one day Abrasion counter The abrasion counter counts the accumulated number of scanned sheets This counter increments e...

Page 23: ...Start button to be pressed Only When the Video Interface Option is installed Reading Cleaning request When the Pick roller cleaning is necessary the scanner displays the following on the upper line When the ADF glass cleaning is necessary the scanner displays the following on the LCD Clean the Pick roller or the ADF glass in accordance with the manual Cleaning and Maintenance ...

Page 24: ...st Waiting ADF glass cleaning request Waiting Pick roller and ADF glass cleaning request When the back light of LCD turns OFF the scanner is in Low power mode Example NOTICE One of the following will wake up the scanner Pressing any button Setting the paper on the ADF paper chute Sending a command from the host computer ...

Page 25: ... is displayed if a document is jammed in the ADF See the Cleaning and Maintenance manual for removing jammed documents ADF cover open This message is displayed when the ADF detects the Double feed error Check the document and re scan the document Double feed error This message is displayed if the ADF is not closed completely Close the ADF completely and enable the read operation Waiting When doubl...

Page 26: ... Hopper empty error When the double feed error is displayed Ink cartridge empty error Print disition document error Paper empty ...

Page 27: ...displayed if an error occurs in the scanner If one of the following error messages is displayed turn the power Off and then On again If the same message is displayed contact your service representative Optical alarm front Optical alarm back ...

Page 28: ...hen the total number of sheets scanned by the ADF is less than 100 the message above and the message below are displayed alternately Remove the bracket Shipping Lock that holds the carrier in place Motor fuse alarm Lamp fuse alarm ...

Page 29: ... Image transfer alarm Memory alarm EEPROM alarm FAN alarm IPC board alarm Imprinter error ADF chute error Self diagnostic error ...

Page 30: ......

Page 31: ...TION AND CONNECTIONS The chapter describes how to install and connect the scanner Precautions Inspection Repositioning the Shipping Lock Cable Connections Mounting the Stacker Setting the SCSI ID and the SCSI Terminator ...

Page 32: ......

Page 33: ...ut of the sun and away from heaters These environments may shorten the scanner life or cause hardware failures Do not install the scanner in a place where vibrations may occur This environment may cause hardware failures or may cause the scanner to operate incorrectly Do not install the scanner in humid dusty or damp places These environments may shorten the scanner life or cause hardware failures...

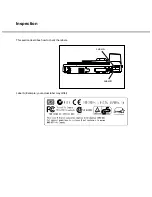
Page 34: ...Label A Label B Inspection This section describes how to check the labels Label A Example your actual label may differ ...

Page 35: ...Label B Example your actual label may differ ...

Page 36: ...r hang more than 20 cm 8 in over the edge of the desk 2 Remove the shipping lock from position A Then install the shipping lock at position B CAUTION Before moving or storing the scanner make sure that the shipping lock is set to the shipment position to prevent possible damage Before setting the shipping lock make sure that the carrier has been returned to the home position B A Good Bad Bad less ...

Page 37: ...lows Turning the power switch Off Press the O side of the power switch to turn the power Off Connecting the power cable Connect the power cable to the power inlet of the device and a power outlet Power inlet Power cable for North America for Europe Power outlet Power OFF Power ON Power switch ...

Page 38: ...nner is in the middle of the daisy chain or of two devices turn the scanner termination Off via the operator panel The factory default for the SCSI ID is 5 If the ID of the scanner is the same as the other device change the ID via the operator panel or change the ID of the other device Back of the image scanner Interface cables To the host system ...

Page 39: ...Mounting the Stacker Mount the stacker using the following procedure 1 Mount the stacker Hook the pins on the stacker to the claws on the image scanner Stacker Pin inside Claw ...

Page 40: ...canner displays Mode select 1 3 Then press the Next button twice The scanner displays Mode select 2 meaning that the setup mode is ready 4 Then press the Enter button several times The scanner displays the following 5 Press the Next button several times then the scanner displays SCSI ID on the upper line of the LCD 6 Select the wished SCSI ID by pressing the or button and press Enter the SCSI ID i...

Page 41: ...the scanner displays Terminator on the upper line of the LCD Select On or Off by pressing or then press Enter NOTICE The scanner includes a SCSI terminator that can be turned On and Off from the operator panel of the scanner The factory default is On 9 Press Exit to return to the Scanner Ready state ...

Page 42: ......

Page 43: ...latbed how to load documents larger than the Document bed and how to read a page from a thick book Refer to the Cleaning and Maintenance manual for routine scanner maintenance Turning the Power On Waking up the Scanner from the Low Power Mode Manual Feed Mode Setting Loading Documents on the ADF Loading Documents on the Flatbed Loading Documents Larger than the Document Bed Reading a Page from a T...

Page 44: ......

Page 45: ...ing the Power On This section describes how to turn the power On Press the I side of the power switch The power turns On and the green Power lamp at the operator panel lights Power Off Power On Power switch ...

Page 46: ...up the scanner from the Low Power Mode To wake up the Scanner simply press a button set the papers on the ADF or send a command to scan from the host computer NOTICE As an ENERGYSTAR partner PFU Limited declares that this scanner meets the ENERGYSTAR guidelines for energy efficiency ...

Page 47: ...etting the manual feed mode are as follows Screen M1 1 Turn the power On and verify that Scanner Ready is displayed on the LCD Screen M2 2 Press then the scanner displays Screen M2 This screen will show up only when Video Interface Option is installed Screen M3 3 Press then the scanner displays Screen M3 Screen M4 4 Press then the scanner displays Screen M4 5 Select Yes by pressing Then press Scre...

Page 48: ...he position of the shipping lock according to the Installation and Connection procedure before operation 1 Lift up the ADF paper chute and lock the bar in its operating position Stacker ADF ADF paper chute Guide Guide lever ADF lever Operating position Bar ...

Page 49: ...d testing using the same type of paper is recommended If the feed testing is not successful use Flatbed for the scanning Paper of uneven thickness for example envelopes Paper with large rumples or curls Paper with folds or tears Tracing paper Coated paper Carbon paper Photographic paper Paper with perforations on the side Non rectangular paper Very thin paper Use Flatbed always for the following d...

Page 50: ...es not exceed the measures shown below To avoid skewing do not feed documents of different widths during the same batch Less than 5mm More than 30mm Top of the paper Less than 3mm More than 30mm Feed direction Top of the paper Read surface Feed direction Read surface ...

Page 51: ...cuments tightly with your left hand and bend them as shown in B Grip the documents tightly with your right hand loosen the grip of your left hand and straighten as shown in C Even up the feed edge of the batch of paper as shown in D NOTICE Reduce the batch size of the documents if double feed or mispick occurs 4 Adjust the stacker extension to the paper size and then flip out the plate A For portr...

Page 52: ...oad the document face down on the ADF paper chute and adjust the guides to the document width NOTICES Squeeze the guide lever to free the guides Do not load document stacks thicker than 8 mm Set the guides so that they touch the document sides Guide lever Both sides Documents Guide max 8 mm 0 32 ...

Page 53: ...6 After the read command is issued from the host system and the documents are read scanned documents are expelled into the stacker for removal ...

Page 54: ...tion Scanner parts involved when loading documents 1 Open the document cover 2 Place the document face down and align the top left corner with the reference mark 3 Slowly close the Document cover 4 Issue the read command from the host system Document cover Document holding pad Document bed Reference mark ...

Page 55: ...Document cover to an angle of approximately 90 degrees and slide the cover in the direction of the arrow to remove it 2 Place the document face down on the Document bed Issue the read command from the host system 3 After the read operation remove the document re attach the Document cover and close it gently Document bed Document ...

Page 56: ... light source during the read operation 1 Open the Document cover 2 Place the book face down on the Document bed 3 Issue the read command from the host system Keep the cover open for the reading operation NOTICE Do not move the book during the read operation Thick book ...

Page 57: ...r describes the document size and document guality required to use the ADF successfully Document Size Document Quality ADF Document Feeder Capacity Areas not to be Perforated Grounding Color Areas Double Feed Detection Condition Job Separation Sheet ...

Page 58: ......

Page 59: ...Document Size The following figure shows document sizes that the scanner can read using the ADF Unit mm Scanner Maximum Minimum A B A B fi 4750C 297 1 7 432 17 53 2 1 74 2 9 11 x 17 inch A8 Portrait ...

Page 60: ... within the following ranges 52 to 127 g m2 13 9 to 34 lb 127g m2 34lb for A8 Precautions For the following types of paper a preliminary document feed test may be necessary to avoid unexpected errors Paper without a constant thickness like envelopes Paper with large rumples or curls See the NOTICE on the next page Paper with folds or tears Tracing paper Coated paper for example some paper used for...

Page 61: ...arbonless papers have a chemical composition that damages the Pad and Pick roller Therefore note the following Cleaning If mispicks occur frequently clean the Pad and Pick roller in accordance with the Cleaning and Maintenance manual Replacement of parts The life of the Pad and Pick roller may be shorter than if PPC paper documents are fed The leading edge of all documents fed using the ADF should...

Page 62: ...per size and the ream weight This information is shown in the following graph B4 67 79 52 39 61 41 50 33 25 31 50 100 100 80 60 40 20 0 52 64 81 104 127 A3 ADF chute loading number of pages A4 Letter or smaller 11 x 17 in ADF Capacity g m2 Unit Conversion g m2 52 64 75 90 104 127 lb 13 9 17 20 24 27 9 34 ...

Page 63: ...ou must read data from such a paper use the flatbed 113 134 96 79 10 15 10 23 12 10 10 5 10 10 Areas that must not be perforated Read reference position Center of sensor arm Center of sensor arm Unit mm Top of paper Front side Paper feeding direction Bottom of paper Center of paper ...

Page 64: ... have paper grounding color white or drop out color If not turn the white level following Off when reading Grounding color area 3 Read reference position Main scanning direction Grounding color white or drop out color area Read surface Subscanning direction Unit mm ...

Page 65: ...the center of the leading edge of the paper is not allowed 10 mm x 10 mm 4 No binding holes are allowed within 35 mm of the middle halfway point along the center of the paper 5 Printing duty 12 or less 6 The deviation of the amount of transparent light on the base color area should be less than 10 NOTICE Certain paper types or a certain condition of paper result in lower detection rates in terms o...

Page 66: ...the job separation sheet 2 Paper conditions The paper conditions are the same as the specification described before But the paper width must be A4 or larger 210 mm or larger in width 15 15 Reading direction Top of paper Bottom of paper Center of paper Job separation sheet ...

Page 67: ...5 CHAPTER SCANNER SPECIFICATIONS This chapter describes the installation specifications dimensions consumables and options Basic Product Specification Installation Specification Dimensions ...

Page 68: ......

Page 69: ...x 2 Green Red Blue 4 Document Size Minimum A8 Portrait Maximum A3 11x17in 5 Document Thickness 52 g m2 14 lb to 127 g m2 34 lb Note 1 6 Optical Resolution 400 dpi 7 Output Resolution Binary 100 150 200 240 300 400 600 800 dpi Color 100 150 200 240 300 400 600 dpi 8 Grayscale level internal 1024 levels 10 bits 9 Scanning Speed mechanical Note 2 Simplex White binary Unicolor binary Color 50ppm 200dp...

Page 70: ...10 Phases Single phase Frequency 50 60 3 Hz Power consumption 160 VA or less Ambient condition Device status Operating Not operating Temperature 5 to 35 C 41 to 95 F 20 to 60 C 4 to 140 F Humidity 20 to 80 8 to 95 Heat capacity 110 kcal H 442 BTU H Shipping Weight kg 28 61 7 Ib Installation Specification The following table lists the installation specifications of the scanner ...

Page 71: ... unit mm 521 234 335 445 696 17 5 in 27 4 in 13 2 in 9 2 in 20 5 in Dimensions ...

Page 72: ......

Page 73: ...6 CHAPTER CONSUMABLES AND OPTIONS This chapter describes the installation specifications dimensions consumables option Consumables Options Video Interface Option IPC 4D Option Imprinter Option fi 475PR ...

Page 74: ......

Page 75: ...d the scanner may not function properly The abrasion counter can be used to check the total number of documents scanned since the last replacement s NOTICE Refer to the fi 4750C Image Scanner Cleaning and Maintenance manual for replacing the consumables NOTICE Certain paper types or conditions might reduce the life of consumables Name Specification Replacement cycle Pad ASY PA03951 0151 Up to 100 ...

Page 76: ...options available for the scanner Contact your Fujitsu Sales agent for more information Name P N Remarks Video Interface Board Option CA02956 2391 IPC 4D CA02919 0521 Image Processing Circuit One per unit fi 475PR Imprinter CA02956 2395 ...

Page 77: ... the Third Party slot plate 2 Insert the board along the rails of the third party slot Make sure that the connector is connected securely Secure the board with two screws CAUTION Protective measures are required to prevent damage from static electricity When the scanner power is turned On again the scanner automatically recognizes the video interface board ...

Page 78: ...n operation is not required NOTICE When the video interface option is installed in the scanner the scanner automatically recognizes the board and changes the display Whenever you press the scanner returns to screen M1 Screen M1 1 Turn the power On and verify that Scanner Ready is displayed on the LCD Screen M2 2 Press then the scanner displays Screen M2 3 Press then the scanner displays Screen 1 S...

Page 79: ...ves to the left 100 150 may appear Then press The scanner displays Screen 6 Screen 6 9 Select Front Density by pressing or As the cursor moves to the right may appear Then press The scanner displays Screen 7 Density display Without IPC With IPC 4D Description option option Very dark Dark AT1 Dynamic Threshold DTC mode AT2 Simplified Dynamic Threshold IPC mode Normal Light Very light This parameter...

Page 80: ...plays Screen 9 Screen 9 12 Select Back Halftone when Duplex was specified by pressing or The parameters are the same as in step 11 Press to confirm The scanner displays Screen 10 Screen 10 13 Select Front Document Type by pressing or Parameter Description No Halftone is Off Therefore binary reading is specified H1 Halftone with dither is specified H2 Halftone with error diffusion is specified L1 A...

Page 81: ...s Screen 12 Screen 12 Example 15 Confirm what you have specified If some parameter needs to change press or to select the corresponding screen and re select the parameter by pressing or and finally press If all parameters are acceptable press to return to the Scanner Ready screen Parameter Description L Line White level following is ON Top 3mm part of the document must be left blank grounding colo...

Page 82: ...mic Threshold Adjusts the threshold level for binarzing to separate text from backgrounds thus capturing light text while preserving its sharpness Noise Removal 2x2 to 5x5 dot removal by matching Removes isolated dots in the size of 2x2 to 5x5 pixels Auto Separation Auto Separation Automatically detects the text area for binarizing and the photo area for dithering Outline Extract Outline Extract o...

Page 83: ...pproximately 3 53mm Printing area Printable area is shown as below C 5mm or more D 140 5mm or less Max 40column E 5mm or more Consumables Print Cartridge CA00050 0262 Imprinter Option fi 475PR fi 475PR Specifications are described below As for the operations and functions of fi 475PR refer to the fi 475PR Operator s Guide included in the package NOTICE E C Printing Area Back D Back Side Center of ...

Page 84: ......

Page 85: ...7 CHAPTER SETUP MODE This chapter describes the setup mode of the scanner Activating the Setup Mode Contents of the Setup Mode ...

Page 86: ......

Page 87: ...nner does not have a video interface option go to the procedure step 3 Press then the scanner with the video interface option displays Screen M2 Screen M3 3 Press then the scanner displays Screen M3 Screen M4 4 Press then the scanner displays Screen M4 5 Press Now the scanner is at Screen 41 page 6 3 in Setup mode NOTICE Any time you press you can return to the Scanner Ready screen ...

Page 88: ...sets the abrasion counter 5 Pick start time setting Specifies the time from document Insertion to the start of picking User can select the most comfortable Pick start time for the job Time 0 2 to 29 8 sec 1 0 sec 6 Time out limit setting Specifies the time the scanner waits for the next document insertion after the last document was scanned Time 27 values from 1 to 1999 sec 30 sec 7 ADF front offs...

Page 89: ...de setting Change the default setting of the duration for power save 5 min to 60 min 15 min 14 Select Interface Select the interface when the scanner has a board in the third party Slot Auto SCSI Tps Auto 15 Display TPS Board ID Number Display the ID number of the board in the third party Slot 16 IPC mode When the IPC 4D image processing board is installed in the third party slot select this IPC 4...

Page 90: ...ht 0 mm Top 0 mm Bottom 0 mm 18 FB Edge Erasing Adjusts the edge area to be erased from the image scanned by the flatbed FB Left Right 0 to 15mm Top 0 to 15mm Bottom 0 to 15mm Left Right 0 mm Top 0 mm Bottom 0 mm 19 Select light source Selects a light source in reading in unicolor R G B W G 20 Line Enhance mode Select this mode when blur of color should be prevented However the reading speed reduc...

Page 91: ...e setting by the host computer is valid the location of the blinking does not move when either switch is pressed 1 No is blinking Paper thickness is not checked 2 Yes and 1 are blinking Paper thickness is checked However a detected double feed error is displayed on the screen only processing is continued 3 Yes and 2 Stop are blinking Paper thickness is checked When the double feed error is detecte...

Page 92: ...h is pressed 1 No is blinking Paper length is not checked 2 Yes and 1 are blinking Paper length is checked However a detected double feed error is displayed only on the screen processing is continued 3 Yes and 2 Stop are blinking Paper length is checked When the double feed error is detected the scan processing is stopped The error is then reported to the host If you want to disable the double fee...

Page 93: ...rinted on the colored background Preset 2 Produces an image with good contrast Preset 3 OCR Smoothing Preset 4 Image Smoothing Preset 5 Dither The following built in IPC pre settings can be selected even though IPC 4D is not installed Sharpen Darken Character Copy Quality Screen 43 1 3 At Screen 43 1 select Yes or No Note that when you select Yes the IPC setting from the Host computer is ignored I...

Page 94: ...ounter select No and press Finally press to return Screen 44 1 3 At Screen 44 1 If you want to reset the abrasion counter select Yes and press If you do not want to reset it select No and press Press to return 5 Setting the pick start time When you set the pick start time you must set it as follows 1 Press Next or Previous and let the scanner display Screen 45 Screen 45 2 At Screen 45 press to inc...

Page 95: ...he setting NOTICE Default is 30 seconds 3 Press to return 7 ADF Front Offset Setting 8 ADF Back Offset Setting 9 Flatbed Offset Setting Screen 47 1 Press Next or Previous and let the scanner display the following Front Offset by ADF Screen 47 Back Offset by ADF Screen 48 Offset of the Flatbed Screen 49 Screen 48 Screen 49 Screen A 2 Select Yes by pressing the or button then press The scanner displ...

Page 96: ...een C Example of ADF Front Offset 4 At Screen B press to increase the offset or press to decrease offset The increment or decrement is 0 5 mm Then press to activate the setting The scanner displays Screen C Screen C Example of ADF Back Offset Screen C Example of FB Offset 5 At Screen C press to increase the offset or press to decrease the offset Then press to activate the setting The scanner displ...

Page 97: ...3 Press to return 11 SCSI ID Setting Screen 51 1 Press Next or Previous and let the scanner display Screen 51 2 At Screen 51 press or to select SCSI ID Then press to activate the setting 3 Press to return 12 SCSI Terminator Setting Screen 52 1 Press Next or Previous and let the scanner display Screen 52 2 At Screen 52 press or to select Terminator Then press to activate the setting 3 Press to retu...

Page 98: ... or to select the time duration A minimum of 5 min to the maximum of 60 minutes can be selected Then press to activate the setting NOTICE At Screen 53 No does not mean that you can turn off the Low Power Mode Power Save Mode You cannot disable the Power Save Mode The default time recommended by the ENERGYSTAR program is 15 minutes The default for the M4097D scanner is 15 minutes as recommended 4 P...

Page 99: ...e the setting NOTICES Normally this setting does not have to be changed When an appropriate board is installed in the third party slot of the scanner the scanner automatically turns off the SCSI interface activating the board in the third party slot Screen 54 can be used to forcibly change the selected interface The selected interface is then forcibly changed The SCSI interface and the board insta...

Page 100: ...stalled properly the display shows ID 7 2 Press to return 16 Select Built In IPC 4D Image Processing Screen 56 1 Press Next or and let the scanner display the Screen 56 2 At Screen 56 press or to select Standard or IPC 4D When Standard is selected the scanner uses its built in image processing On the other hand the scanner selects the image processing of the IPC 4D when the IPC 4D is installed and...

Page 101: ...unctions is intended for compatibility with the IPC 3 3D The matrix size used in the IPC 4D is larger than the one in the fi 4750C The fi 4750C Built in Dynamic Threshold is a new algorithm NOTICE 17 Setting ADF page edge filter 1 Press Next or Previous and let the scanner display Screen 57 2 At Screen 57 press and select Yes to change the setting Then press to display Screen 57 1 3 If you want to...

Page 102: ...bove set value 6 At Screen 57 3 designate the area through or button 7 Press to declease or to increase the value The increment decrement is 1mm and the value can be selected from 7 through 7 Then press Enter to display Screen 57 4 NOTICE When a plus figure is designated the area is set upward from the bottom edge of the image When a minus figure is designated the area is set downward from the bot...

Page 103: ...dge filter area is in proportion to the above set value 10 At Screen 57 5 designate the page edge filter area through or button 11 Press to declease or to increase the value The increment decrement is 1mm and the value can be selected from 0 through 15 Then press to display Screen 58 NOTICE The page edge filter area from the right edge towards the left is in proportion to the above set value The s...

Page 104: ...ange the setting select No by button and press to display Screen 58 2 NOTICE When you select Yes the values on the screens 58 2 through 58 5 become 0 4 At Screen 58 2 designate the page edge filter area through or button 5 Press to decrease or to increase the value The increment decrement is 1mm and the value can be selected from 0 through 15 Then press to display Screen 58 3 NOTICE The page edge ...

Page 105: ...e of the image When a minus figure is designated the area is set downward from the bottom edge of the image The standard value is the paper length 3mm 8 At Screen 58 4 designate the page edge filter area through or button 9 Press to declease or to increase the value The increment decrement is 1mm and the value can be selected from 0 through 15 Then press to display Screen 58 5 NOTICE The page edge...

Page 106: ...to increase the value The increment decrement is 1mm and the value can be selected from 0 through 15 Then press to display Screen 58 or Screen 41 NOTICE The page edge filter area from the right edge towards the left is in proportion to the above set value The standard value is the paper width 3mm ...

Page 107: ...ivate the setting NOTICES 1 The specification from the host computer has priority 2 The default is G Green 3 Press to return 20 Line Enhance Mode setting Screen 60 1 Press Next or Previous and let the scanner display Screen 60 2 At Screen 60 press or to select On or Off Press if you want to activate the setting NOTICE The reading speed reduces to half when On is selected 3 Press to return ...

Page 108: ...must reset the ink remain counter even if you replace the print cartridge before its service life is complete 1 Press Next or Previous to display Screen 61 First No blinks 2 Press then Reset blinks Screen 61 1 3 Press The reset execution screen appears First No blinks Screen 61 2 4 Press then Yes blinks Screen 61 3 5 Press to perform reset operation The ink remain indicator returns to nnnnnn Scree...

Page 109: ...elect On Press if you want to activate the setting function The scanner displays Screen 62 1 indicating that the setting function is activated NOTICE When the setting function is disabled the screen is as shown right Screen 62 1 3 At Screen 62 1 select the number of digits Press or to select 5 or 8 then press The scanner displays Screen 62 2 Screen 62 2 4 At Screen 62 2 select the initial number P...

Page 110: ...creen 62 4 6 At Screen 62 4 specify whether the number is reset at once Press or to select yes if you want to reset at once press The scanner terminates the setup mode NOTICE The command from the host computer overrides the specification of the operator panel When the host computer issues a command disabling the specification of the operator panel Screen 62 4 does not appear ...

Page 111: ...256 codes numbered 0 to 255 used to communicate information between a computer and another device such as a scanner Automatic separation An image processing method in which the scanner automatically detects difference between text and photos and chooses the threshold accordingly Automatic separation allows the scanner to switch between line mode and half tone mode in one pass Automatic start mode ...

Page 112: ...acent pixels The purpose of this technique is to minimize the average error between read and printed densities Density data for adjacent pixels is modified by diffusing errors on the objective pixel into several pixels which are then binarized This maintains high grayscale levels and resolution during reading while suppressing more patterns by dotted halftone images such as newspaper photographs F...

Page 113: ...g An image is read with specified parameters Interface The connection that allows communication from one part of a system to another For example electrical signals are transferred between the computer and scanner over an interface cable Inversion Reverse image reading In reverse image reading data is changed from black to white and vice versa IPC preset mode While reading binary images it is neces...

Page 114: ...perator panel A panel containing the scanner indicators and buttons The operator panel is used to control scanner operations such as loading document selecting features and changing setup options Outline extraction The boundary between black and white areas is traced and the outline extracted for closed areas PAPER JAM A warning informing the user that document is jammed in the transport unit or t...

Page 115: ...s 10 feet can be used This is often necessary in networking environments where the scanner may be shared SETUP mode In this mode users can view or set a variety of function in off line Simplex reading mode Only the front side of the document is read in this mode Place the documents face up at the center of the hopper table Smoothing A process that eliminates jaggies from slanted lines and curves I...

Page 116: ...ce board provided by a third party can be installed and used Time out limit This is the time the scanner waits for next document insertion after the last document feeding The scanner returns Paper Empty when no document is set after time out limit TPS Third Party Slot ...

Page 117: ...k 7 2 feed detection 7 5 feed error 1 11 Duplex reading mode 6 4 ENTER button 1 5 1 6 EXIT button 1 5 1 6 Feeding direction 4 1 4 3 Halftone processing 6 6 Heat capacity 5 2 Hopper empty 1 11 Image processing board 7 3 7 14 input power 5 2 Inspection 2 2 Installation specifications 5 2 Interface connectors 1 2 1 3 IPC presetting 7 2 7 7 status 7 3 7 11 Label A 2 2 B 2 3 Landscape orientation 6 5 L...

Page 118: ...C preset mode 7 7 Offset 7 9 picking start time 7 8 SCSI ID 7 11 time out limit 7 9 Setup mode 7 1 7 2 Simplex 6 4 Size 6 5 Specifications 5 1 5 2 Stacker 1 2 1 4 2 7 Start button 1 5 1 6 Stop button 1 5 1 6 Terminator 2 8 Temporary error 1 11 Third party slot 1 2 1 3 Turning the power on 3 1 the power off 2 5 Units 1 2 Units and Assemblies 1 2 Weight 5 2 Left Arrow Key button 1 6 Right Arrow Key ...

Page 119: ...Declarations of Conformity ...

Page 120: ......

Page 121: ......

Reviews: