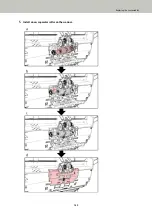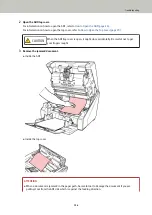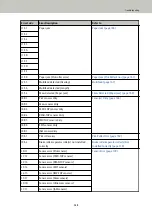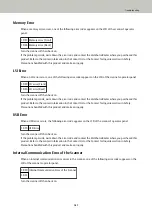
A supplementary procedure describing how to install the separator roller on the scanner is provided below.
a
Insert the right side of the separator roller shaft first, then the left side so that the tab fits in the
groove.
b
Push up the lever which is located on the left side of the separator roller.
c
Push up the lever which is located on the right side of the separator roller.
d
Close the roller cover, and make sure that both ends of the cover are locked firmly.
6
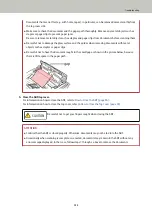
Close the ADF.
For details, refer to
How to Close the ADF (page 28)
CAUTION
Be careful not to get your fingers caught when closing the ADF.
ATTENTION
●
Do not close the ADF while the roller cover is open.
●
Confirm that the separator roller is installed properly. When the separator roller is not installed properly,
it causes feeding errors such as paper jams.
7
Plug in the power cable and turn on the scanner.
For details, refer to
How to Turn the Power ON (page 19)
.
8
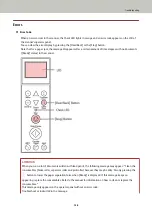
Reset the separator roller counter.
Use one of the following methods to reset the counter.
●
Select [23: Show/Clear Counters] from [Main Menu] on the operator panel, then reset the counter.
For details, refer to
Checking and Resetting the Counters (page 83)
●
Start up the Software Operation Panel and reset the counter.
For details, refer to
Resetting the Sheet Counters (page 218)
.
Replacing the Consumables
146
Summary of Contents for fi-7800
Page 1: ...P3PC 6502 01ENZ2 FUJITSU Image Scanner fi 7800 fi 7900 Operator s Guide ...
Page 25: ...Make sure to push the hopper until it locks Scanner Overview 25 ...
Page 65: ...Fig 1 How to Load Documents 65 ...
Page 71: ...ATTENTION A8 size cannot be scanned in a mixed batch How to Load Documents 71 ...
Page 105: ...Put your finger on the tab in the center and push it down Various Ways to Scan 105 ...
Page 130: ... Inside the top cover sensors 2 units Paper path upper side sensors 9 units Daily Care 130 ...
Page 143: ...4 Remove the separator roller from the scanner Replacing the Consumables 143 ...
Page 145: ...5 Install a new separator roller on the scanner Replacing the Consumables 145 ...
Page 148: ...5 Remove the brake roller from the scanner Replacing the Consumables 148 ...
Page 150: ...6 Install a new brake roller on the scanner Replacing the Consumables 150 ...
Page 179: ...For details refer to Adjusting the Paper Separation Force page 37 Troubleshooting 179 ...
Page 201: ...The password is set Operational Settings 201 ...
Page 204: ...The password is set Operational Settings 204 ...
Page 220: ...For details about cleaning refer to Daily Care page 115 Operational Settings 220 ...
Page 251: ...HINT This setting can also be configured from the operator panel Operational Settings 251 ...
Page 272: ... 1 The depth excludes the hopper stacker and tabs 2 Includes the package weight Appendix 272 ...
Page 273: ...Outer Dimensions The outer dimensions are as follows Unit mm in Appendix 273 ...


