How to Use Function Selection
This section explains the Function Selection.
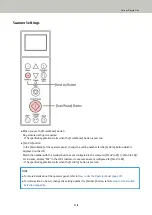
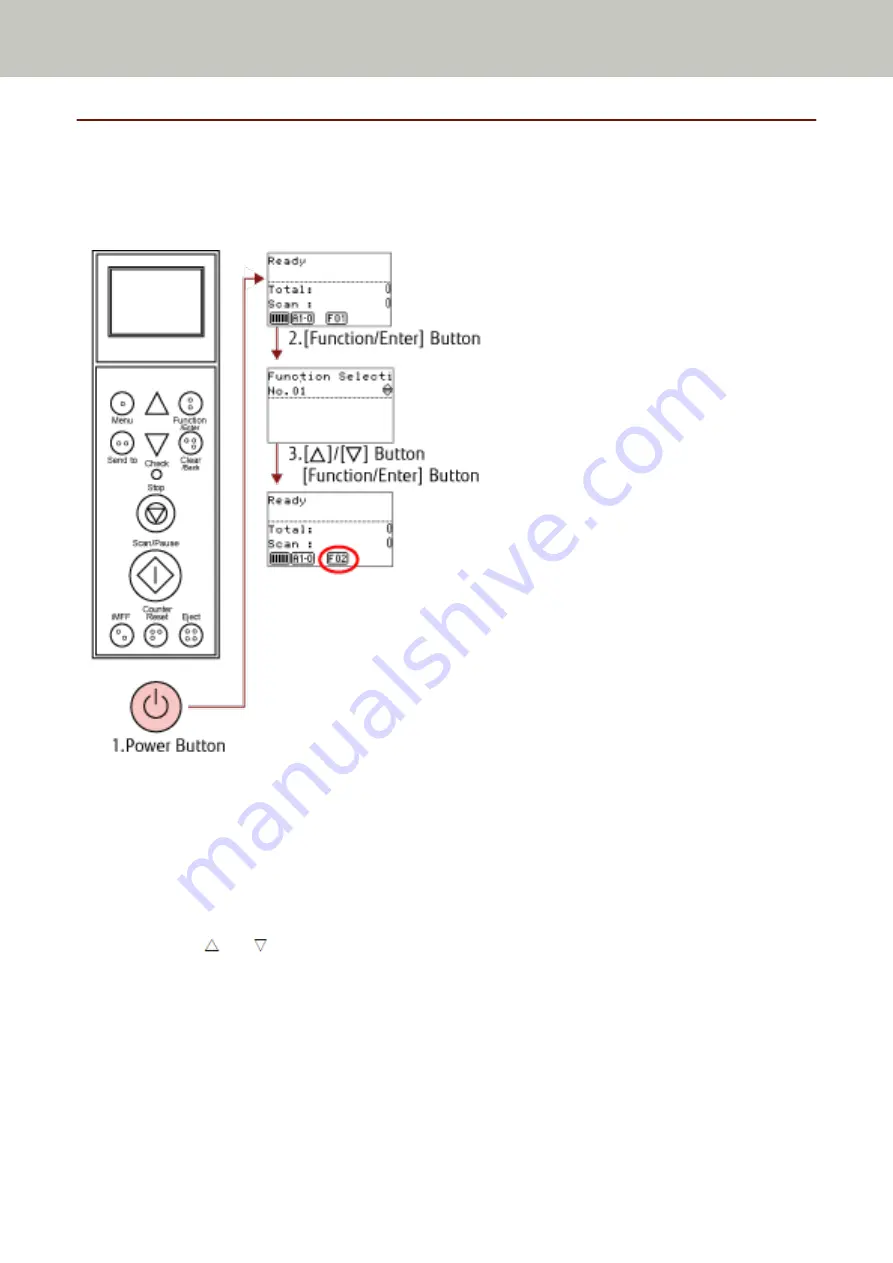
When you press the [Function/Enter] button in the [Ready] screen, [Function Selection] is displayed.
By using Function Selection, you can configure an application to be launched when the [Send to] button is pressed.
1
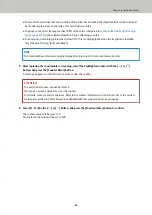
Press the power button on the front of the scanner.
[Ready] is displayed on the LCD.
The indicator displays [F01] when the power has just been turned on.
2
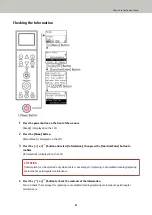
Press the [Function/Enter] button to confirm.
[Function Selection] is displayed on the LCD.
3
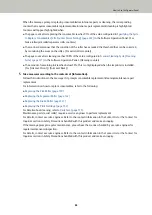
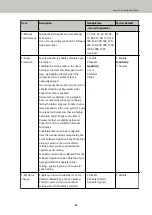
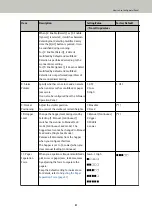
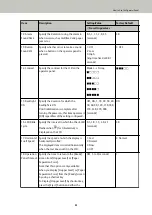
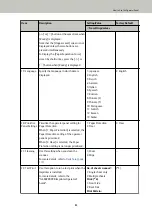
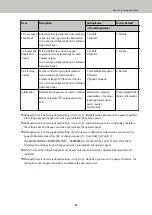
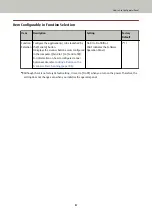
Press the [ ] or [ ] button and select a parameter, then press the [Function/Enter] button to confirm.
For details about the settings, refer to
Item Configurable in Function Selection (page 97)
.
The setup is completed when the LCD displays the [Ready] screen.
The configured parameter is shown by the indicator.
In this example, the indicator displays [F02].
Note that No.C indicates that the setting is fixed at the Software Operation Panel. If No.C is selected, [SOP] is
displayed on the indicator.
How to Use the Operator Panel
96
Summary of Contents for fi-7800
Page 1: ...P3PC 6502 01ENZ2 FUJITSU Image Scanner fi 7800 fi 7900 Operator s Guide ...
Page 25: ...Make sure to push the hopper until it locks Scanner Overview 25 ...
Page 65: ...Fig 1 How to Load Documents 65 ...
Page 71: ...ATTENTION A8 size cannot be scanned in a mixed batch How to Load Documents 71 ...
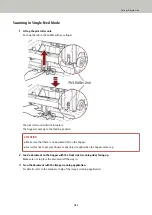
Page 105: ...Put your finger on the tab in the center and push it down Various Ways to Scan 105 ...
Page 130: ... Inside the top cover sensors 2 units Paper path upper side sensors 9 units Daily Care 130 ...
Page 143: ...4 Remove the separator roller from the scanner Replacing the Consumables 143 ...
Page 145: ...5 Install a new separator roller on the scanner Replacing the Consumables 145 ...
Page 148: ...5 Remove the brake roller from the scanner Replacing the Consumables 148 ...
Page 150: ...6 Install a new brake roller on the scanner Replacing the Consumables 150 ...
Page 179: ...For details refer to Adjusting the Paper Separation Force page 37 Troubleshooting 179 ...
Page 201: ...The password is set Operational Settings 201 ...
Page 204: ...The password is set Operational Settings 204 ...
Page 220: ...For details about cleaning refer to Daily Care page 115 Operational Settings 220 ...
Page 251: ...HINT This setting can also be configured from the operator panel Operational Settings 251 ...
Page 272: ... 1 The depth excludes the hopper stacker and tabs 2 Includes the package weight Appendix 272 ...
Page 273: ...Outer Dimensions The outer dimensions are as follows Unit mm in Appendix 273 ...


