33
U s e r I n s t a l l a b l e F e a t u r e s
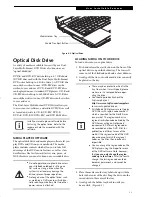
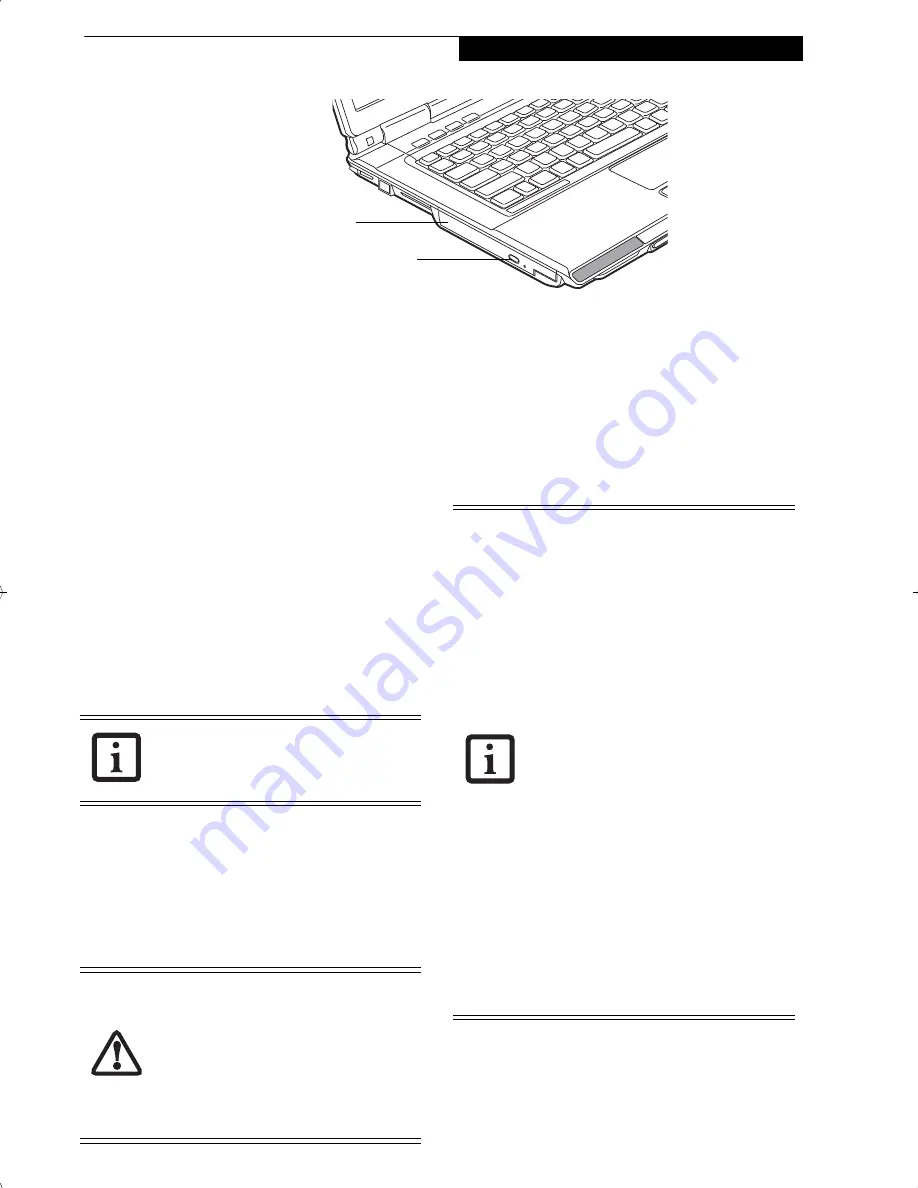
Figure 4-2. Optical Drive
Optical Disk Drive
A variety of media is available to use with your Dual-
Layer Multi-Format DVD Writer, also known as an
“optical disk drive”.
DVD-R and DVD-RW discs hold up to 4.7 GB of data
(DVD-R discs used with the Dual-Layer Multi-Format
DVD writer hold up to 8.5 GB of data.). A DVD-R disc
can only be written to once; DVD-RW discs can be
written to over and over. DVD-R and DVD-RW discs
can be played on most standard DVD players. CD-R and
CD-RW discs hold up to 640 MB of data. A CD-R disc
can only be written to once; CD-RW discs can be written
to over and over.
The Dual-Layer Multi-Format DVD Writer allows you
to access movies, software, and audio DVD/CDs as well
as to read and write to CD-R, CD-RW, DVD-R,
DVD+R, DVD-RW, DVD+RW, and DVD RAM discs.
MEDIA PLAYER SOFTWARE
The optical disk drive and media player software let you
play DVDs and CDs on your notebook. The media
player includes controls which allow you to take full
advantage of the DVD movie features, as well as stan-
dard features like fast forward, fast reverse, pause, etc.
With this drive you can also burn onto recordable discs.
LOADING MEDIA ON YOUR DRIVE
To load a disc into your optical drive:
1. Push and release the eject button on the front of the
optical drive to open the holder tray. The tray will
come out of the LifeBook notebook a short distance.
2. Gently pull the tray out until a media disc can easily
be placed in the tray.
3. Place the media into the tray, label side up, with the
hole in the center of the disc. Snap the disc onto the
raised circle in the center of the tray.
4. Gently push the holder tray back in until you
hear a click.
(Figure 4-3)
Media Holder Tray
Media Tray Eject Button
Install your media player software before
first using the optical drive. Refer to the
readme or help file associated with the
software.
■
Do not operate your optical drive unless
your LifeBook notebook is sitting on a
flat surface. Using a drive when the
system is not level may damage the
drive or prevent proper operation.
■
Prolonged use of the optical drive, such
as watching a DVD movie, will substan-
tially reduce your battery life if no other
power source is attached.
■
There may be a protective sheet in the
tray from when it was shipped; please
make sure it is removed before oper-
ating the drive.
■
You should periodically check the
Fujitsu website at
http://www.us.fujitsu.com/computers
for current updated drivers.
■
All LifeBook DVD players are set to play
DVD titles with region code number 1
which is specified for the North Amer-
ican market. The region number is a
regional restriction code defined by the
DVD Forum acting on Hollywood
requirements. Different region codes
are recorded on video DVD titles for
publication in different areas of the
world. If the regional code of the DVD
player does not match the regional
codes on the titles, then playback is
impossible.
■
You can change the region code on the
DVD player using the Properties menu
of the DVD software. Note, however,
that
you can only change the region
code up to four times.
After the fourth
change, the last region code entered
becomes permanent, and cannot be
changed.
ferret.book Page 33 Monday, April 23, 2007 1:32 PM
Summary of Contents for Lifebook A6030
Page 1: ...Fujitsu LifeBook A6030 Notebook User s Guide ...
Page 2: ......
Page 8: ...L i f e B o o k A 6 0 0 0 S e r i e s N o t e b o o k ...
Page 9: ...1 Preface ...
Page 10: ...L i f e B o o k A 6 0 0 0 S e r i e s N o t e b o o k ...
Page 12: ...2 L i f e B o o k A 6 0 0 0 S e r i e s N o t e b o o k ...
Page 13: ...3 2 Getting to Know Your LifeBook Notebook ...
Page 14: ...4 L i f e B o o k A 6 0 0 0 S e r i e s N o t e b o o k S e c t i o n T w o ...
Page 31: ...21 3 Getting Started ...
Page 32: ...22 L i f e B o o k A 6 0 0 0 S e r i e s N o t e b o o k S e c t i o n T h r e e ...
Page 39: ...29 4 User Installable Features ...
Page 40: ...30 L i f e B o o k A 6 0 0 0 S e r i e s N o t e b o o k S e c t i o n F o u r ...
Page 54: ...44 L i f e B o o k A 6 0 0 0 S e r i e s N o t e b o o k S e c t i o n F o u r ...
Page 55: ...45 5 Troubleshooting ...
Page 56: ...46 L i f e B o o k A 6 0 0 0 S e r i e s N o t e b o o k S e c t i o n F i v e ...
Page 70: ...60 L i f e B o o k A 6 0 0 0 S e r i e s N o t e b o o k S e c t i o n F i v e ...
Page 71: ...61 6 Care and Maintenance ...
Page 72: ...62 L i f e B o o k A 6 0 0 0 S e r i e s N o t e b o o k S e c t i o n S i x ...
Page 76: ...66 L i f e B o o k A 6 0 0 0 S e r i e s N o t e b o o k S e c t i o n S i x ...
Page 77: ...67 7 System Specifications ...
Page 78: ...68 L i f e B o o k A 6 0 0 0 S e r i e s N o t e b o o k S e c t i o n S e v e n ...
Page 83: ...73 8 Glossary ...
Page 84: ...74 L i f e B o o k A 6 0 0 0 S e r i e s N o t e b o o k S e c t i o n E i g h t ...
Page 92: ...82 L i f e B o o k A 6 0 0 0 S e r i e s N o t e b o o k S e c t i o n E i g h t ...
Page 93: ...83 Appendix A Integrated Wireless LAN User s Guide ...
Page 94: ...84 L i f e B o o k A 6 0 0 0 S e r i e s N o t e b o o k A p p e n d i x ...
Page 105: ...95 Appendix B Using the Fingerprint Sensor ...
Page 106: ...96 L i f e B o o k A 6 0 0 0 S e r i e s N o t e b o o k ...
Page 114: ...104 L i f e B o o k A 6 0 0 0 S e r i e s N o t e b o o k ...
Page 118: ...108 L i f e B o o k A 6 0 0 0 S e r i e s N o t e b o o k I n d e x ...
Page 119: ......
Page 120: ......


