18
L i f e B o o k B S e r i e s – S e c t i o n T w o
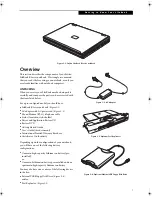
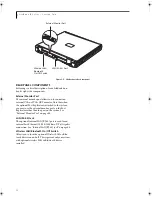
DRAGGING
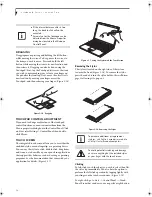
Dragging means pressing and holding the left button,
while moving the cursor. To drag, move the cursor to
the item you wish to move. Press and hold the left
button while moving the item to its new location and
then release it. Dragging can also be done using the
Touchpad. First, tap the Touchpad twice over the item
you wish to move making sure to leave your finger on
the pad after the final tap. Next, move the object to its
new location by moving your finger across the
Touchpad, and then releasing your finger.
(Figure 2-16)
Figure 2-16. Dragging
TOUCHPAD CONTROL ADJUSTMENT
If you need to change or adjust any of the touchpad
control functions, you can customize them from the
Mouse properties dialog box in the Control Panel. Click
on Start, select Settings > Control Panel, then double-
click Mouse.
TOUCH SCREEN
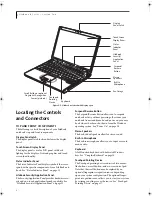
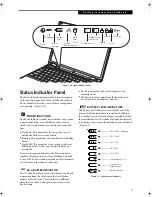
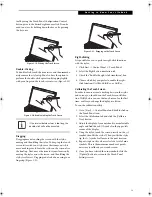
The integrated touch screen allows you to use either the
included stylus, or your fingertip, as a pointing device.
You can use the stylus to click, double-click, drag items
and icons, or to draw like a pen or pencil in applications
that support this behavior, such as drawing or painting
programs. See the documentation that came with your
application for details.
(Figure 2-17)
Figure 2-17. Using the Stylus with the Touch Screen
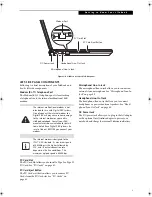
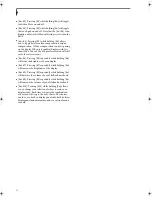
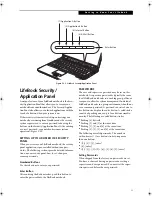
Removing the Stylus
The stylus is located on the right side of the system,
towards the front
(Figure 2-18)
. To remove the stylus,
press the end of it into the stylus holder; this will disen-
gage it, allowing it to pop out.
Figure 2-18. Removing the Stylus
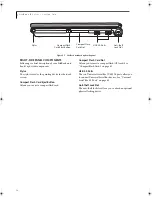
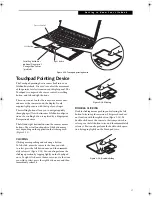
Clicking
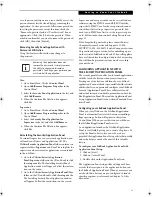
To left-click, touch the object you wish to select, then lift
the stylus tip immediately. You also have the option to
perform the left-click operation by tapping lightly with
your finger on the touch screen once.
(Figure 2-19)
To right-click, go to Start -> Control Panel -> Touch
Panel. From that window, you can specify a right button
■
I
f the interval between clicks is too
long, the double-click will not be
executed.
■
Parameters for the Touchpad can be
adjusted from the Mouse Properties
dialog box located in the Windows
Control Panel.
To purchase additional or replacement
styluses, visit Fujitsu’s accessories web site
at: http://us.fujitsu.com/computers.
To avoid potential scratching and damage,
never use anything but the included stylus
or your finger with the touch screen.
B Series.book Page 18 Wednesday, April 27, 2005 8:59 AM
Summary of Contents for LifeBook B
Page 6: ...L i f e B o o k B S e r i e s ...
Page 7: ...1 1 Preface ...
Page 8: ...2 L i f e B o o k B S e r i e s ...
Page 10: ...4 L i f e B o o k B S e r i e s S e c t i o n O n e ...
Page 11: ...5 2 Getting to Know Your LifeBook ...
Page 12: ...6 L i f e B o o k B S e r i e s ...
Page 31: ...25 3 Getting Started ...
Page 32: ...26 L i f e B o o k B S e r i e s ...
Page 41: ...35 4 User Installable Features ...
Page 42: ...36 L i f e B o o k B S e r i e s ...
Page 56: ...50 L i f e B o o k B S e r i e s S e c t i o n F o u r ...
Page 57: ...51 5 Troubleshooting ...
Page 58: ...52 L i f e B o o k B S e r i e s ...
Page 71: ...65 6 Care and Maintenance ...
Page 72: ...66 L i f e B o o k B S e r i e s ...
Page 76: ...70 L i f e B o o k B S e r i e s S e c t i o n S i x ...
Page 77: ...71 7 Specifications ...
Page 78: ...72 L i f e B o o k B S e r i e s ...
Page 82: ...76 L i f e B o o k B S e r i e s S e c t i o n S e v e n ...
Page 83: ...77 8 Glossary ...
Page 84: ...78 L i f e B o o k B S e r i e s ...
Page 92: ...86 L i f e B o o k B S e r i e s ...
Page 93: ...87 Appendix A Integrated Wireless LAN User s Guide Optional Device ...
Page 94: ...88 L i f e B o o k B S e r i e s N o t e b o o k A p p e n d i x A ...
Page 110: ...104 L i f e B o o k B S e r i e s N o t e b o o k A p p e n d i x B ...
Page 122: ...116 L i f e B o o k B S e r i e s ...
Page 123: ......
Page 124: ......
Page 125: ......
Page 126: ......
Page 127: ......
Page 128: ......


