19
G e t t i n g t o K n o w Y o u r L i f e B o o k
Wireless Infrared Mouse
This section contains information on using the optional
Wireless Infrared (IR) Mouse with your LifeBook note-
book.
PREPARING YOUR IR MOUSE FOR USE
To prepare your IR Mouse, you need to:
1. Activate the port in your notebook’s BIOS.
2. Purchase and install two AAA batteries.
3. Turn the IR Mouse power switch to your preferred
setting.
To activate the IR Mouse Port in your BIOS
1. Power On or Restart your notebook.
2. Press [F2] as soon as the Fujitsu screen appears.
3. When you see the Phoenix
®
BIOS Setup Utility,
press the right arrow key once to display the
Advanced Menu.
4. Press the down arrow three times until
Keyboard/
Mouse Features
is highlighted.
5. Press [Enter].
6. Once the Keyboard/Mouse Features Menu appears,
press the down arrow three times until
Infrared
Mouse
is highlighted.
7. Press the [Spacebar] once to enable the Infrared
Mouse setting.
8. Press [F10], then [Enter] to save the changes, exit
the BIOS, and restart your notebook.
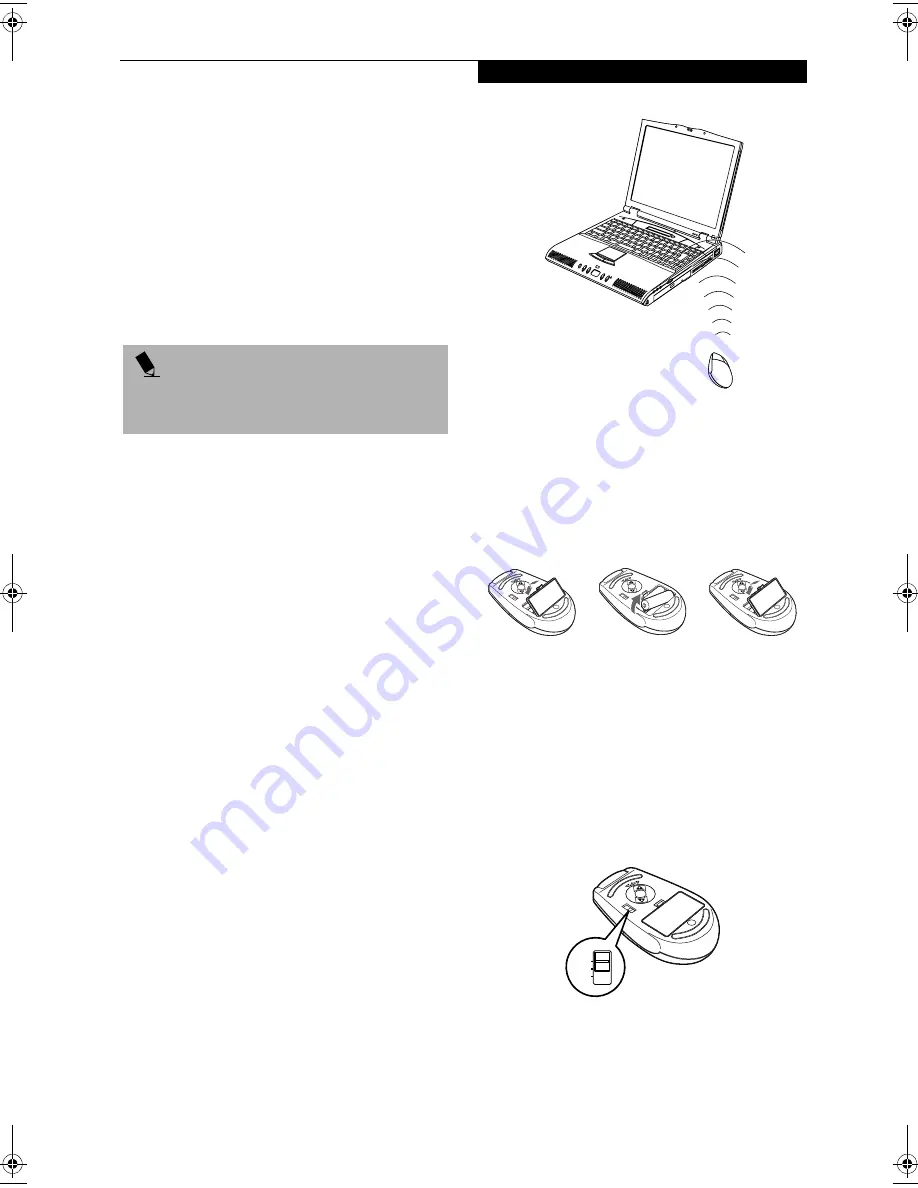
Range of Operation
Your IR Mouse communicates with the IR Mouse port
on your notebook, located at the bottom right-hand
corner of your Display Panel. In order for your mouse to
communicate effectively with your notebook, you will
need to keep it within the area in which the signals from
the mouse can be received by your notebook. This area
is pie-shaped, with the tip at the front of the mouse, and
the back approximately 1.5 feet from the port on the L
setting and 3 feet on the H setting (optimal settings).
This area, and the effective distance at either the L or the
H setting is subject to environment, type of use, and
other factors, and will vary. (Figure 2-12)
Figure 2-12. IR Mouse Area of Operation
To Install the Batteries
Turn your IR Mouse over, release the battery compart-
ment cover by depressing the tab, remove the cover, and
set it aside. Insert the batteries in the compartment,
making sure that the “+” on the batteries corresponds
with the “+” in the compartment. Replace the cover.
(Figure 2-13)
Figure 2-13. IR Mouse Battery Installation
Power Switch and Settings
The power switch is located on the bottom of the mouse.
Use your fingernail or the tip of a pen to slide it from the
off position to either the L or the H setting. (Figure 2-14)
On the L setting, your mouse can communicate with the
computer up to approximately 1.5 feet away. On the H
setting it can communicate up to approximately 3 feet
away. The H setting, however, depletes the mouse’s
batteries more quickly.
Figure 2-14. IR Mouse Power Switch
P O I N T
By activating the IR Mouse, your PS/2 port may not
work. If you need to use the PS/2 port, you need to
change your BIOS setting again.
OFF
L
H
FPC58-0549-01.book Page 19 Wednesday, June 27, 2001 1:58 PM
Summary of Contents for LIFEBOOK E Series
Page 8: ...L i f e B o o k E S e r i e s ...
Page 9: ...1 1 Preface ...
Page 10: ...2 L i f e B o o k E S e r i e s S e c t i o n 1 ...
Page 12: ...L i f e B o o k E S e r i e s S e c t i o n 1 4 ...
Page 13: ...5 2 Getting to Know Your LifeBook Notebook ...
Page 14: ...6 L i f e B o o k E S e r i e s S e c t i o n 2 ...
Page 38: ...30 L i f e B o o k E S e r i e s S e c t i o n 2 ...
Page 39: ...31 3 Getting Started ...
Page 40: ...32 L i f e B o o k E S e r i e s S e c t i o n 3 ...
Page 49: ...41 4 User Installable Features ...
Page 50: ...42 L i f e B o o k E S e r i e s S e c t i o n 4 ...
Page 65: ...57 5 Troubleshooting ...
Page 66: ...58 L i f e B o o k E S e r i e s S e c t i o n 5 ...
Page 79: ...71 6 Care and Maintenance ...
Page 80: ...72 L i f e B o o k E S e r i e s S e c t i o n 6 ...
Page 84: ...76 L i f e B o o k E S e r i e s S e c t i o n 6 ...
Page 85: ...77 7 Specifications ...
Page 86: ...78 L i f e B o o k E S e r i e s S e c t i o n 7 ...
Page 93: ...85 8 Glossary ...
Page 94: ...86 L i f e B o o k E S e r i e s S e c t i o n 8 ...
Page 100: ...92 L i f e B o o k E S e r i e s ...
Page 101: ...93 Index ...
Page 102: ...94 L i f e B o o k E S e r i e s ...


