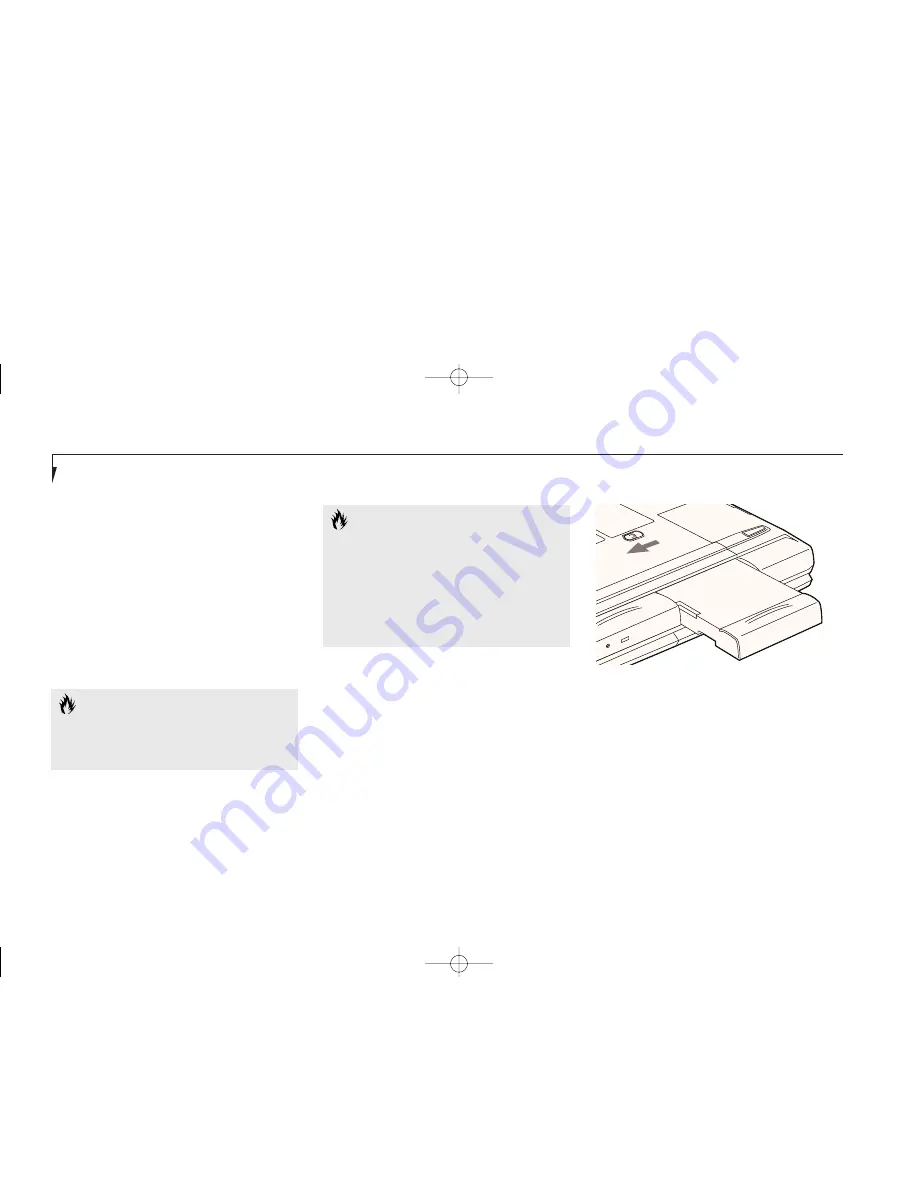
Removing a Device in Multi-function
Bay 1 or 2 When the System is Off.
1. Close any open files on the removable device
that you plan to eject from the computer, if a
device is currently installed and shut down.
2. Slide the release latch at the left rear corner of
the Multi-function Bay toward the outer edge
of your notebook.
3. Slide the device forward until the unit is clear
of the compartment. This will require some
force. Use the finger ridge on the bottom of
the device.
S e c t i o n F i v e
130
C A U T I O N
Be careful aligning and seating modules
in the bay. If the fit is incorrect you may
damage the bay or the module. If the
module does not move easily, remove
it, and check for dirt or foreign objects.
It will require a firm push to latch the
module in place.
■
Lithium ion battery installed with Battery
Adapter for Multi-function Bay 2.
(Adapter included with your Battery.)
■
Weight Saver.
The Lithium ion battery included with your
notebook can power your notebook from either
bay. Your notebook also supports a dual battery
configuration with a Lithium ion battery in
both bays at the same time. (The optional
second battery must be purchased separately.)
Figure 5-2 Removing and Installing a
Device in Multi-function Bay 1
C A U T I O N
The LifeBook E Series notebook does not
support multiple floppy disk drives, but
has two different places to install one.
Installing a Device in Multi-function
Bay 1 or 2 When the System is Off.
1. Orient the item to be installed with the finger
ridge away from the body of your notebook
and the connector toward the body of
your notebook.
2. With the module connector toward the back
of your notebook align the grooves on the
side of the device with the tracks in the side
of the bay.
(Figure 5-3.)
H Five UserInstallable.qxd 10/28/98 10:26 AM Page 130
Summary of Contents for Lifebook E330
Page 6: ...Black White of Cover to come A Copyright qxd 10 28 98 9 50 AM Page 7 ...
Page 7: ...T a b l e o f C o n t e n t s B TOC qxd 10 28 98 9 52 AM Page i ...
Page 10: ...T a b l e o f C o n t e n t s iv B TOC qxd 10 28 98 9 52 AM Page iv ...
Page 11: ...LifeBook E Series from Fujitsu P r e f a c e C Preface qxd 10 28 98 10 00 AM Page v ...
Page 14: ...P r e f a c e viii C Preface qxd 10 28 98 10 00 AM Page viii ...
Page 26: ...S e c t i o n O n e 12 D One SettingUp qxd 10 28 98 10 04 AM Page 12 ...
Page 40: ...S e c t i o n T w o 26 E Two Starting qxd 10 28 98 10 08 AM Page 26 ...
Page 80: ...S e c t i o n T h r e e 66 F Three Using qxd 10 28 98 10 15 AM Page 66 ...
Page 140: ...S e c t i o n F o u r 126 G Four Configuring qxd 10 28 98 10 21 AM Page 126 ...
Page 194: ...S e c t i o n S e v e n 180 J Seven Care_Maintain qxd 10 28 98 10 35 AM Page 180 ...
Page 208: ...A p p e n d i c e s 194 K Appendicies_Glossary qxd 10 28 98 10 39 AM Page 194 ...
Page 209: ...I n d e x L Index_E qxd 10 28 98 10 41 AM Page 195 ...
Page 218: ...I n d e x 204 L Index_E qxd 10 28 98 10 41 AM Page 204 ...


