36
L i f e B o o k P 7 0 0 0 N o t e b o o k – S e c t i o n F o u r
5. Click OK. The Dolby Headphone feature will now
be enabled until you disable it by unchecking Enable
Dolby Headphone.
USING THE DVD/CD-RW DRIVE
ON BATTERY POWER
Since a DVD/CD-RW drive consumes a lot of power,
your overall battery life will be shorter when operating
the drive continuously (such as watching a DVD movie)
than during standard operation. Many movies run-times
are longer than your LifeBook notebook can support on a
single battery. If you are watching a DVD movie on
battery power you may need to swap in an additional,
charged battery or attach AC power during the movie to
view it in its entirety.
To Watch a Movie on Battery Power:
1. Have an additional full-charged battery or your
AC adapter ready for use.
2. Start watching your DVD movie.
3. When the low battery warning occurs, immediately
stop the movie and exit the DVD/CD-RW
application
.
4. Connect an AC Adapter to your system, or install a
fully charged battery in the Flexible Bay (after
removing any modular devices that may be present
in the bay) prior to removing the main battery.
5. Manually place your notebook into suspend mode
by depressing the Suspend button and replace the
discharged battery with an additional fully-charged
battery.
6. If you removed the DVD/CD-ROM drive from the
Flexible Bay in step 4, reinstall it now.
7. Resume your notebook by pressing the Suspend
button again. This step is not required if you
attached AC power without entering suspend mode.
8. Restart your DVD/CD-RW application and skip to
the chapter of the movie you were last watching.
9. Continue watching your DVD movie.
AUTO INSERT NOTIFICATION FUNCTION
The Auto Insert Notification function allows your Life-
Book notebook to automatically start a DVD/CD as soon
as it is inserted in the DVD/CD-RW drive and the tray is
closed. Your notebook will begin playing an audio DVD/
CD or will start an application if the DVD/CD includes an
auto run file.
To prevent a CD from playing automatically as soon as it
is inserted, refer to the related help file for your specific
operating system.
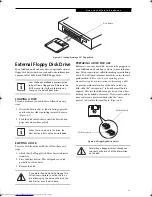
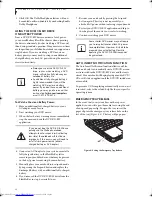
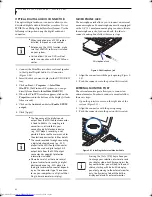
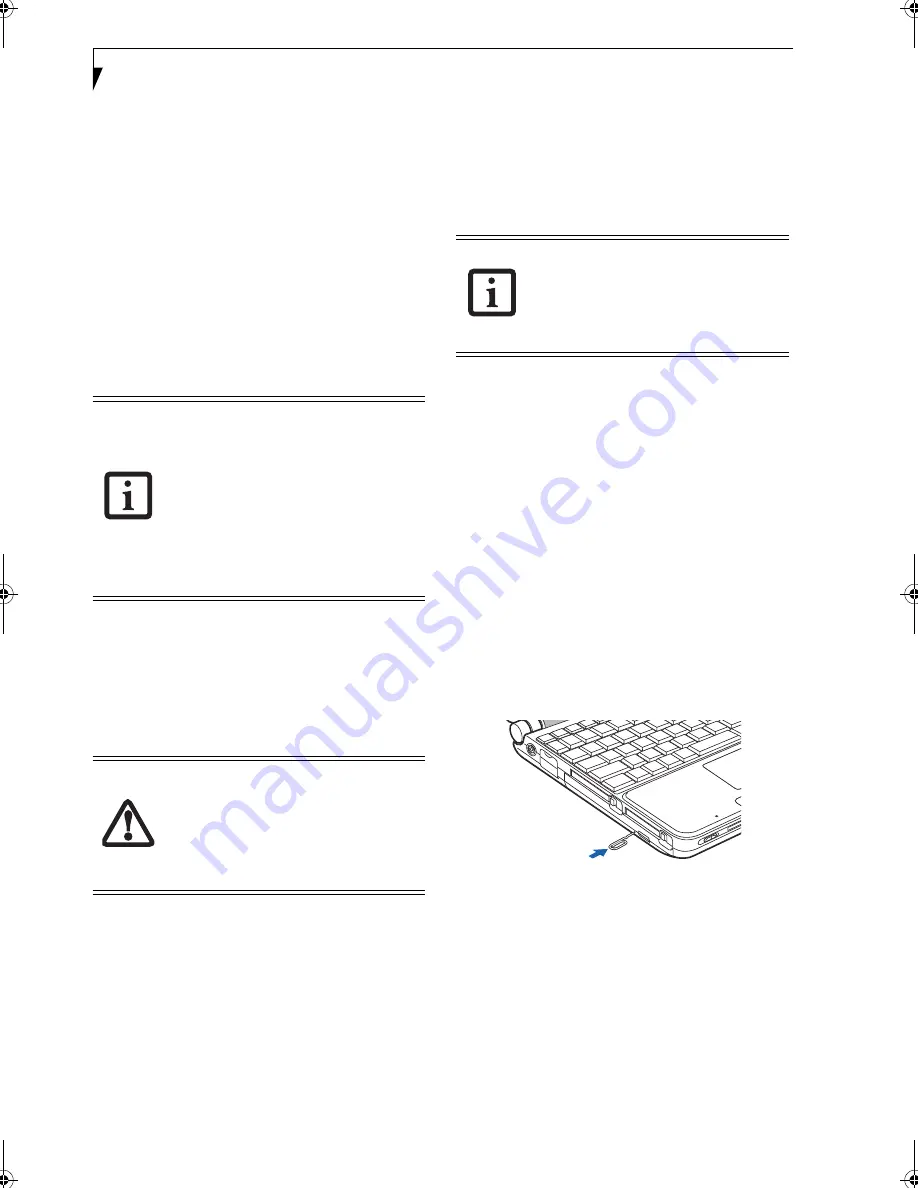
EMERGENCY TRAY RELEASE
In the event that your system does not have power
applied, you can still open the media tray using the end
of an opened paper clip. To open the tray, insert the
paper clip into the emergency tray release hole on the
fact of the tray (Figure 4-5). The tray will pop open.
Figure 4-5 Using the Emergency Tray Release
■
Prolonged use of the DVD/CD-RW
drive, such as when watching a DVD
movie, will substantially reduce your
notebook’s battery life.
■
An additional fully-charged battery is
highly recommended if you will be
watching DVD movies on battery
power. If you don’t have an additional
battery, you may purchase one either
on-line at us.fujitsu.com/computers
or call 1-877-372-3473.
If you do not stop the DVD/CD-RW drive
quickly and the LifeBook notebook
attempts to auto-suspend (critical battery
low state) the notebook will shut down
improperly. If this occurs, you will need to
install a fresh power source (either a
charged battery or AC Adapter).
Some shorter DVD movies may not require
you to swap batteries or attach AC power
to complete them. However, it is best to be
prepared since actual battery life while
operating the DVD/CD-RW drive cannot
be guaranteed.
P7010.book Page 36 Tuesday, April 20, 2004 2:26 PM
Summary of Contents for Lifebook P7010
Page 2: ...L i f e B o o k P 7 0 0 0 N o t e b o o k ...
Page 6: ...L i f e B o o k P 7 0 0 0 N o t e b o o k ...
Page 7: ...1 Preface ...
Page 8: ...L i f e B o o k P 7 0 0 0 N o t e b o o k ...
Page 10: ...2 L i f e B o o k P 7 0 0 0 N o t e b o o k S e c t i o n O n e ...
Page 11: ...3 2 Getting to Know Your LifeBook Notebook ...
Page 12: ...4 L i f e B o o k P 7 0 0 0 N o t e b o o k S e c t i o n T w o ...
Page 28: ...20 L i f e B o o k P 7 0 0 0 N o t e b o o k S e c t i o n T w o ...
Page 29: ...21 3 Getting Started ...
Page 30: ...22 L i f e B o o k P 7 0 0 0 N o t e b o o k S e c t i o n T h r e e ...
Page 37: ...29 4 User Installable Features ...
Page 38: ...30 L i f e B o o k P 7 0 0 0 N o t e b o o k S e c t i o n F o u r ...
Page 55: ...47 5 Using the Integrated Wireless LAN ...
Page 56: ...48 L i f e B o o k P 7 0 0 0 N o t e b o o k S e c t i o n F I v e ...
Page 73: ...65 6 Troubleshooting ...
Page 74: ...66 L i f e B o o k P 7 0 0 0 N o t e b o o k S e c t i o n S i x ...
Page 88: ...80 L i f e B o o k P 7 0 0 0 N o t e b o o k S e c t i o n S i x ...
Page 89: ...81 7 Care and Maintenance ...
Page 90: ...82 L i f e B o o k P 7 0 0 0 N o t e b o o k S e c t i o n S e v e n ...
Page 94: ...86 L i f e B o o k P 7 0 0 0 N o t e b o o k S e c t i o n S e v e n ...
Page 95: ...87 8 Specifications ...
Page 96: ...88 L i f e B o o k P 7 0 0 0 N o t e b o o k S e c t i o n E i g h t ...
Page 100: ...92 L i f e B o o k P 7 0 0 0 N o t e b o o k S e c t i o n E i g h t ...
Page 104: ...96 L i f e B o o k P 7 0 0 0 N o t e b o o k S e c t i o n E i g h t ...
Page 105: ...97 9 Glossary ...
Page 106: ...98 L i f e B o o k P 7 0 0 0 N o t e b o o k S e c t i o n N i n e ...
Page 111: ...103 Appendix A Using the Fingerprint Sensor Optional Device ...
Page 112: ...104 L i f e B o o k P 7 0 0 0 N o t e b o o k A p p e n d i x ...
Page 120: ...112 L i f e B o o k P 7 0 0 0 N o t e b o o k A p p e n d i x ...


