background image

31

U s e r - I n s t a l l a b l e   F e a t u r e s

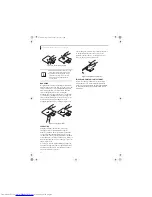
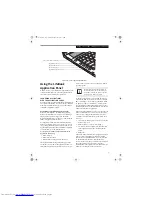
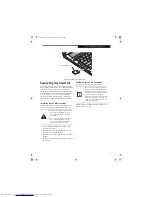
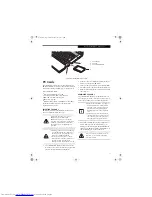
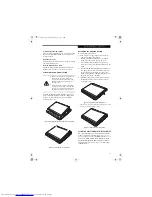
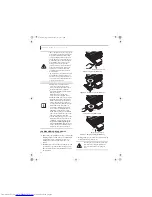
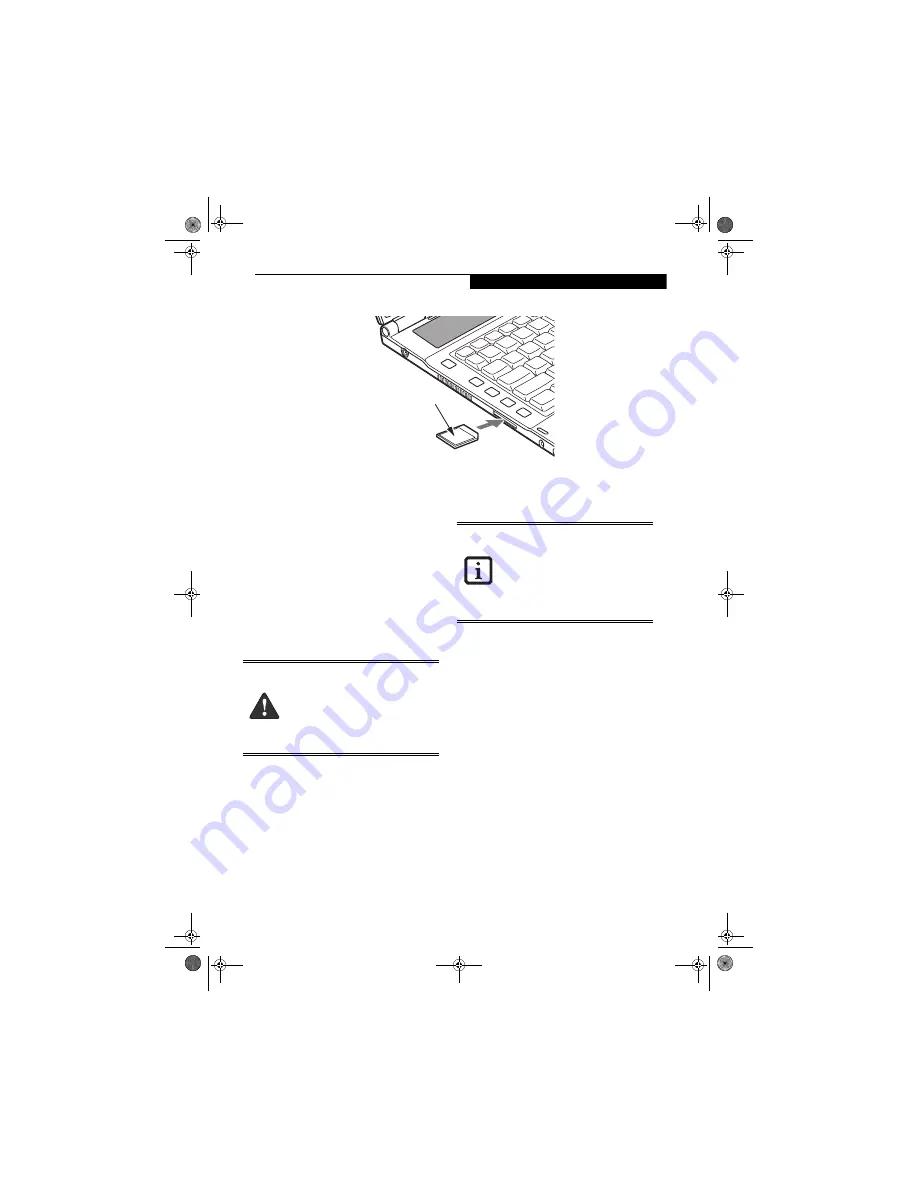
Figure 4-1. Inserting a Secure Digital Card

Secure Digital Card Slot

Your LifeBook notebook supports Secure Digital (SD) 
memory cards, on which you can store and transfer data 
to and from a variety of digital devices such as cell 
phones, GPS systems, digital cameras, and PDAs. These 
cards use flash memory architecture, which means they 
don’t need a power source to retain data. SD Cards 
transfer data quickly, with low battery consumption. 
Like the memory stick, it uses flash memory architec-
ture.

INSERTING SECURE DIGITAL CARDS

Secure Digital Cards are inserted in the SD Card slot 

(Figure 4-1)

. To insert an SD Card, follow these steps:


1. See your SD Card manual for instructions on the 

insertion of your card. 

2. Make sure there is no card currently in the slot. If 

there is, see Removing an SD Card.

3. Insert your card into the slot with the product label 

facing up.

4. Push the card firmly into the slot until it is seated in 

the connector.

REMOVING SECURE DIGITAL CARDS

To remove an SD Card, follow these easy steps:

Push the SD Card in until it unlatches. It will then eject 
from the slot for removal.

Secure Digital (SD) Card

Inserting or removing an SD Card during 
your notebook’s shutdown or bootup 
process may damage the card and/or 
your notebook.

Do not insert a card into a slot if there is 
water or any other substance on the 
card as you may permanently damage 
the card, your notebook, or both.

• When removing cards from your note-

book, be sure to click the Safely Remove 
Hardware icon in the notification area 
and select the item you want to remove.

• See your card manual for specific 

instructions on the removal of your card. 
Some cards may require your LifeBook 
notebook to be in Standby Mode or Off 
while removing them.

Q2010.book  Page 31  Wednesday, May 24, 2006  1:36 PM

Summary of Contents for LifeBook Q2010

Page 1: ...C o p y r i g h t Fujitsu LifeBook Q2010 Notebook User s Guide Q2010 book Page 1 Wednesday May 24 2006 1 36 PM ...

Page 2: ...C o p y r i g h t Q2010 book Page 2 Wednesday May 24 2006 1 36 PM ...

Page 3: ...irus and Norton AntiSpam are regis tered trademarks of Symantec Corporation in the United States and other countries Google Toolbar is a trademark of Google Incorporated PowerDVD is a trademarks of CyberLink Corp This product incorporates copyright protection technology that is protected by method claims of certain U S patents and other intellectual property rights owned by Macrovision Corporation...

Page 4: ...batteries in a fire They may explode Check with local codes for possible special disposal instructions To reduce the risk of fire use only No 26 AWG or larger UL Listed or CSA Certified Telecommunica tion Line Cord For TV tuner use To protect from overvoltages and transients on the Cable Distribution System make sure that the outer shield of the coaxial cable is con nected to earth grounded at the...

Page 5: ...5 Volume Control Controlling the Volume 16 Touchpad Pointing Device Clicking 17 Double Clicking 17 Dragging 18 Scrolling 18 Touchpad Control Adjustment 18 Using the LifeBook Application Panel Launching Applications with the Panel 19 3 GETTING STARTED WITH YOUR LIFEBOOK NOTEBOOK Power Sources Connecting the AC Adapter 23 Display Panel Opening the Display Panel 24 Adjusting Display Panel Brightness ...

Page 6: ...Media Player Software 41 Using Dolby Headphone 41 Auto Play Function 42 5 TROUBLESHOOTING YOUR LIFEBOOK NOTEBOOK Troubleshooting Identifying the Problem 45 Troubleshooting Table 46 Power On Self Test Messages 53 Restoring Pre installed Software Restoring the Factory Image 55 Automatically Downloading Driver Updates 56 6 CARE AND MAINTENANCE Caring for Your LifeBook Notebook LifeBook Notebook 59 Ba...

Page 7: ...leshooting the WLAN Troubleshooting Table 86 Wireless LAN Glossary Glossary 87 IP address information About IP Addresses 89 WLAN Specifications Specifications 90 Using the Bluetooth Device What is Bluetooth 91 Where to Find Information About Bluetooth 91 APPENDIX B USING THE FINGERPRINT SENSOR Fingerprint Sensor Device Introducing the Fingerprint Sensor Device 95 Getting Started 95 Installing Omni...

Page 8: ...L i f e B o o k Q 2 0 0 0 S e r i e s U s e r s G u i d e Q2010 book Page 4 Wednesday May 24 2006 1 36 PM ...

Page 9: ...1 1 Preface Q2010 book Page 1 Wednesday May 24 2006 1 36 PM ...

Page 10: ...2 L i f e B o o k Q 2 0 0 0 S e r i e s U s e r s G u i d e Q2010 book Page 2 Wednesday May 24 2006 1 36 PM ...

Page 11: ... Web links LifeBook Accessories Website URL link located in the Windows Start menu You can also reach Fujitsu Service and Support online by clicking on the Fujitsu Service and Support Website URL link located in the Fujitsu Web links Service and Support Software folder of the Windows Start menu To ensure that you always have the most current driver updates related to your system you should occasio...

Page 12: ...4 L i f e B o o k Q 2 0 0 0 S e r i e s U s e r s G u i d e Q2010 book Page 4 Wednesday May 24 2006 1 36 PM ...

Page 13: ...5 2 Getting to Know Your LifeBook Notebook Q2010 book Page 5 Wednesday May 24 2006 1 36 PM ...

Page 14: ...6 L i f e B o o k Q 2 0 0 0 S e r i e s U s e r s G u i d e Q2010 book Page 6 Wednesday May 24 2006 1 36 PM ...

Page 15: ... items listed below For a pre configured model you should have LifeBook Q2000 Series notebook computer Lithium ion battery pre installed AC adapter with AC power cord Figure 2 2 VGA LAN Adapter Figure 2 3 Drivers and Applications Restore CD Restore DVD Getting Started Guide User s Guide this guide International Limited Warranty Brochure Microsoft associated materials Depending upon the configurati...

Page 16: ...Windows keys See Using the Keyboard on page 14 for more information Wireless LAN Switch The Wireless LAN On Off Switch turns the wireless LAN and or Bluetooth device on and off See Integrated Wireless LAN User s Guide on page 77 for more informa tion Air Flow Vents The air flow vents assist in proper cooling of the system Scrolling Fingerprint Sensor The scrolling fingerprint recognition sensor al...

Page 17: ...ge 17 for more information LifeBook Application Panel The LifeBook Application Panel buttons allow you to launch specified applications with the touch of a button See Using the LifeBook Application Panel on page 19 for more information Power Suspend Resume Button The Power Suspend Resume button allows you to suspend notebook activity without powering off resume your notebook from suspend mode and ...

Page 18: ...eadphone Jack The headphone jack allows you to connect headphones or powered external speakers See Headphone Jack on page 37 for more information SD Card Slot The Secure Digital SD card slot allows you to insert a flash memory card for data storage This architecture allows you to transfer data between a variety of different digital devices See Inserting Secure Digital Cards on page 31 for more inf...

Page 19: ...s See Universal Serial Bus USB 2 0 Ports on page 36 for more informa tion PC Card Eject Button The PC Card eject buttons are used to eject a PC Card from the PC Card slot See PC Cards on page 35 for more information PC Card Slot The PC Card Slot allows you to insert a Type I or Type II PC Card See PC Cards on page 35 for more information VGA LAN Adapter Port The VGA LAN Adapter Port allows you to ...

Page 20: ...n stored over a long period of time or for swapping a discharged battery with a charged Lithium ion battery See Lithium ion Battery on page 32 for more information Battery Release Latches The battery release latches are used to remove the Lithium ion battery from the battery bay Air Vents Docking Battery Latches Release Connector Station Lithium ion Battery Bay To protect your notebook from damage...

Page 21: ...re being accessed NUMLOCK INDICATOR NumLock indicator shows that the internal keyboard is set in ten key numeric keypad mode CAPSLOCK INDICATOR CapsLock indicator shows that your keyboard is set to type in all capital letters SCRLOCK INDICATOR ScrLock indicator shows that your scroll lock is active NumLock Indicator CapsLock Indicator ScrlLock Indicator Battery Charging Indicator Battery Level Ind...

Page 22: ...he keyboard serves as a numeric keypad To activate the keypad functions press the NumLk button Using the keypad keys you can enter numerals 0 through 9 perform addition subtraction multiplication or division and enter decimal points using the keys designated as ten key function keys When NumLk is not active you can use the numeric keypad to navigate Home End Page Up Page Down left right up down Th...

Page 23: ...OS setting for Advanced Keyboard Mouse Features Internal Pointing Device is set to Manual Setting Fn F6 Pressing F6 repeatedly while holding Fn will lower the brightness of your display Fn F7 Pressing F7 repeatedly while holding Fn will increase the brightness of the display Fn F8 Pressing F8 repeatedly while holding Fn will lower the volume of your system Fn F9 Pressing F9 repeatedly while holdin...

Page 24: ...external audio devices you might connect to your system may have hardware volume controls Each source discussed above puts an upper limit on the volume level that must then be followed by the other sources We recommend that you experiment with the various volume controls to discover the optimal sound level Any software that contains audio files will also contain a volume control of its own If you ...

Page 25: ... wish to select press the left button once and then immediately release it To right click move the mouse cursor to the item you wish to select press the right button once and then immediately release it You also have the option to perform the clicking operation by tapping lightly on the Touchpad once Figure 2 12 Figure 2 12 Clicking methods DOUBLE CLICKING Double clicking means pushing and releasi...

Page 26: ...r finger forward or backward across the button to scroll up or down a page When you have reached the desired section of the page raise your finger Figure 2 15 Note that you can also scroll by sliding your finger up and down the right side of the touchpad This feature is disabled by default but you can enable it by going to Start Control Panel Mouse The scrolling sensor is also used as a fingerprin...

Page 27: ...n you receive your notebook these buttons are pre configured to launch specific programs To change an application associated with the Applica tion buttons click on the tab for the button you would like to reconfigure for example Application A Click on Browse or Go to Start Menu scroll down the list of applications click on the application you wish to launch with this button and then click OK The b...

Page 28: ...on Start 2 Click on All Programs 3 Click on LifeBook Application Panel 4 Click on Stop Application Panel To reactivate follow the same procedure except for step 4 Click on Restart Application Panel instead If your system has dedicated one of the application launcher buttons to be an Internet launcher the button can still be configured to launch any application you wish not just an Internet browser...

Page 29: ...21 3 Getting Started Q2010 book Page 21 Wednesday May 24 2006 1 36 PM ...

Page 30: ...22 L i f e B o o k Q 2 0 0 0 S e r i e s U s e r s G u i d e Q2010 book Page 22 Wednesday May 24 2006 1 36 PM ...

Page 31: ...utlet Figure 3 1 Switching from AC Adapter Power to Battery Power 1 Be sure that you have a charged battery installed 2 Unplug the AC adapter Figure 3 1 Connecting the AC Adapter 1 2 DC Power Jack DC Output Cable 3 4 AC Adapter AC Cable 1 2 3 4 When you run the Q2000 Series Life Book on battery power by default the CPU will slow down approxi mately by half in order to optimize battery life This fe...

Page 32: ...eyboard to Change Display Brightness Fn F6 Pressing this key combination repeatedly will lower the brightness of your display Fn F7 Pressing this key combination repeatedly will increase the brightness of the display CLOSING THE DISPLAY PANEL Holding the middle edge of your display panel pull it forward until it is flush with the body of your LifeBook notebook Display Panel Display Lift Point When...

Page 33: ...ur notebook is performing a standard boot sequence including a Power On Self Test POST When the boot sequence is completed without a failure and without a request for the BIOS Setup Utility the system displays the operating system s opening screen The boot sequence is executed when You turn on the power to your LifeBook notebook You restart your LifeBook notebook from the Win dows Shut Down dialog...

Page 34: ... you have an appropriate connection available If a connection is not possible you will be asked about how you dial out from where you will be using your note book If you are not connected to a phone line and plan to register at a later time you may click the Skip button Once you are connected to the Internet you will be asked if you wish to continue with the registration If you select Yes you will...

Page 35: ...for restarting Your LifeBook notebook can be put in Standby mode by Pressing the Power Suspend Resume button when your system is turned on Selecting Standby from the Windows Shut Down menu Timing out from lack of activity Allowing the battery to reach the Dead Battery Warning condition Your LifeBook notebook s system memory typically stores the file s on which you are working open appli cation s i...

Page 36: ...d disabled in Windows RESTARTING THE SYSTEM If your system is on and you need to restart it be sure that you use the following procedure 1 Click the Start button and then click Turn Off Computer 2 Select the Restart option from within the Windows Shut Down dialog box 3 Click OK to restart your LifeBook notebook Your notebook will shut down and then reboot POWER OFF Before turning off the power by ...

Page 37: ...29 4 User Installable Features Q2010 book Page 29 Wednesday May 24 2006 1 36 PM ...

Page 38: ...30 L i f e B o o k Q 2 0 0 0 S e r i e s U s e r s G u i d e Q2010 book Page 30 Wednesday May 24 2006 1 36 PM ...

Page 39: ...f there is see Removing an SD Card 3 Insert your card into the slot with the product label facing up 4 Push the card firmly into the slot until it is seated in the connector REMOVING SECURE DIGITAL CARDS To remove an SD Card follow these easy steps Push the SD Card in until it unlatches It will then eject from the slot for removal Secure Digital SD Card Inserting or removing an SD Card during your...

Page 40: ...dby mode and shutdown procedure Low Battery State When the battery is running low a low battery notifica tion message will appear If you do not respond to the low battery message the batteries will continue to discharge until they are too low to operate When this happens your LifeBook notebook will go into Standby mode There is no guarantee that your data will not be lost once the notebook reaches...

Page 41: ...anel displays the battery status via the Battery Status indicator to show the charge level available in that battery If the display is flashing red it means that the battery is damaged and must be replaced so it does not damage any other parts of your LifeBook notebook REPLACING THE BATTERY With the purchase of an additional battery you can have a fully charged spare to swap with one that is not c...

Page 42: ... reformat your hard disk drive please note Any data that currently resides on your hard disk drive must be backed up to CDs or other data storage media or it will be permanently lost These back up disks can then be used to reinstall and restore your data See your operating system manual for more information on backing up your data files All application software that is installed on the hard disk d...

Page 43: ...r note book to be in Standby Mode or Off during removal 2 Unlock the card from the slot by pressing the eject button When pressed the button will pop out 3 Firmly press the button again until it is flush with the notebook This will eject the card slightly out of the slot allowing you to remove the card 1 1 PC Card Slot 2 3 2 PC Card 3 PC Card Eject Button You may be required to log on as an Admini...

Page 44: ...ps that can be used to transfer large amounts of data between your notebook and an IEEE 1394 peripheral such as a digital camera external hard drive or video camera Hot swappable and plug n play it is much faster than USB 1 1 CardBus or parallel port To connect a 1394 device follow these steps Figure 4 6 Figure 4 6 IEEE 1394 Interface UNIVERSAL SERIAL BUS USB 2 0 PORTS The two Universal Serial Bus...

Page 45: ...easy steps 1 Align the connector with the port opening 2 Push the connector into the port until it is seated HEADPHONE JACK The headphone jack allows you to connect stereo head phones or powered external speakers to your LifeBook notebook See Figure 2 5 on page 10 for location Your headphones or speakers must be equipped with a 1 8 3 5 mm stereo mini plug To connect headphones or speakers follow t...

Page 46: ...on battery The DC power jack is located on the end of the Docking Station LAN RJ 45 Jack The LAN jack allows you to connect a LAN to the Docking Station Note that when the system is attached to the Docking Station the LAN Jack on the Docking Station should be used not the one on the system Figure 4 9 Docking Station Front USB 2 0 Ports Qty 4 Universal Serial Bus USB 2 0 ports allow you to connect ...

Page 47: ...the system 4 Wait until the FDD Optical Drive access indicator is no longer visible on the Status Indicator Panel If the optical drive is active when you remove the system any application running may hang up and the system may become unstable 5 Pull the Docking Station s release latch away from the Docking Station to release it from your note book Figure 4 12 Figure 4 12 Unlatching the Docking Sta...

Page 48: ...e battery life you will experience Do not operate your optical drive unless your LifeBook notebook is sitting on a flat surface Using a drive when the sys tem is not level may damage the drive or prevent proper operation Install your media player software before first using the optical drive Refer to the applicable readme file on the Driver Applications CD ROM You should regularly check the Fujits...

Page 49: ...ntrols avail able This will open the control panel into the bottom of the screen Using the Media Player Control Panel The media player software allows you to watch the movie much like a VCR player You have the option to pause rewind fast forward and stop the movie at any point 1 To Pause the movie click the on screen button 2 To Rewind the movie click the button to rewind to a specific portion of ...

Page 50: ... under Room Filter Setting 5 Click OK The Dolby Headphone feature will now be enabled until you disable it by unchecking Enable Dolby Headphone AUTO PLAY FUNCTION The Auto Play function allows your LifeBook notebook to automatically start a DVD CD as soon as it is inserted in the optical drive and the tray is closed Your notebook will begin playing an audio DVD CD or will start an applica tion if ...

Page 51: ...43 5 Troubleshooting Q2010 book Page 43 Wednesday May 24 2006 1 36 PM ...

Page 52: ...44 L i f e B o o k Q 2 0 0 0 S e r i e s U s e r s G u i d e Q2010 book Page 44 Wednesday May 24 2006 1 36 PM ...

Page 53: ...e it has been off at least 10 seconds before you turn it on 6 Go through the boot sequence 7 If the problem has not been resolved refer to the Troubleshooting Table that follows for more detailed troubleshooting information 8 If you have tried the solutions suggested in the Troubleshooting Table without success contact your support representative Toll free 1 800 8Fujitsu 1 800 838 5487 E mail 8fuj...

Page 54: ...peakers remove the headphones BIOS audio settings are incorrect Set the BIOS setup utility to the default values within the Multimedia Device Configuration menu See BIOS Setup Utility page 25 for more information Software driver is not config ured correctly Refer to your application and operating system documentation for help Sound may be set to Mute Click on the Volume icon in the notification ar...

Page 55: ...ation The wrong drive designator was used by an application when a bootable CD ROM was used to start the notebook Verify drive designator used by application is in use by the operating system When the operating system is booted from a CD drive designations are automatically adjusted Security is set so your oper ating system cannot be started without a password Verify your password and security set...

Page 56: ... for more information The device is not properly installed Remove and reinstall the device See Device Ports page 36 for more information The device may have been installed while an application was running so your notebook is not aware of its installation Close the application and restart your LifeBook notebook Your software may not have correct software driver active See your software documentatio...

Page 57: ...ll a charged battery The AC adapter is not plugged in properly Verify that your adapter is connected correctly See Power Sources page 23 for more information The Power adapter has no power from the AC outlet Move the AC cord to different outlet check for a line switch or tripped circuit breaker for the AC outlet The AC adapter is faulty Try a different Power adapter Your LifeBook notebook turns of...

Page 58: ...con will flash when the battery is out of operating range Shutdown and Startup Problems The Power Suspend Resume button does not work The Power Suspend Resume button is disabled from the Power Advanced submenu of the setup utility Enable the button from the setup utility You did not hold the button in long enough Hold the button longer This may need to be a few seconds if your application is preve...

Page 59: ...ement time outs may be set for very short intervals and you failed to notice the display come on and go off again Press any button or key on the keyboard or move the mouse to restore operation If that fails push the Power Suspend Resume button The display may be shut off by Standby mode Auto Suspend or Video Timeout The notebook turned on with a series of beeps and your display is blank Power On S...

Page 60: ...ixel resolution You can fill the screen but have less resolution by changing your display compres sion setting See Video Features submenu located within the Advanced menu of the BIOS See BIOS Setup Utility page 25 for more information You have connected an external video device and it does not display any information Your BIOS setup is not set to enable your external device Toggle the video destin...

Page 61: ...he message appears when you restart the system there may be a serious fault which might cause you to lose data if you continue Contact your support representative Incorrect Drive A type run SETUP Type of floppy drive A not correctly identified in Setup This means that the floppy disk drive type identified in your setup utility does not agree with the type detected by the Power On Self Test Run the...

Page 62: ...dow RAM Passed Where nnnn is the amount of shadow RAM in kilobytes successfully tested System battery is dead Replace and run SETUP The BIOS CMOS RAM memory hold up battery is dead This is part of your BIOS and is a board mounted battery which requires a support representative to change You can continue operating but you will have to use setup utility default values or reconfigure your setup utili...

Page 63: ...ify change the boot up priority rather than booting up from the hard drive or an external floppy disk drive perform the following steps 1 Start your system and press the F2 key when the Fujitsu logo appears You will enter the BIOS Setup Utility 2 Using the arrow keys go to the Boot menu 3 Arrow down to the Boot Device Priority submenu Press Enter 4 If Optical Media Drive or CD ROM Drive is not at ...

Page 64: ...utomatically or manually go to the Fujitsu site to check for new updates for your system The FDU icon should appear in the notification area at the bottom right of your screen roll the cursor over the icons to find the correct one If the FDU icon does not appear in the notification area it can be started by going to Start All Programs and clicking on Fujitsu Driver Update this will create the icon...

Page 65: ...57 6 Care and Maintenance Q2010 book Page 57 Wednesday May 24 2006 1 36 PM ...

Page 66: ...58 L i f e B o o k Q 2 0 0 0 S e r i e s U s e r s G u i d e Q2010 book Page 58 Wednesday May 24 2006 1 36 PM ...

Page 67: ...ook Do not touch the screen with any sharp objects Cleaning your LifeBook notebook Always disconnect the power plug Pull the plug not the cord Clean your LifeBook notebook with a damp lint free cloth Do not use abrasives or solvents Use a soft cloth to remove dust from the screen Never use glass cleaners Storing your LifeBook notebook If storing your LifeBook notebook for a month or longer turn yo...

Page 68: ... DRIVES Caring for your Floppy Disks Please observe the following points if using an optional external floppy disk drive Avoid using floppy disks in damp or dusty locations Never store floppy disks near a magnet or magnetic field Do not use a pencil or an eraser on a disk or disk label Avoid storing the floppy disks in extremely hot or cold locations or in locations subject to severe temperature c...

Page 69: ...on to the following points The drive rotates the compact disk at a very high speed Do not carry it around or subject it to shock or vibration with the power on Avoid using or storing the drive where it will be exposed to extreme temperatures Avoid using or storing the drive where it is damp or dusty Avoid using or storing the drive near magnets or devices that generate strong magnetic fields Avoid...

Page 70: ...62 L i f e B o o k Q 2 0 0 0 S e r i e s U s e r s G u i d e Q2010 book Page 62 Wednesday May 24 2006 1 36 PM ...

Page 71: ...63 7 System Specifications Q2010 book Page 63 Wednesday May 24 2006 1 36 PM ...

Page 72: ...64 L i f e B o o k Q 2 0 0 0 S e r i e s U s e r s G u i d e Q2010 book Page 64 Wednesday May 24 2006 1 36 PM ...

Page 73: ...colors at 85Hz Simultaneous Video XGA SVGA VGA compat ible 1024 x 800 16M colors max Graphics Accelerator Card Intel Graphics Media Accelerator GMA 950 supports up to 128 MB of shared memory using Unified Memory Architecture UMA Dynamically responds to applica tion requirements and allocates the proper amount of memory for optimal graphics and performance AUDIO The SigmaTel STAC9228 codec supports...

Page 74: ...tion keys 12 F1 through F12 Feature extension key Fn Windows keys 2 Start key and application key Key pitch 18 mm Key stroke 2 0 mm Built in Alps Wide Touchpad pointing device with left and right buttons and scrolling fingerprint sensor External Keyboard Support USB compatible External Mouse Support USB compatible Management Standard DMI 2 0 ready WFM 2 0 compliant POWER Batteries 3 cell Lithium i...

Page 75: ...n or contam ination The 90 day trial version is activated upon your acceptance of software license agreement After 90 days it will be necessary to purchase a subscription from Symantec to download latest virus definitions See your online help or manual for more information on how and when to run this program Fujitsu HotKey Utility Fujitsu HotKey Utility allows you to monitor and manage the status ...

Page 76: ...68 L i f e B o o k Q 2 0 0 0 S e r i e s U s e r s G u i d e Q2010 book Page 68 Wednesday May 24 2006 1 36 PM ...

Page 77: ...69 8 Glossary Q2010 book Page 69 Wednesday May 24 2006 1 36 PM ...

Page 78: ...70 L i f e B o o k Q 2 0 0 0 S e r i e s U s e r s G u i d e Q2010 book Page 70 Wednesday May 24 2006 1 36 PM ...

Page 79: ... interface which offers performance similar to the 32 bit PCI architecture Command An instruction which you give your operating system Example run a particular application or format a floppy disk Configuration The combination of hardware and software that makes up your system and how it is allocated for use CRT Cathode Ray Tube A display device which uses a beam of electronic particles striking a ...

Page 80: ...ommission Floppy Disk A spinning platter of magnetic data storage media which is highly flexible GB Gigabyte Hard drive A spinning platter of magnetic data storage media where the platter is very stiff Hexadecimal A decimal notation for the value of a 4 bit binary number 0 9 A B C D E F Example 2F in hexa decimal 00101111 in binary 47 in decimal I O Input Output Data entering and leaving your Life...

Page 81: ...sociation The Personal Computer Memory Card International Association is an organization that sets standards for add in cards for personal computers Peripheral Device A piece of equipment which performs a specific function associated with but not integral to a computer Examples a printer a modem a CD ROM Pitch keyboard The distance between the centers of the letter keys of a keyboard Pixel The sma...

Page 82: ...tery Status Indicator A display which reports the condition of some portion of your hardware On your LifeBook notebook this is an LCD screen just above the keyboard Stereo audio A system using two channels to process sound from two different sources Stroke keyboard The amount of travel of a key when it is pressed from resting to fully depressed SVGA Super VGA S Video Super Video A component video ...

Page 83: ...y cause harmful interference to radio communications However there is no guarantee that interference will not occur in a particular installation If this equipment does cause harmful interference to radio or television reception which can be determined by turning the equipment off and on the user is encouraged to try to correct the interference by one or more of the following measures Reorient or r...

Page 84: ...76 L i f e B o o k Q 2 0 0 0 S e r i e s U s e r s G u i d e Q2010 book Page 76 Wednesday May 24 2006 1 36 PM ...

Page 85: ...77 Appendix A Integrated Wireless LAN User s Guide Q2010 book Page 77 Wednesday May 24 2006 1 36 PM ...

Page 86: ...78 L i f e B o o k Q 2 0 0 0 S e r i e s U s e r s G u i d e Q2010 book Page 78 Wednesday May 24 2006 1 36 PM ...

Page 87: ...otection against harmful interference in a residential installa tion This equipment generates uses and can radiate radio frequency energy If not installed and used in accordance with the instructions it may cause harmful interference to radio communications However there is no guarantee that interfer ence will not occur in a particular installation If this equipment does cause harmful interference...

Page 88: ...mode and 11 Mbps in IEEE802 11b mode The WLAN device supports the following encryption methods WEP TKIP CKIP and AES encryption WIRELESS LAN MODES USING THIS DEVICE Ad Hoc Mode See Figure A 1 Ad Hoc Mode refers to a wireless network where wireless network connectivity between multiple computers is established without a central network device typically known as Access Point s Connectivity is accomp...

Page 89: ...nd effi ciently by toggling the Wireless On Off Switch to the Off position Figure A 3 The wireless On Off switch has no effect on non Wireless LAN models Deactivation using Intel PROSet for Wireless Utility The WLAN device can be deactivated in Windows using the Intel PROSet for Wireless utility The procedure to accomplish this 1 Click Start All Programs 2 Select Intel ProSet Wireless then click o...

Page 90: ... the icon Intel PROSet Wireless to execute the Intel PROSet for Wireless utility 4 Click the Add button The General Settings dialog displays 5 Enter a profile name in the Profile Name field 6 Enter the network SSID in the Network Name SSID field 7 Click Infrastructure or Ad Hoc for the operating mode 8 Click Advanced 9 The Mandatory Access Point option is only used if Infrastructure mode is select...

Page 91: ...then enter data for IP address and Subnet mask See page 89 for IP address setting For access point infrastructure connection If your network uses DHCP select Obtain an IP address automatically and Obtain DNS server address automatically If your network uses static IP addresses consult with your network administrator for the correct IP address settings 8 Click the OK button Processing will return t...

Page 92: ...splayed 9 Click File and Printer Sharing for Microsoft Net works and then click the OK button Processing will return to the Wireless Network Connection Properties window and File and Printer Sharing for Microsoft Networks will be added to the list 10 Click the Close button Setting the file sharing function The procedure for setting the file sharing function follows with the work folder in drive C ...

Page 93: ... status of the radio When the radio is turned off or the com puter is not yet connected some of the conditions will not be displayed Profile Name The current configuration profile is displayed Network Name SSID Displays the Network Name SSID currently used by the radio IP Address The IP address of the current profile Signal Quality Displays a message stating the current quality of the signal Signa...

Page 94: ...int or removing any obstacles for better sight The WLAN device has been deactivated or disabled Check if the wireless switch is turned ON Also verify Disable Radio is not checked in Network setting window The computer to be connected is turned off Check if the computer to be connected is turned ON RF interference from Access Points or other wireless networks The use of identical or overlapping RF ...

Page 95: ... address or IEEE MAC address is the 48 bit address typically written as twelve hexadecimal digits 0 through 9 and A through F or as six hexadecimal numbers separated by periods or colons e g 0080002012ef 0 80 0 2 20 ef which uniquely identifies a computer that has an Ethernet interface MTU Maximum Transmission Unit The maximum size of data which can be transmitted at one time in networks including...

Page 96: ...another so all access points and all devices attempting to connect to a specific WLAN must use the same SSID A device will not be permitted to join the BSS unless it can provide the unique SSID Because the SSID is broadcast in plain text it does not supply any security to the network Subnet mask TCP IP network is controlled by being divided into multiple smaller networks subnets IP address consist...

Page 97: ...pressed with four values in the range between 1 and 255 Set the each computer as follows The value in paren theses is a subnet mask Example Computer A 192 168 100 2 255 255 255 0 Computer B 192 168 100 3 255 255 255 0 Computer C 192 168 100 4 255 255 255 0 Computer X 192 168 100 254 255 255 255 0 IP addressing is much more complicated than can be briefly explained in this document You are advised ...

Page 98: ...em Specifications Type of network The Intel PRO Wireless 3945ABG Network Connections WLAN device conforms to IEEE 802 11a and 802 11b g Wi Fi based Transfer rate Automatic switching IEEE 802 11a g 54 Mbps maximum data rate IEEE 802 11b 11 Mbps maximum data rate Active frequency 802 11b g 2400 2473 MHz 802 11a 4900 5850 MHz Number of channels 802 11a 8 independent channels 802 11b g 11 channels 3 n...

Page 99: ...e co located or operated in conjunction with any other antenna or transmitter Canadian Notice To prevent radio interference to the licensed service this device is intended to be operated indoors and away from windows to provide maximum shielding Equipment or its transmit antenna that is installed outdoors is subject to licensing Warranty Users are not authorized to modify this product Any modifica...

Page 100: ...92 L i f e B o o k Q 2 0 0 0 S e r i e s U s e r s G u i d e Q2010 book Page 92 Wednesday May 24 2006 1 36 PM ...

Page 101: ...93 Appendix B Using the Fingerprint Sensor Q2010 book Page 93 Wednesday May 24 2006 1 36 PM ...

Page 102: ...94 L i f e B o o k Q 2 0 0 0 S e r i e s N o t e b o o k Q2010 book Page 94 Wednesday May 24 2006 1 36 PM ...

Page 103: ...ee if the following are present The presence of the gold key shaped OmniPass icon in the notification area at the bottom right of the screen The presence of the Softex program group in the Programs group of the Start menu System Requirements The OmniPass application requires space on your hard drive it also requires specific Operating Systems OS s The minimum requirements are as follows Windows XP...

Page 104: ...ebmail credentials as usual username John_02 and password lifebook but instead of clicking Submit he directs OmniPass to Remember Password Now whenever he returns to that site OmniPass will prompt him to supply access credentials John enters his OmniPass user credentials John_01 and freq14 in the OmniPass authentication prompt and he is allowed into his webmail account He can do this with as many ...

Page 105: ...creen will automati cally appear To verify your enrolled fingerprint place your fingertip on the sensor and hold it there as if you were having a fingerprint captured Successful fingerprint verification will show a green fingerprint in the capture window and the text Veri fication Successful under the capture window USING OMNIPASS You are now ready to begin using OmniPass Used regu larly OmniPass ...

Page 106: ...changed in Vault Management The following cases are applicable to using OmniPass to login to Windows remembered websites and all other password protected resources With Master Password Once you return to a site you have remembered with OmniPass you may be presented with a master pass word prompt Enter your master password and you will be allowed into the site Logging into Windows with a Fingerprin...

Page 107: ...ield to bring the cursor to it and you will see the pull down menu in the Identity field Select the identity you wish to login as and then click OK to login Switch User Identity To switch identities at any time right click the OmniPass notification area icon and click Switch User Identity from the submenu The Switch Identity dialog will appear Select the desired identity and then click OK Identiti...

Page 108: ...he same name as a user already enrolled in OmniPass the OmniPass import function will fail OMNIPASS CONTROL CENTER This section will serve to explain functions within the OmniPass Control Center that weren t explained earlier You can access the OmniPass Control Center any of three ways Double click the golden OmniPass key shaped icon in the Windows taskbar typically in the lower right cor ner of t...

Page 109: ...by going to Start Control Panel Administrative Tools and Local Security Settings Expand Local Policies expand Security Options and double click Network Access Sharing and Security Model for Local Accounts The correct setting should be Classic Local Users Authen ticate as Themselves Cannot add a User with a Blank Password to OmniPass If you experience difficulties adding a user with a blank passwor...

Page 110: ...102 L i f e B o o k Q 2 0 0 0 S e r i e s N o t e b o o k Q2010 book Page 102 Wednesday May 24 2006 1 36 PM ...

Page 111: ...103 Index Q2010 book Page 103 Wednesday May 24 2006 1 36 PM ...

Page 112: ...104 L i f e B o o k Q 2 0 0 0 S e r i e s U s e r s G u i d e Q2010 book Page 104 Wednesday May 24 2006 1 36 PM ...

Page 113: ...5 Cursor control 17 Cursor Keys 14 D DC In Jack 23 DC Power Jack 10 38 Device Ports 36 66 Disk Care 60 Display Panel 8 51 adjusting 24 brightness 24 closing 24 opening 24 Display Timeout 28 Docking 38 Docking Port 38 Docking Station 38 attaching 39 detaching 39 Docking Station Connector 12 Docking Station Release Latch 39 Dolby Headphone 41 Drivers and Application Restore CD 55 Dual Layer Multi Fo...

Page 114: ...guring 19 deactivating and activating 20 launching applications 19 M Media Player control panel 41 software 41 Memory 65 Microphone Jack 10 37 38 Microsoft Small Business Edition SBE 67 Microsoft Windows XP Professional 67 Microsoft Works 67 Modem Result Codes 54 Multi Format Optical Drive 39 N Norton Internet Security 67 Numeric Keypad 14 NumLk Indicator 13 O Optical Drive 39 65 emergency tray re...

Page 115: ...Speakers 8 System Memory 65 T Touchpad 9 17 buttons 17 clicking 17 controls 18 double clicking 17 dragging 18 scrolling 18 Troubleshooting 45 U Universal Serial Bus Port 36 Unpacking 7 USB 2 0 Ports 11 36 38 48 V VGA LAN Adapter Port 11 Video 65 Video RAM 65 Volume Control 10 16 W Windows keys 14 Application key 14 Start keys 14 Wireless LAN Before Using the Wireless LAN 80 Connection using Wirele...

Page 116: ...108 L i f e B o o k Q 2 0 0 0 S e r i e s U s e r s G u i d e Q2010 book Page 108 Wednesday May 24 2006 1 36 PM ...

Page 117: ...109 I n d e x Q2010 book Page 109 Wednesday May 24 2006 1 36 PM ...

Page 118: ...110 L i f e B o o k Q 2 0 0 0 S e r i e s U s e r s G u i d e Q2010 book Page 110 Wednesday May 24 2006 1 36 PM ...

Page 119: ...111 I n d e x Q2010 book Page 111 Wednesday May 24 2006 1 36 PM ...

Page 120: ...112 L i f e B o o k Q 2 0 0 0 S e r i e s U s e r s G u i d e Q2010 book Page 112 Wednesday May 24 2006 1 36 PM ...
Reviews: