33
U s e r - I n s t a l l a b l e F e a t u r e s
Dead Battery Suspend mode shows on the Status indi-
cator just like the normal Standby mode. Once your
LifeBook notebook goes into Dead Battery Suspend
mode you will be unable to resume operation until you
provide a source of power from an AC adapter. Once
you have provided power, you will need to press the
Suspend/Resume button to resume operation. In the
Dead Battery Suspend mode, your data can be main-
tained for some time, but if a power source is not
provided promptly, the Power indicator will stop
flashing and go out, meaning that you have lost the data
that was not stored. Once you provide power, you can
continue to use your LifeBook notebook while the
adapter is charging the battery.
Shorted Batteries
The Status Indicator panel displays the battery status via
the Battery Status indicator to show the charge level
available in that battery. If the display is flashing red, it
means that the battery is damaged and must be replaced
so it does not damage any other parts of your LifeBook
notebook.
REPLACING THE BATTERY
With the purchase of an additional battery, you can
have a fully charged spare to swap with one that is not
charged.
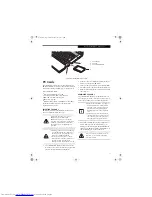
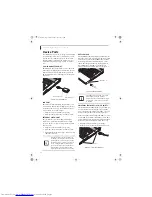
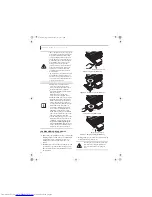
Follow the steps below to replace a battery
(Figure 4-2)
:
1. Have a charged battery ready to install.
2. Shut down your notebook and disconnect the AC
adapter.
3. Turn the system over.
4. Press the two battery latches towards the battery
pack.
5. Lift the battery and remove it from the bay.
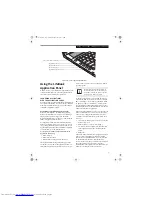
Figure 4-2. Removing the Battery
6. Place a charged battery into the bay and press it
down until the latches click into place.
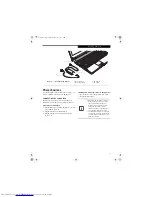
(Figure 4-3)
7. Plug in the AC adapter and turn the power on.
Figure 4-3. Installing the Battery
Battery Latches
Battery Pack
Q2010.book Page 33 Wednesday, May 24, 2006 1:36 PM
Summary of Contents for LifeBook Q2010
Page 2: ...C o p y r i g h t Q2010 book Page 2 Wednesday May 24 2006 1 36 PM ...
Page 9: ...1 1 Preface Q2010 book Page 1 Wednesday May 24 2006 1 36 PM ...
Page 13: ...5 2 Getting to Know Your LifeBook Notebook Q2010 book Page 5 Wednesday May 24 2006 1 36 PM ...
Page 29: ...21 3 Getting Started Q2010 book Page 21 Wednesday May 24 2006 1 36 PM ...
Page 37: ...29 4 User Installable Features Q2010 book Page 29 Wednesday May 24 2006 1 36 PM ...
Page 51: ...43 5 Troubleshooting Q2010 book Page 43 Wednesday May 24 2006 1 36 PM ...
Page 65: ...57 6 Care and Maintenance Q2010 book Page 57 Wednesday May 24 2006 1 36 PM ...
Page 71: ...63 7 System Specifications Q2010 book Page 63 Wednesday May 24 2006 1 36 PM ...
Page 77: ...69 8 Glossary Q2010 book Page 69 Wednesday May 24 2006 1 36 PM ...
Page 101: ...93 Appendix B Using the Fingerprint Sensor Q2010 book Page 93 Wednesday May 24 2006 1 36 PM ...
Page 111: ...103 Index Q2010 book Page 103 Wednesday May 24 2006 1 36 PM ...
Page 117: ...109 I n d e x Q2010 book Page 109 Wednesday May 24 2006 1 36 PM ...
Page 119: ...111 I n d e x Q2010 book Page 111 Wednesday May 24 2006 1 36 PM ...

