78
Checking the Memory Capacity
Once you have changed the system memory capacity by replacing the installed module with a larger one,
be sure to check that your notebook has recognized the change.
Windows 7:
Check the memory capacity by clicking [Start] -> Control Panel, then (while in Category
view) clicking the System and Security icon. Select the System icon and check the amount of memory
next to “Installed memory (RAM):”.
Windows XP:
Check the memory capacity by clicking [Start] -> Settings -> Control Panel, then double-
clicking the System icon. Select the General tab and check the amount of memory under “Computer:”
Windows Vista:
Check the memory capacity by clicking [Start] -> Control Panel -> System and
Maintenance -> System. The amount of memory is displayed next to “Memory - RAM:”
The actual memory size and what is displayed may vary. This is possible if your system is configured with
a graphics controller which dynamically allocates system memory to accelerate graphics performance.
3
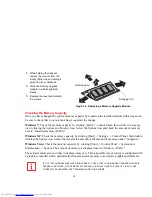
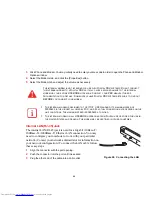
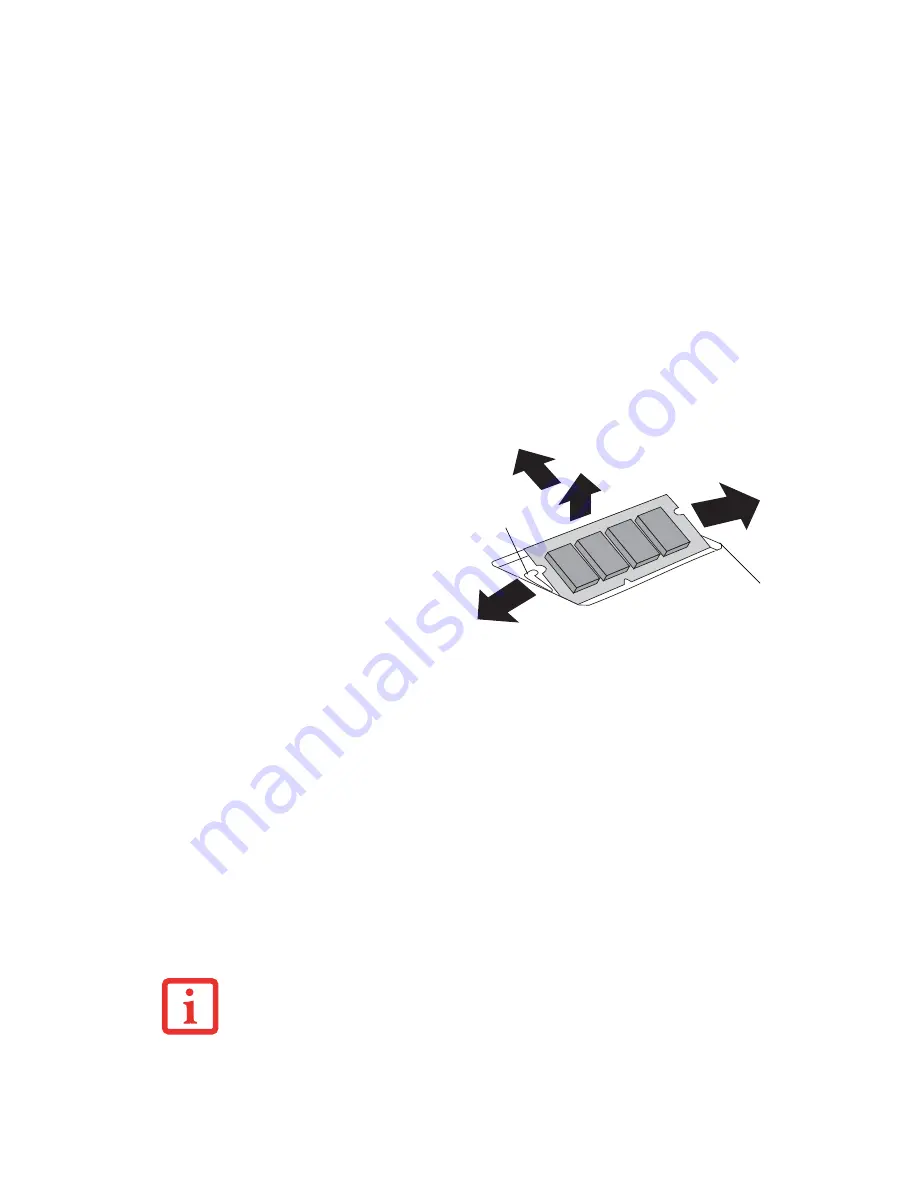
While holding the clips out,
remove the module from the
slot by lifting it up and pulling it
away from your notebook.
4
Store the memory upgrade
module in a static guarded
sleeve.
5
Replace the cover and reinstall
the screws.
Figure 24. Removing a Memory Upgrade Module
I
F
THE
TOTAL
MEMORY
DISPLAYED
IS
INCORRECT
,
CHECK
THAT
YOUR
MEMORY
UPGRADE
MODULE
IS
PROPERLY
INSTALLED
. (I
F
THE
MODULE
IS
PROPERLY
INSTALLED
AND
THE
CAPACITY
IS
STILL
NOT
CORRECTLY
RECOGNIZED
,
SEE
T
ROUBLESHOOTING
ON
PAGE
84
.
3
2
1
1
Retaining Clip
Retaining Clip


