59
T r o u b l e s h o o t i n g
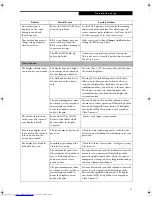
An error message is
displayed on the screen
during the notebook
(boot) sequence.
Power On Self Test (POST) has
detected a problem.
See the POST messages to determine the meaning
and severity of the problem. Not all messages are
errors; some are status indicators.
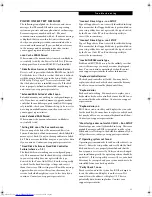
(See Power On Self
Test Messages page 61 for more information)
Your notebook appears to
change setup parameters
when you start it.
BIOS setup changes were not
saved when you exited the
BIOS setup utility, returning it
to previous settings.
Make sure you select
Save Changes And Exit
when
exiting the BIOS setup utility.
The BIOS CMOS hold-up
battery has failed.
Contact your support representative for repairs.
This is not a user serviceable part but has a normal
life of 3 to 5 years.
Video Problems
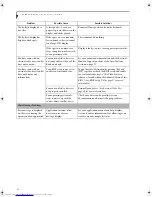
The display is blank when
you turn on your notebook.
The display angle and bright-
ness settings are not adequate
for your lighting conditions.
Press the [Fn] + [F7] keys repeatedly until you have
the desired brightness.
The LifeBook notebook is set
for an external video device
only.
Pressing [F10] while holding down the [Fn] key
allows you to change your selection of where to
send your display video. Each time you press the
combination of keys you will step to the next choice.
The choices, in order are: built-in display only,
external monitor only, both built-in display and
external monitor.
The power management time-
outs may be set for very short
intervals and you failed to
notice the display come on
and go off again.
Press any button or key on the keyboard, or move
the mouse to restore operation. If that fails, push the
Power and Suspend/Resume button. (The display
may be shut off by Sleep mode, Auto Suspend or
Video Timeout.)
The notebook turned on
with a series of beeps and
your display is blank.
Power On Self Test (POST)
has detected a failure which
does not allow the display
to operate.
Contact your support representative.
Your system display won’t
turn on when the system is
turned on or when the
system has resumed.
The system may be password-
protected.
Check the status indicator panel to verify that the
Security icon is blinking. If it is blinking, enter your
password.
The display goes blank by
itself after it is used.
Something is pushing on the
Closed Cover switch.
Check the Closed Cover switch.
(See Figure on page
8 for location)
The notebook has gone into
Video timeout, Sleep mode, or
Save-to-Disk mode because
you have not used it for a
period of time.
Press any button or key on the keyboard, or move the
mouse to restore operation. If that fails, push the
power/suspend/resume button. Check your power
management settings, or close all applications and go
to Power Options control panel.
The power management time-
outs may be set for very short
intervals and you failed to
notice the display come on
and go off again.
Press any button or key on the keyboard, or move the
mouse to restore operation. If that fails, push the
Power and Suspend/Resume button. (The display
may be shut off by Sleep Mode, Auto Suspend or
Video Timeout.)
Problem
Possible Cause
Possible Solutions
N6460-Baikal.book Page 59 Friday, June 1, 2007 2:50 PM
Summary of Contents for N6460 - LifeBook
Page 1: ...C o p y r i g h t Fujitsu LifeBook N6460 Notebook User s Guide ...
Page 2: ...C o p y r i g h t ...
Page 8: ...L i f e B o o k N 6 4 0 0 S e r i e s U s e r s G u i d e ...
Page 9: ...1 1 Preface ...
Page 10: ...2 L i f e B o o k N 6 4 0 0 S e r i e s U s e r s G u i d e ...
Page 12: ...4 L i f e B o o k N 6 4 0 0 S e r i e s U s e r s G u i d e ...
Page 13: ...5 2 Getting to Know Your LifeBook Notebook ...
Page 14: ...6 L i f e B o o k N 6 4 0 0 S e r i e s U s e r s G u i d e ...
Page 31: ...23 3 Getting Started ...
Page 32: ...24 L i f e B o o k N 6 4 0 0 S e r i e s U s e r s G u i d e ...
Page 40: ...32 L i f e B o o k N 6 4 0 0 S e r i e s U s e r s G u i d e ...
Page 41: ...33 4 User Installable Features ...
Page 42: ...34 L i f e B o o k N 6 4 0 0 S e r i e s U s e r s G u i d e ...
Page 58: ...50 L i f e B o o k N 6 4 0 0 S e r i e s U s e r s G u i d e ...
Page 59: ...51 5 Troubleshooting ...
Page 60: ...52 L i f e B o o k N 6 4 0 0 S e r i e s U s e r s G u i d e ...
Page 73: ...65 6 Care and Maintenance ...
Page 74: ...66 L i f e B o o k N 6 4 0 0 S e r i e s U s e r s G u i d e ...
Page 78: ...70 L i f e B o o k N 6 4 0 0 S e r i e s U s e r s G u i d e ...
Page 79: ...71 7 System Specifications ...
Page 80: ...72 L i f e B o o k N 6 4 0 0 S e r i e s U s e r s G u i d e ...
Page 85: ...77 8 Glossary ...
Page 86: ...78 L i f e B o o k N 6 4 0 0 S e r i e s U s e r s G u i d e ...
Page 93: ...85 Appendix A Integrated Wireless LAN User s Guide Optional Device ...
Page 94: ...86 L i f e B o o k N 6 4 0 0 S e r i e s U s e r s G u i d e ...
Page 104: ...96 L i f e B o o k N 6 4 0 0 S e r i e s U s e r s G u i d e ...
Page 105: ...97 Appendix B Using the Fingerprint Sensor ...
Page 106: ...98 L i f e B o o k N 6 4 0 0 N o t e b o o k A p p e n d i x B ...
Page 114: ...106 L i f e B o o k N 6 4 0 0 N o t e b o o k A p p e n d i x B ...
Page 115: ...107 Index ...
Page 116: ...108 L i f e B o o k N 6 4 0 0 S e r i e s U s e r s G u i d e ...
Page 120: ...112 L i f e B o o k N 6 4 0 0 S e r i e s U s e r s G u i d e ...


