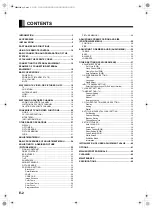
background image

English

Deutsch

Espa

ñol

Fran

ç

ais

Ital

iano

Portugu

ê

s

日 本 語

Póññêèé

中文

Before using the plasma display, read this manual carefully so that you know how to use the plasma display correctly.
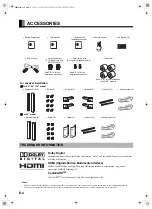
Three manuals of the "Safety Precautions" , this "User's Manual" and "Speaker Unit Installation Manual"are supplied with the
plasma display. Especially, be sure to read and observe the "Safety Precautions".
Refer to this manual whenever questions or problems about operation arise. 
Keep this manual in the place where the user can see it easily.
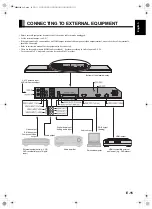
* Installation and removal require special expertise. Consult your dealer for details.
* The last digit of Model No. (10 digit alphanumeric characters) indicated on the product means the body color indication


 alphabet or the management number.
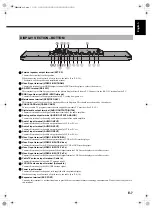
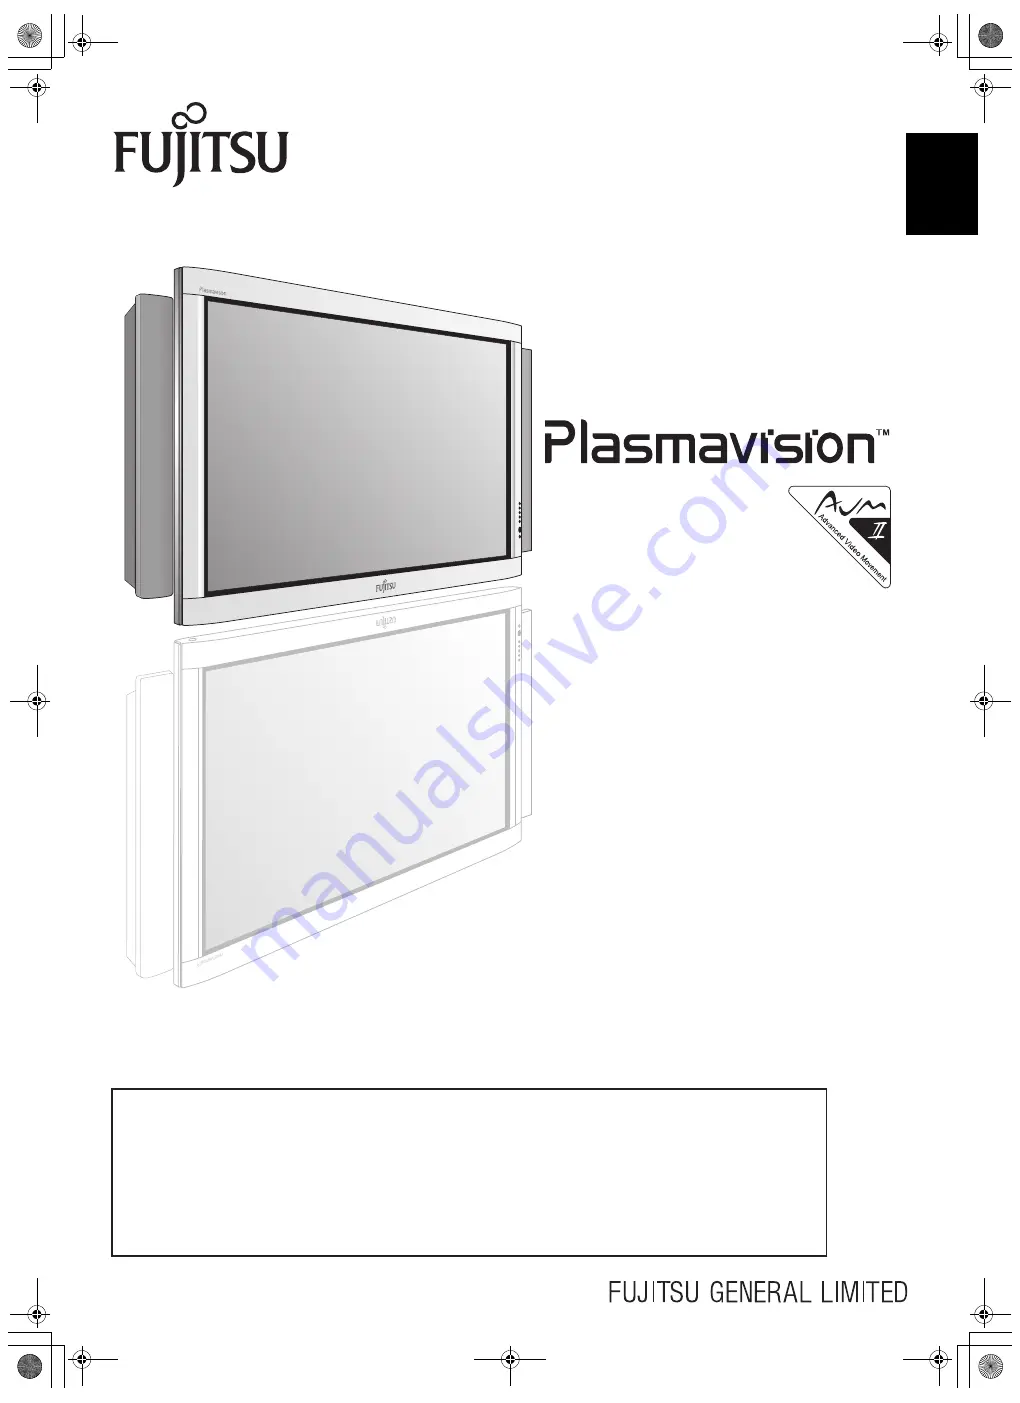
WIDE PLASMA DISPLAY

P42XTA51U
P50XTA51U
P55XTA51U
P63XTA51U

USER'S MANUAL

MHD02098‑01̲E.book  1 ページ  2005年12月28日 水曜日 午前9時16分

Summary of Contents for P42XTA51US

Page 1: ...ure to read and observe the Safety Precautions Refer to this manual whenever questions or problems about operation arise Keep this manual in the place where the user can see it easily Installation and removal require special expertise Consult your dealer for details The last digit of Model No 10 digit alphanumeric characters indicated on the product means the body color indication alphabet or the ...

Page 2: ...ck Level 26 Detail Gradation 26 3D NR 26 CODEC NR 26 Image Enhance 26 Color Temp 26 User Color Temp 26 Color Focus 27 Progressive Scan 27 PICTURE MEMORY 28 ADJUSTING SCREEN POSITION AND SIZE POSITION SIZE MENU 29 POSITION 29 SIZE 29 ADJUSTING TO DESIRED AUDIO AUDIO MENU 30 TREBLE 30 BASS 30 BALANCE 30 LOUDNESS 30 OTHER SETTINGS FEATURES MENU 31 ADJUSTMENT ITEMS 31 Dot Clock RGB 31 Clock Phase RGB ...

Page 3: ...ly lit Some models are fitted with a radiator fan to prevent the plasma display s internal temperature from rising during operation Be careful of the air emitted by the radiator fan as it may be hot Contact your dealer when causing a bad influence to the plasma display and other audio visual equipment mutually You may need to move your plasma display if it produces degraded pictures or noise due t...

Page 4: ...tery 2 Safety Precautions This manual Power Cord Speaker unit installation manual Spacer 4 See P E 14 for the installation procedure See P E 14 for the installation procedure For speaker installation See P E 41 for the installation for 42 50 models For 42 50 55 model Speaker Unit 2 Screw 8 Holder A 2 Holder B 2 Cushion 2 Speaker cable 2 For 63 model Speaker Unit 2 Screw 8 Holder 2 Cushion 2 Speake...

Page 5: ...as much space as indicated below Make sure that the plasma display is installed in a location where the temperature can be maintained between 0 C and 40 C between 32 F and 104 F Never attempt to tilt the plasma display sideways or backward To prevent the power and other cables from being accidentally pulled make sure that they run along the wall or through corners To prevent accidents and ensure s...

Page 6: ... of malfunction ON OFF button Turns the power ON and OFF standby state Remote control signal receiver Receives the signals from the remote control Ambient Sensor Detects the brightness of ambient light It is important not to obstruct it for full functionality of the feature Warning If the power indicator lamp flashes red or green this signifies that the plasma display has developed a problem When ...

Page 7: ...IO1 INPUT Connect this terminal to the audio output terminal of VCR or PC etc Audio2 input terminal AUDIO2 INPUT Connect this terminal to the audio output terminal of VCR or PC etc Audio3 input terminal AUDIO3 INPUT Connect this terminal to the audio output terminal of VCR or PC etc Video1 input terminal VIDEO1 INPUT VIDEO Connect this terminal to the Video output terminal of VCR or DVD recorder p...

Page 8: ...rn to the previous channel or switch to the Video mode or RGB mode Volume adjustment buttons Î E 17 Press to adjust the volume control MENU EXIT button Î E 23 E 40 Press to display or hide the menu screen Use for Picture or Audio adjustment MUTE button Î E 17 Press to temporarily mute the audio To restore the sound press the button again Instead the or button can also be pressed Adjustment buttons...

Page 9: ...Î E 20 Press to display the closed captions Antenna In button Î E 18 Press to switch to the signal input of Antenna In terminal Cable In button Î E 18 Press to switch to the signal input of Cable In terminal DISPLAY button Î E 21 Press to display the channel input mode and screen size status The status is displayed for about five seconds PICTURE MODE button Î E 21 E 25 Press to switch the Picture ...

Page 10: ...emote control Make sure that the batteries are properly oriented 3 Close the cover until it snaps into place PRECAUTIONS EFFECTIVE RANGE FOR THE REMOTE CONTROL CAUTION It is very important to use replacement batteries of the same type as the originally used Do not use rechargeable batteries Ni Cd etc When disposing of used batteries please comply with governmental regulations or environmental publ...

Page 11: ...HF UHF If you are not connecting an antenna line skip to step 2 2 Connect the CATV cable See the above figure for the connection of the CATV line 3 Connect the speakers For details see the separate manual Speaker Unit Installation manual 4 Connect external equipment such as a DVD Player For details see EXAMPLE OF CONNECTING EXTERNAL EQUIPMENT P E 16 CONNECTIONS TO THE PLASMA DISPLAY VHF UHF antenn...

Page 12: ...sma display Upper side of the card Note Be sure to use only the CableCARD supplied by the cable TV provider Do not insert PCMCIA card other than CableCARD into the CableCARD slot Slowly push in the designated CableCARD until it is locked Insertion of an undesignated card may damage the CableCARD slot First Setup is displayed when the power is turned on for the first time or after the power cable i...

Page 13: ... In 9 Perform Auto Scan For details see TUNER SETTING Auto Scan Cable P E 33 10 Select a desired program 5 Connect the plasma display s power cord to the outlet and turn on the power For details see Power ON P E 17 6 Press to select the TV mode 7 The First Setup screen is displayed Set the date and time 8 Press to select signal of Antenna In 9 Perform Auto Scan For details see TUNER SETTING Auto S...

Page 14: ...ite cores When connecting the cord to the power input terminal RS232C input terminal attach one of these ferrite cores to the cord and the cable near the terminal Two small ferrite cores When connecting a cable to the external speaker output terminal attach a ferrite core to the cable near the terminal Power Cord RS232C Cable Ferrite Core Ferrite Core Note Cables for connecting the plasma display ...

Page 15: ...or the equipment to be connected There are three audio inputs HDMI audio excluded Set them according to Audio Input on P E 38 To receive cable TV programs contact a desired cable TV provider CATV antenna input VHF UHF antenna input Bottom of the plasma display Video output S Video output Component Video output External equipment e g VCR DVD recorder player or digital tuner Audio amplifier Personal...

Page 16: ... inputs Factory setting For changing of Audio input settings see Audio Input on P E 38 To Video output To S Video output To Audio output To Audio input To Video input To S Video input To Component Video output To Component Video input To HDMI input To HDMI output Bottom of the plasma display DVD or VCR Video input Audio input RGB1 D sub Audio1 Video1 Video Audio2 Video2 S video Audio2 Video3 Compo...

Page 17: ...d To increase the volume press To decrease the volume press Note that the volume level remains stored even when you turn OFF the power An audio signal from an audio output terminal AUDIO OUTPUT DIGITAL or AUDIO OUTPUT ANALOG does not change The sound can be temporarily muted Press The sound is muted To restore the original sound volume press the button again The volume can also be restored by pres...

Page 18: ...me this button is pressed the video input mode is switched to the next one The video input mode can also be switched directly by pressing and then the number button on the remote control For the settings of input terminals see EXAMPLE OF CONNECTING EXTERNAL EQUIPMENT P E 16 and Audio Input P E 38 Select the RGB mode to watch pictures through the RGB input Press The RGB input mode is selected For t...

Page 19: ...ress The registered FAVORITE list is displayed 2 Select a target one from the channels registered by The current channel is switched to the selected one 3 Press Press to exit the FAVORITE channel list A registered program can be deleted from the FAVORITE channel list 1 Press Press to display the registered channel list 2 Press or to select the channel to be deleted and press Remove is displayed 3 ...

Page 20: ...ion Service SETTING on P E 35 The audio mode is switched Press Each time this button is pressed the audio mode is switched The switching varies depending on the broadcasting contents The switching method is determined by the program you are watching The available language is determined by the program you are watching If a stereo broadcast is hard to hear due to poor reception change to Mono mode M...

Page 21: ...lay modes 1 Press The currently selected mode will appear 2 Press to select a desired display mode Each time you press a different display mode appears Here are the display mode sequences TV mode Normal Wide1 Wide2 Zoom1 Zoom2 Video mode Normal Wide1 Wide2 Zoom1 Zoom2 RGB mode Normal Wide Zoom Depending on the type of signal some aspects may not be selected See P E 29 for how to adjust the display...

Page 22: ... Captions may not be easy to read however depending on the picture Aspect Ratio The following aspect ratios are available SD signal 4 3 aspect ratio HD signal 16 9 aspect ratio Vista Vision size 1 85 1 aspect ratio Cinema Scope size 2 35 1 aspect ratio Picture of standard size Wide1 Vertically extended picture Wide2 Wide Horizontally extended picture Zoom1 Zoom Horizontally extended picture with c...

Page 23: ...ness 30 FEATURES 31 Adjustment 31 Dot Clock 31 Clock Phase 31 Clamp Position 31 Auto Calibration 31 On Screen Menu 31 OSD 31 Language 31 Name Select 32 Input Terminal 32 D SUB Input 32 Clock Set 32 Tuner 33 Channel Setting 33 Auto Scan 33 Channel Edit 33 D Audio Program 34 Audio Compression 34 D Audio Format 34 Fact Ch Reset 34 CableCARD 34 Reboot 34 Emergency Alert 34 CC Service 35 Display 35 Ana...

Page 24: ...E AUDIO FEATURES FACTORY DEFAULT The PICTURE Menu screen will appear 3 Press or to select Tint 4 Press The Tint adjustment screen will appear 5 Press or to change tint values More greenish colors More purplish colors 6 Press to store 7 Press when you finish Repeat steps 3 4 5 and 6 when you wish to make changes to other options Select Default and press The PICTURE items are changed back to the def...

Page 25: ...ten the Sharpness Press to store Ambient Sensor can be set Automatically adjusts the picture quality to an optimized level that matches the brightness of the ambient light Each time or is pressed the setting is switched On Off Press to store Picture Mode can be set Each time you press or the available choices appear in the following sequence Press to store Signal Contrast Drive Contrast Brightness...

Page 26: ...owing sequence Off Min Mid Max Press to store This performs detailed image quality settings Chroma Transient This function corrects the color contours Each time or is pressed the setting is switched On Off Press to store Image Identify RGB This function discerns between the natural image display section and the text display section and performs correction to enable an optimized display for each Ea...

Page 27: ...ng Green Performs correction with respect to Green Targeting Cyan Performs correction with respect to Cyan Targeting Blue Performs correction with respect to Blue Targeting Magenta Performs correction with respect to Magenta Targeting White Corrects red green and blue with respect to white Red Use and to adjust Red Green Use and to adjust Green Blue Use and to adjust Blue Press to store This sets ...

Page 28: ... priority setting Press to specify still picture priority Press to specify motion picture priority Press to store Eight groups of picture adjustment settings can be stored enabling you to quickly switch to your desired group of settings for watching program Load Use or to select Memory 1 8 When is pressed the values becomes the picture adjustment values stored in the selected Memory Save Use or to...

Page 29: ...the screen picture up Moves the screen picture down Press to store Screen width Width Increases the width Reduces the width Screen height Height Increases the height Reduces the height Press to store Position POSITION SIZE Menu screen Position adjustment screen Size Size adjustment screen Note If the operation is not executed for about 60 seconds the menu disappears Depending on the model or the o...

Page 30: ...Stronger bass Weaker bass Press to store Shifts the volume balance towards the right Shifts the volume balance towards the left Press to store Corrects the balance between bass and treble for easy listening even with weak volume Each time you press or one of the available choices appears in the following sequence On Off Press to store Treble Bass Balance Loudness Treble screen Note An audio signal...

Page 31: ...e of picture to the optimum Execute while a white screen signal is received 1 Select Execute and press 2 Press or to select YES and press You can use this option to select from following display indication Each time you press or one of the available choices appears in the following sequence On OSD bright On screen information shown in light color On OSD dark On screen information shown in dark col...

Page 32: ...ut screen appears 2 Select the signal system to receive Each time you press or one of the available choices appears in the following sequence RGB PC Decoder RGB PC For using RGB of PC Decoder For using digital broadcast tuner Press to store The date and time can be set Press or to select the item and press or to set it Each time or is pressed the items are selected in the following sequence Year M...

Page 33: ...y Please set HRC and IRC only when required from your cable TV provider 2 Execute Press or to select Execute Press to start Auto Scan After all the channels are scanned only receivable channels are input into the channel list Scanning all the channels may take many minutes To stop the scanning halfway press Channel Edit This function displays channels scanned by Auto Scan or channels registered wi...

Page 34: ...ound will be output in PCM even if the AUDIO OUTPUT DIGITAL is set to Dolby Digital Fact Ch Reset This function resets the current channel list to the factory setting 1 Select Execute and press 2 Press or to select YES and press This function displays information necessary for contacting your cable TV provider The information is not displayed unless the CableCARD is inserted Reboot when the displa...

Page 35: ...Color Opacity Color Press or to switch among the items Default Black White Red Green Blue Yellow Magenta Cyan Press to store Opacity Press or to switch among the items Default Solid Transparent Translucent Flashing Press to store Background The color of the background and transparency can be set Press or to select Color Opacity Color Press or to switch among the items Default Black White Red Green...

Page 36: ... for Channel blocking or Block by Rating Press or to switch between the items On Off On Blocking Off Unblocking Press to store Plasma display is shipped from the factory with all AUTO LOCK settings in the unlock position You can determine whether to enable disable the parental lock for the channel of the program you are watching The parental lock is set for channels displayed with Channel Edit Pre...

Page 37: ...G Parents permission is required TV 14 Firm warning to parents Program parents would find unsuitable for children under 14 years of age TV MA For adults only FV Fantasy Violence D Suggestive Dialogue L Adult Language S Sexual situations V Violence Block by Rating Screen Blocking Unblocking Change Password Change Password Screen Note About Auto Lock Parental Lock Auto Lock can be set for TV and vid...

Page 38: ...e corresponding mode For the audio input terminals see CONNECTING TO EXTERNAL EQUIPMENT P E 15 and EXAMPLE OF CONNECTING EXTERNAL EQUIPMENT P E 16 Press to store Audio Input menu will not be displayed when No Audio is selected You can use this option to move the screen position to minimize phosphor induced burn in Mode Time 1 Press or to select Mode Time 2 Select a desired pattern Each time you pr...

Page 39: ...ongoing purpose Each time you press or one of the available choices appears in the following sequence Off On Press to store In Exhibition mode the display returns to the memorized setting after about 5 minutes even if the adjustment is changed The setup will be cancelled when AC power is cut to the plasma display s power cord e g power failure unplugging the power cord and so on Displays system op...

Page 40: ...ll be displayed after initializing 6 Press when you finish FACTORY DEFAULT selected in the main menu screen Displays the message prompting you to proceed with the initialization Displays the message of having completed the initialization Note If the operation is not executed for about 60 seconds the menu disappears Depending on the model or the types of signals some of the functions may not be ava...

Page 41: ... details see the wall mounting bracket installation manual Spacer B Screw A Frame Attached spacer To install this plasma display with the ceiling unit install the accessory spacers between the plasma display and frame as shown in the figure at right For details see the ceiling unit installation manual Spacer B Screw A Frame Attached spacer Note When mounting the plasma display newly it is importan...

Page 42: ...GA 85 Hz 720 x 400 31 47 70 09 400 lines 800 x 600 37 88 60 32 SVGA 60 Hz 800 x 600 46 88 75 00 SVGA 75 Hz 800 x 600 53 67 85 06 SVGA 85 Hz 1024 x 768 48 36 60 00 XGA 60 Hz 1024 x 768 60 02 75 03 XGA 75 Hz 1024 x 768 68 68 84 99 XGA 85 Hz 1280 x 1024 63 98 60 02 SXGA 60 Hz 1280 x 1024 79 98 75 03 SXGA 75 Hz 848 x 480 31 02 60 00 852 x 480 31 72 59 97 1360 x 768 47 71 60 01 720 x 485 15 73 59 94 60...

Page 43: ...h for cleaning If the cabinet or remote control is heavily stained soak a soft cloth in a mixture of water and detergent and squeeze it dry before wiping off the stains Use a soft dry cloth for final cleaning Cleaning the Screen Clean the screen gently with a soft cloth The screen surface is fragile Never attempt to clean it with a hard material press on it forcefully or tap it Cleaning the ventil...

Page 44: ...sted See ADJUSTING SCREEN POTISION AND SIZE on P E 29 No audio Check cables for disconnection Check whether the proper audio input has been selected See Audio Input on P E 38 If Out of range appears the plasma dis play is receiving a signal whose picture or signal cannot be reproduced by the plasma display The screen turns to black and white Signals that are not supported by this plasma display ha...

Page 45: ...Vp p 75 Ω Component video input PB CB 0 7 Vp p 75 Ω PR CR 0 7 Vp p 75 Ω VIDEO5 INPUT HDMI terminal HDMI type A connector RGB1 input mD Sub 3 rows 15 pin Picture signal 0 7 Vp p 75 Ω Synchronization signal TTL level Audio1 3 INPUT 2 audio input pin jacks L R 3 lines 0 5 Vrms 22kΩ Min Audio OUTPUT ANALOG 2 audio input pin jacks L R 1 line 0 5 Vrms 5kΩ Max Audio OUTPUT DIGITAL Optical audio terminal ...

Page 46: ...ut pin jacks L R 3 lines 0 5 Vrms 22kΩ Min Audio OUTPUT ANALOG 2 audio input pin jacks L R 1 line 0 5 Vrms 5kΩ Max Audio OUTPUT DIGITAL Optical audio terminal PCM Dolby Digital EXT SP Max output 10 W 10 W 6 Ω RS 232C D Sub 9 pin On screen display language English Spanish or French Operating conditions Temperature 0 to 40 C 32 to 104 F Humidity 20 to 80 Accessories 3 user s manuals 1 remote control...

Reviews: