About Actions (for Windows Users)
142
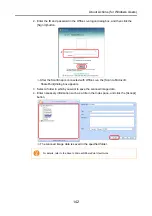
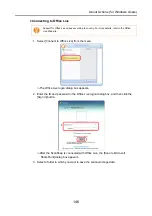
2. Enter the ID and password in the Office Live logon dialog box, and then click the
[Sign In] button.
⇒
After the ScanSnap is connected with Office Live, the [Scan to Microsoft
SharePoint] dialog box appears.
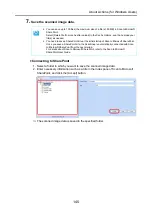
3. Select a folder in which you want to save the scanned image data.
4. Enter necessary information such as a title in the Index pane, and click the [Accept]
button.
⇒
The scanned image data is saved in the specified folder.
For details, refer to the Scan to Microsoft SharePoint User Guide.
Summary of Contents for PA03586-B205
Page 1: ...Operator s Guide P3PC 2432 02ENZ0 ...
Page 14: ...Contents 14 Installation Specifications 368 About Maintenance 369 Index 370 ...
Page 44: ...For S1500 44 12 Click the Close button 13 Remove the Setup DVD ROM from the DVD ROM drive ...
Page 264: ...About Actions for Mac OS Users 264 4 Check the scanned image data ...


