6
INSTALLATION
To prevent the display’s internal components from overheating, make sure that the display is installed in a well-ventilated location.
Be sure to use the optional stand, wall-mounting unit or the other unit when installing the display. Also, be also sure that your dealer
performs the installation.
See the appropriate instruction manual for more information on the installation hardware you select.
To prevent an accident and ensure safety in the event of an earthquake, fix the display securely into position as described below.
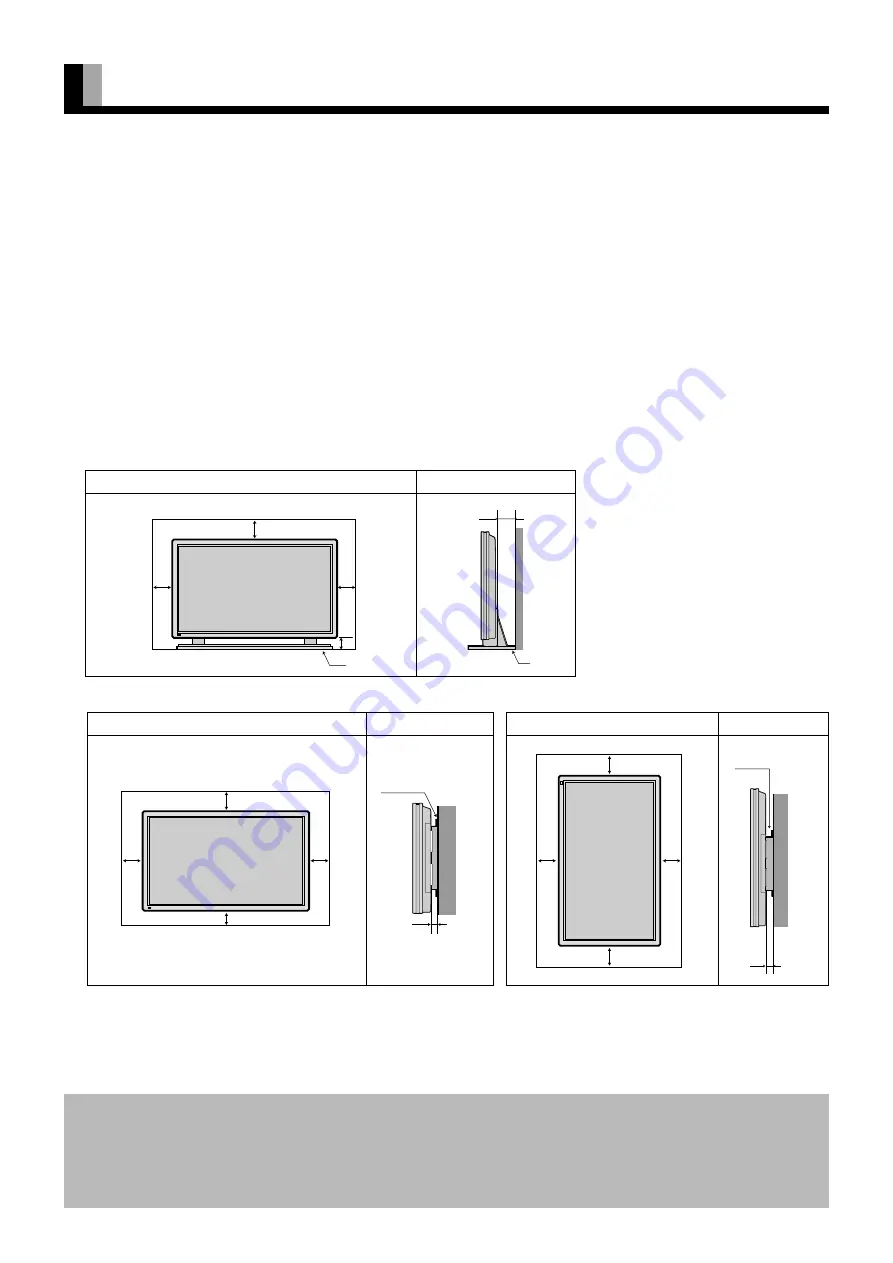
To ensure proper heat radiation, provide at least as much space around the display as shown below.
* Make sure that the display is installed in a location where the temperature can be maintained between 0
°
C and 40
°
C.
* Never attempt to tilt the display sideways or backward.
* To prevent the power and other cables from being accidentally pulled, make sure that they run along the wall or through corners.
* The display can be installed with either of its sides facing down.
Note
The display is a highly precise piece of equipment and therefore must be packed properly before transportation. Be sure to use only those packing
materials originally supplied with the display when repacking it.
Reference
See P. 40 for more information on options.
Front
Side
Front
Side
Front
Side
When using the wall-mounting unit (vertical type)
When using the wall-mounting unit (horizontal type)
When using the stand
* When installing the display vertically, be sure to rotate
the text.(Refer to OSD Rotate. See P.32) and setup
vertical installation. (Refer to Installation. See P.38)
(cm)
(cm)
(cm)
(cm)
(cm)
(cm)
Upper
10
Floor
10
Left
10
Right
1.5
Wall
Floor
Upper
10
10
Left
10
Right
Lower
6
1.5
Upper
10
10
Left
10
Lower
10
Right
Wall mounting unit
Wall
1.5
Wall mounting unit
Wall
6
Stand
Stand


