A26361-K863-Z102-8-7619
Rev. 8.0
83
The Server Blade
Exchanging/Adding Procedures
Ê
Insert the server blade into the corresponding slot in the system (see
figure 63 in the section “Inserting the Server Blade” on page 99).
I
The BIOS automatically detects, sizes and initializes memory according
to the size and speed of the installed SDRAMs and reports the memory
size and allocation to the system via the configuration registers.
The SDRAM modules are removed in reverse order.
V
CAUTION!
Use extreme care when removing an SDRAM module. Apply only
enough pressure on the ejector levers to release the SDRAM module.
8.5.2
Installing an Additional Hard Disk Drive
Each server blade can accommodate two 2.5-inch IDE hard disk drives (HDD).
The hard disk drives are controlled by the on-board IDE-RAID controller.
Usually two disks are mirrored in a RAID 1 configuration.
V
CAUTION!
Observe the safety information and the information on handling electro-
static-sensitive components in the section “Components With Electro-
static Sensitive Devices” on page 18.
Ê
Remove the server blade from the system (see “Removing the Server Blade”
on page 101).
Ê
Remove the hard disk drive from its antistatic package.
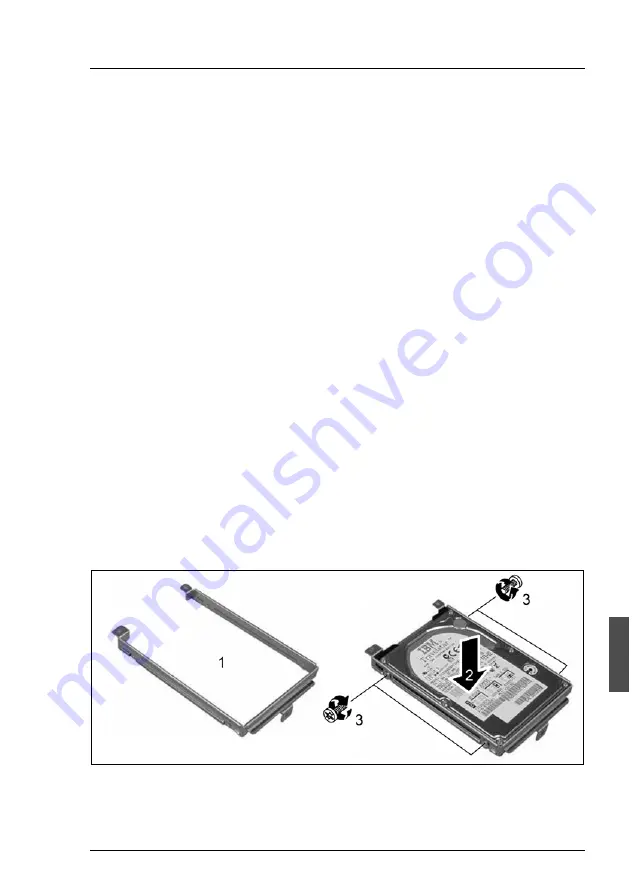
Figure 44: Mounting the hard disk drive
Ê
Take the HDD mounting bracket (1), place the hard disk drive (2) in the
mounting bracket and fasten it with the two screws on each side (3).


