CX400 S1
Upgrade and Maintenance Manual
123
Hard disk drives / solid state drives
7.4.1.4
Installing the 2.5-inch HDD SAS/SATA backplane
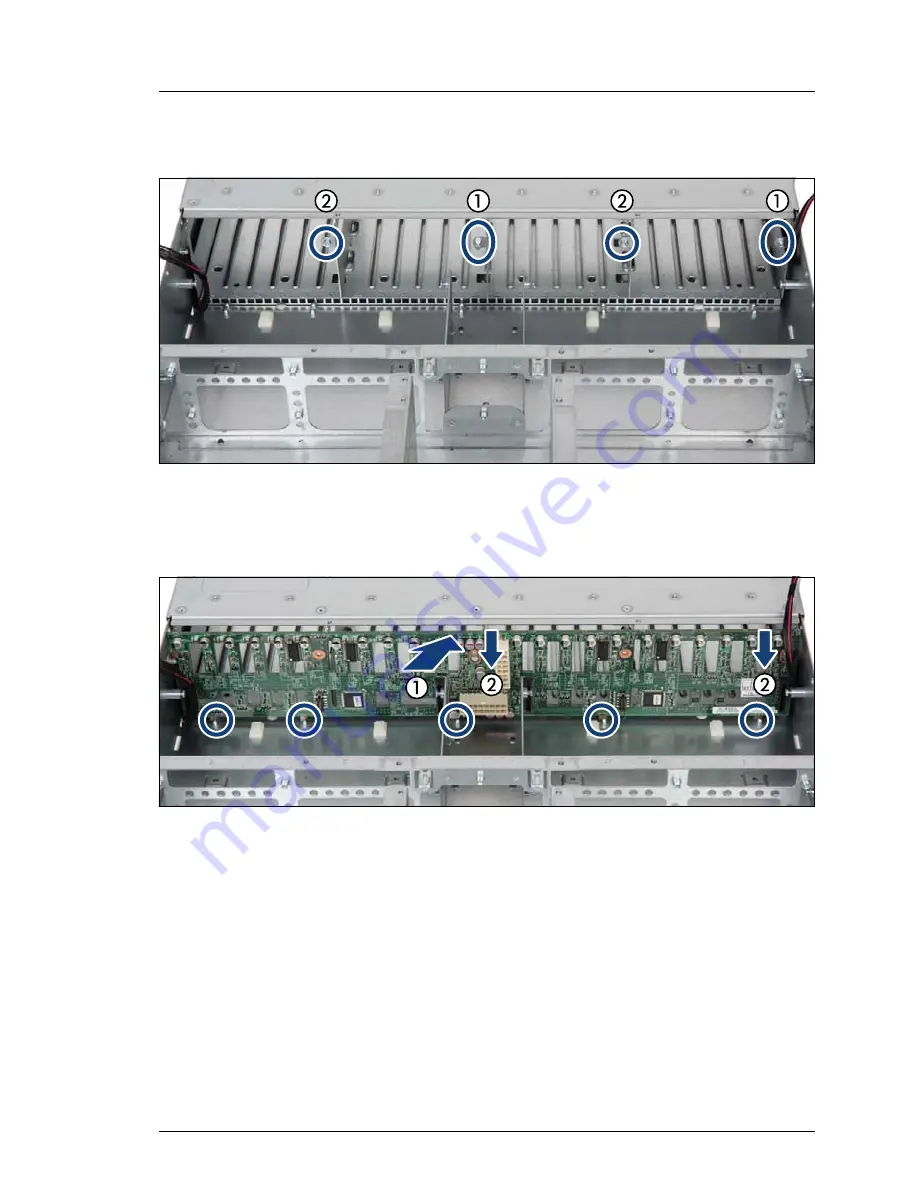
Figure 78: Installing the HDD SAS/SATA backplane (A)
Ê
Note the positions of the shoulder screw caps (1) and the screw holes (2) on
the chassis.
Figure 79: Installing the HDD SAS/SATA backplane (B)
Ê
Insert the new HDD SAS/SATA backplane into the chassis (1):
– The two shoulder screw caps on the chassis rest in the wide end and the
center of the keyhole slots on the HDD SAS/SATA backplane.
– The five noses of the backplane fit behind the guides (see circles).
Ê
Slide the HDD SAS/SATA backplane in the direction of the arrow as far as it
will go (2).
Summary of Contents for PRIMERGY CX400 S1
Page 12: ...12 Bearbeitungsstand Bestellnummer Content ...
Page 14: ...14 Upgrade and Maintenance Manual CX400 S1 Version history ...
Page 18: ...18 Upgrade and Maintenance Manual CX400 S1 Introduction ...
Page 76: ...76 Upgrade and Maintenance Manual CX400 S1 Basic hardware procedures ...
Page 132: ...132 Upgrade and Maintenance Manual CX400 S1 Hard disk drives solid state drives ...
Page 196: ...196 Upgrade and Maintenance Manual CX400 S1 Cabling 12 3 Cabling Figure 147 2 5 inch chassis ...
Page 197: ...CX400 S1 Upgrade and Maintenance Manual 197 Cabling Figure 148 3 5 inch chassis ...
Page 198: ...198 Upgrade and Maintenance Manual CX400 S1 Cabling ...


