44
Upgrade and Maintenance Manual
CX400
S1
Basic hardware procedures
4.3.2
Removing the rear fixing brackets
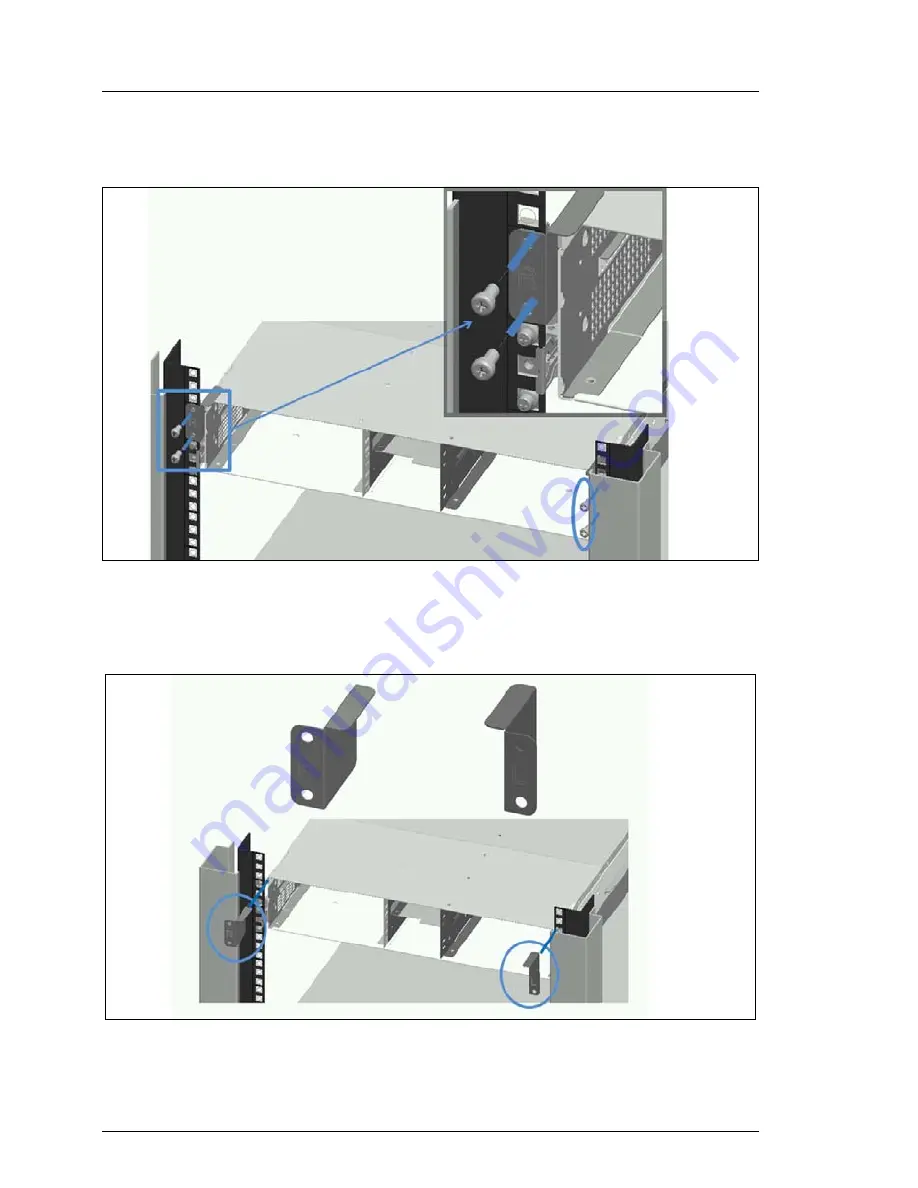
Figure 3: Loosen the rear fixing brackets with screws
Ê
Loosen the two rear fixing brackets by removing the two screws on each
side.
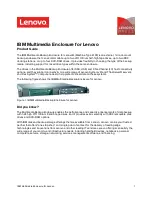
Figure 4: Rear fixing brackets for the rail kit cage nuts
Ê
Remove the two rear fixing brackets on each side.
Summary of Contents for PRIMERGY CX400 S1
Page 12: ...12 Bearbeitungsstand Bestellnummer Content ...
Page 14: ...14 Upgrade and Maintenance Manual CX400 S1 Version history ...
Page 18: ...18 Upgrade and Maintenance Manual CX400 S1 Introduction ...
Page 76: ...76 Upgrade and Maintenance Manual CX400 S1 Basic hardware procedures ...
Page 132: ...132 Upgrade and Maintenance Manual CX400 S1 Hard disk drives solid state drives ...
Page 196: ...196 Upgrade and Maintenance Manual CX400 S1 Cabling 12 3 Cabling Figure 147 2 5 inch chassis ...
Page 197: ...CX400 S1 Upgrade and Maintenance Manual 197 Cabling Figure 148 3 5 inch chassis ...
Page 198: ...198 Upgrade and Maintenance Manual CX400 S1 Cabling ...


